How to set Return Reserves

Reserves Against Returns
or “Return Reserves” are a certain amount of physical records or percentage of royalties (from physical sales) which are withheld off the top from the artist by the record label to guard against the label paying royalties on physical records that may be returned by retailers in the future.

The reserves are based on clauses you may find in Artist Contracts such as

“Label shall have the right to establish a royalty reserve against anticipated returns and credits, of up to twenty (20%) percent of the royalty earnings associated with the units of each Record reported as distributed to its customers in that period. Each royalty reserve shall be liquidated equally and in full over the four (4) semi-annual accounting periods following the accounting period during which the applicable reserve is originally established.” *see the end of this article for corresponding settings in details


In details you can set up return reserves in your royalty CONTRACT on LABEL / ROYALTY.

1) Select the royalty contract and go to the subtab Royalty Rates.
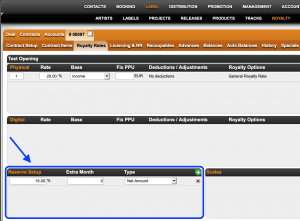


2) Click the green [+] icon to add a reserve and add your reserve percentage and type of reserve you want to add it to.

Catalog No will calculate the reserve to selected products only
Net Amount will calculate the reserve to all physical products included in the specific royalty contract

details will create a return reserve in the current royalty period and by default release it in the next.
 
Extra Month will add additional time to this rule.
NOTE : As this is easy to misinterprete, please read the instructions at the end of this article if you want to apply this option.


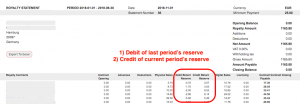
3) The reserves and credits of past reserves will be listed on the royalty statement accordingly.


How to apply the Extra Month option:


Royalty Periods can be
monthly = period of 1x month
quarterly = period of 3x months
semester = period of 6x months


IF X is current royalty period, then next period X+1 is
X + 1 month for monthly
X + 3 months for quarterly
X + 6 months for semester


details will create a Return Reserve in X and by default release it in X+1
=> the setting for the default is EMPTY or 0 Extra Months
so
M1 => M2 for monthly
Q1 => Q2 for quarterly
H1 => H2 for semester


If you are setting Extra Months they will be applied ON TOP of X +1


(1) example “shift”
for use of Extra Month to shift a return release 3 months into the future
M1+ 3 => M4 for monthly
Q1+ 3 => Q3 for quarterly (Q2 plus three additional months on top)
H1+ 3 => H2 + 3 month = effectively next H1 for semester (3 months does not make sense)


(2) example “split”
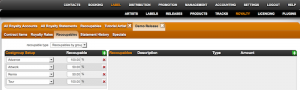
for use of Extra Month to split a 20% return release into 4 parts over 4 periods

The contract clause at the beginning of this article withheld a percentage (20%) of royalty earnings (not income) in the current royalty period and plans to pay it out in 4 equal parts of 5% over a period of the 4 following royalty half-year periods (over 2 years in total). The settings in details would be

Bildschirmfoto_2021-02-11_um_19.01.12.png

(3) example “Distribution scenario”
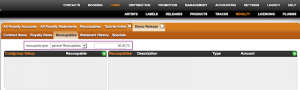
for use of Extra Month set to split a 30% reserve into 3 unequal parts over 3 months :
15% in the next month, 10% the second month and 5% in tthe third month.►

Bildschirmfoto_2021-02-11_um_19.07.27.png


If in doubt, contact our Label Team if you need our help!
 

ROYALTY ACCOUNTS and how to set them up

Royalty Accounts are your business partners from whom you have licensed music etc. and to whom you must send royalty statements.

If you have different contracts with one account, you can just add multiple contracts to one account.

Watch a TUTORIAL videop about how to create ROYALTY ACCOUNTS and CONTRACTS for artist releases here.

Each ROYALTY ACCOUNT has the subtabs Setup, Contracts, Recoupable/Costs, Statements and Balances which are explained step by step below.

”Excursions”
* HOW TO SET UP A NEW CONTRACT – ARTIST RELEASE
* HOW TO SET UP A NEW CONTRACT – COMPILATION
* CREATE ROYALTY STATEMENT

To create a new ROYALTY ACCOUNT, go to LABEL / ROYALTY and click [+] on top right of the list.

Enter the ACCOUNT NAME, ROYALTY PERIOD and choose an INVOICE PROJECT for the statements.
Click OK and you will be directed to the account’s SET UP subtab where you can choose a main contact and add more contacts if wished, add notes and upload related files such as Licence agreements, HOAs etc.

It is essential to choose an ACCOUNT BASE for the statements which defines to which date/period the income of a sale is collected to and hence accounted to your royalty statements.
There are three options:
* Payment Period: All income of sales will be collected to the period in which the invoice for the sales income has been paid by the sales account.
* Sales Period: All income of sales will be collected to the period of the actual sale.
* Invoice Date: All income of sales will be collected to the period in which invoice has been created.


”Example”
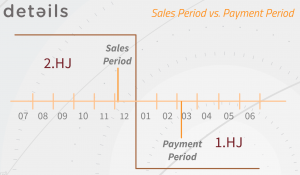
Your records have been sold in December 2016. This is the SALES PERIOD.
If you select SALES PERIOD as royalty base, the income will be accounted in the royalty period 2HJ 2016 or Q4 2016 if you account quarterly.

You will probably receive and import the sales statement from your distributor in January 2017 and create an invoice or receive a credit note dated January 30th 2016. This is the INVOICE DATE.
If you select INVOICE DATE as royalty base, the income will be accounted to the period 1HJ 2017 or Q1 if you account per quarter or 01 2016 if you account monthly.

Then you will probably not receive any money and the invoice in ”details” will not be selected as “paid” before March 2016. This is the PAYMENT PERIOD.
If you select PAYMENT PERIOD as royalty base, the income will be accounted in the period 1HJ 2017 or Q1 if you account per quarter.

Please note that you should NEVER change the account base after you have created and send out a royalty statement.
If you change the ACCOUNT BASE after you have already created a sales statement for your royalty account, it will happen that you account particular sales in several periods OR that you do not account particular sales at all.
Contact details support if you need help!

On the subtab CONTRACTS you can ADD A NEW ROYALTY CONTRACT, edit and delete existing contracts.

The subtab RECOUPABLE/COSTS shows you all costs related to the specific ROYALTY ACCOUNT.
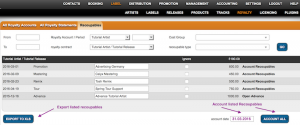
The button ACCOUNT ALL RECOUPABLES will account all listed RECOUPABLE COSTS in one go if not accounted yet.
By ticking Ignore you can exclude single COSTS.

On the subtab STATEMENTS you can look up all past ROYALTY STATEMENTS for this ROYALTY ACCOUNT.

The subtab BALANCES shows allover royalty account related costs of the current royalty period
such as return reserves and closing balances of past royalty statements. If you create your first royalty statements with►details these might need to be set up manually. Ongoing, credit return reserves and closing balances are automatically created and carried over.
All contract related RECOUPABLES of the current royalty period are listed here as well.

It is important to know that contract related recoupables will be separately set off against royalties from the particular contract only, whereas balances (general royalty account costs) will be set off against the sum of all contract’s royalties.

To set up balances manually, click [+] on top right of the list.
Here you can add the DATE, DESCRIPTION, TYPE and AMOUNT.
Negative amounts will be accounted as DEDUCTIONS, positive amounts as ADDITIONS.


How to set Royalty Rates in Royalty Contracts

The calculation of royalties depends largely on the terms of the license agreement and the resulting accounting rules.

Put simply, royalties are calculated by multiplying a sales quantity at a specific base price with a royalty rate. A simple example would be 1.000 CDs * 7  PPD * 20% royalty rate = 1.400 ►

However, if royalty calculation was always this simple, there would be no need for a database solution like details. This article shows you how to set up more complex rules for royalty calculation correctly.


In details you can manage rules for royalty calculation separately for each channel

  1. physical sales
  2. digital sales
  3. licensing / thirdparty revenue
  4. performance revenue

Each channel can have one or multiple rules or royalty options as we call them.


Please check below to find out …

how to set royalty rates for digital sales

how to set royalty rates for physical sales

how to set conditions for royalty options


How to set royalty options for physical sales


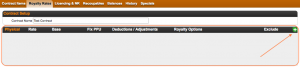
If you want to account physical sales to your royalty accounts, you will need to add one or multiple rules for physical royalty rates. Click the [+] icon on the contract’s Royalty Rate tab.


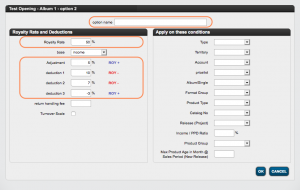
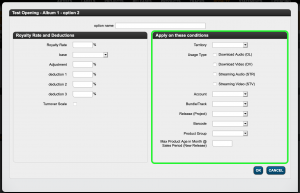
You will see a modal window with multiple options to set your royalty rate etc. for physical sales:

  • First, please give your calculation rule an option name. It helps both you and the artist if you have multiple royalty rules.

  • Then, of course, the most important information is the royalty rate on the top left of the modal window. This is the multiplier that is negotiated in contracts with rights holders.
    NOTE that the rate you enter here is the rate that your Royalty Account is supposed to receive as per contract (not your own share!).

  • Another important factor for the royalty calculation is the accounting base. This can be either the income, the retail price, thePublished Price of the Distributor (PPD) or any of the other
    options in details.

  • There are also options to add deductions to the royalty rate on the fields Deduction 1, Deduction 2, Deduction 3 and Adjustments. When a deduction/adjustment is applied, you will see whether it is added to or subtracted from the royalty rate, depending on the sign of the deduction/adjustment.
    NOTE : While the deductions are displayed to the royalty owner in his statement, an adjustment remains undisclosed. An adjustment is therefore a percentage based reduction of the royalty calculation without any indication in the statement.

  • Return handling fees are a more traditional deduction from royalties. Those are fixed amounts deducted per unit returned, i.e. 0.50  per unit.

On the right-hand side of the modal window, you can define the conditions for which the current calculation rule will apply. Find out more about the available conditions here!
Think of the conditions as a filter that triggers the application of the current rule.


IMPORTANT NOTE : If you have more than one royalty option in one contract, please be aware that the calculation in details starts with the first rule and then continues with 2,3, etc. until the last one – the general royalty rule, which catches all sales that do not fall into any of the previous options.


How to set royalty rates for digital sales


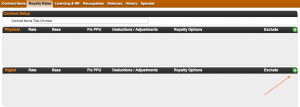
If you want to account digital income to your royalty accounts in details, you will need to add one or more digtal royalty options. Click the (+) icon on the contract’s Royalty Rate tab.


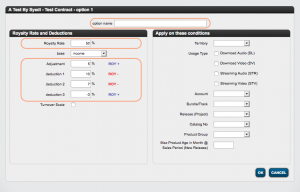
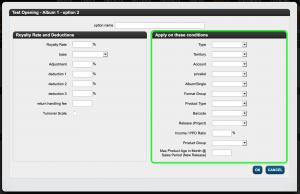
You will see a modal window with multiple options to set your royalty rate etc. for digital sales:

  • If you have multiple calculation rules, please give your calculation rule an option name.
  • In the field royalty rate field on the left side of the modal window, enter the digital royalty rate, which you want your royalty account to receive according to the contract.

  • Establishing the base for the calculation is the next important step. For Digital this is most likely to be “income“, as other available base options are not common for digital sales.

  • For each calculation rule you may also set adjustments and up to three optional deductions, which be applied to the calculation depending on the sign of the deduction/adjustment.

    NOTE : While the deductions are displayed to the royalty owner in his statement, an adjustment remains undisclosed. An adjustment is therefore a percentage based reduction of the royalty calculation without any indication in the statement.

On the right-hand side of the modal window, you can define the conditions for which the current calculation rule will apply. Find out more about the available conditions here!
Think of the conditions as a filter that triggers the application of the current rule.


IMPORTANT NOTE : If you have more than one royalty option in one contract, please be aware that the calculation in details starts with the first rule and then continues with 2,3, etc. until the last one – the general royalty rule, which catches all sales that do not fall into any of the previous options.


Conditions for Royalty Options

As our name suggests, we would never restrict our clients to a static set of royalty calculation types to choose from. In fact, quite the opposite:
In the details you will probably discover so many ways to calculate royalties that you may even be surprised that such terms actually exist! Well, yes, they do ….


Here is an overview of options to choose from that can be applied to royalty options in Royalty Contracts.

You can find those conditions on the right-hand side of the modal window to set your royalty rates.

Think of the conditions as a filter that triggers the application of the current rule:

IF the conditions on the right are met, THEN the rate and deductions on the left will be applied.

Let’s start with digital :

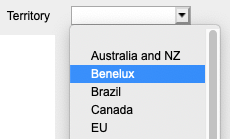
  • In the details you may apply a royalty option to a selected territory.Territories are customizable groups of countries which can be set in SETTINGS / GENERAL.
  • You can also specify which type of digital sale should be affected by the current rule.
    We differentiate 4 different usage types in details:
    Audio Download
    (“DL”)
    Video Download
    (“DV”)
    Audio Streaming
    (“STR”)
    Video Streaming
    (“STV”)

    NOTE: If you do not explicitly pick one of these options, the system will include all of them in the calculation. If you select specific ones, however, the current rule only applies to sales of those usage types.

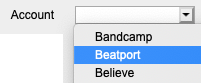
  • Another filter option is by distribution account, i.e. by source. With this option you may select to have sales accounted on a specifc rate when sold by a specific digital distributor / aggregator.


  • You can also choose to apply a royalty option specifically on bundle (album) or track sales only.

  • If you have contracts that include multiple releases and you want a particular rate to apply to a particular one only, specify the release covered by the royalty option.

  • The same applies to products. If you have contracts that cover multiple products and you want a specific rate to apply to only one product, enter the barcode for that royalty option.

  • If, however, you want to combine not only one product but several products at your own discretion and have them processed according to one rule, create a product group and select it for this rule.

  • If your contract states a specific term for a royalty rate, set the duration of rule application from product release in months. This rule will apply only within the period since product release, which is the release date plus any product release shift.
    The period is defined in months, i.e. one year = “12” and three years = “36”.
    This rule will apply for sales made within the set period only and not beyond.

    Example: If you want a royalty option to change after x months after the product release, you will first have to define one of these rules, and then another rule with the royalty rate to follow after the end of the initial period.


For physical sales some options are the same, others are different:

  • One particular aspect is the indication by type of sale. This condition allows you to set different royalty rates for sales than for returns, etc. See the list of sales types below.
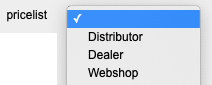
  • Another characteristic of physical sales is that they can be settled according to customised price lists. More information on price lists and price codes can be found here.

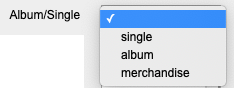
  • You can also create royalty options for predefined product categories, explicitly albums, singles and merchandise.
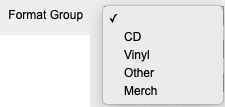
  • In addition you can customize your own product groups and set specific royalty rates accordingly.

Opening balances and Period Result Carryovers

In DETAILS, the handling of royalty statement results across periods is done mostly automaticly, but deserves some explanation:

Automatic Carryover

Royalty statement results are carried over to the next periods under the following conditions:
– The overall period result is negative.
– The overall period result is less than the minimum payment threshold specified in the royalty account settings.

For instance, if the overall period result is -1000 EUR or +30 EUR, both would be automatically carried over as an opening balance to the next period if the minimum payment threshold is set to 50 EUR.
Conversely, total period results equal to or higher than the minimum payment threshold would not be carried over, as DETAILS assumes they are due for payout by default.


Consideration of Cross-Recoupable Contracts

Additional complexity arises when cross-recoupable contracts are involved. Selected contracts may be set as to not be payable unless the overall total of all cross-collectable contracts collectively recoups and exceeds the minimum payout threshold. Further information on cross-collectable contracts can be found in our dedicated article here.


Manual Setting of Opening Balances

DETAILS provides the flexibility to manually include amounts for carryover to royalty periods. This feature is useful when statements were calculated before manually or in another system.

Initial amounts can be entered either at the level of Royalty Contracts or in the Royalty Account as Balances, with the type set as “Closing Balance”.

The date of the balance should correspond to the first day of the period you want the balance to be included in as an opening balance.

How to account recoupables

Recoupables are costs which are paid against royalties. Typical recoupable costs are advance payments. Depending on your ROYALTY CONTRACTS also other costs such as video production costs or marketing expenses can be recoupable costs, mostly with a specific share e.g. 50% of costs are recoupable against royalties.

Your costs added in details are NOT automatically recoupable costs. Only once the relevant contract has a recoupable rate, your costs can be forwarded to your artists! If costs appear as NOT RECOUPABLE, the related contract has no recoupable settings enabled.


”Excursion”
WHERE AND HOW TO ADD COSTS in ”details”
How to upload cost documentation

So, to make costs recoupable you need to add costs in ”details” , set up the recoupable settings within the relevant contract and finally account current recoupables to the ROYALTY ACCOUNT before creating the ROYALTY STATEMENT so that royalties are set off against recoupable costs.

First you need to enter costs in ”details” , depending on where they occur.

On the RELEASES‘ subtab COSTS you can add all costs that occur for the release as a whole. Typical release costs are advance payments, marketing costs, artwork design etc.
On PRODUCTS‘s subtab COSTS you can now add all costs that occur for the particular product. Typical product costs can be CD manufacturing, LP manufacturing, etc.

To set up the RECOUPABLES setting of a ROYALTY CONTRACT go to LABEL / ROYALTY and choose the account and related contract.
On the contracts subtab RECOUPABLES you can choose a RECOUPABLE TYPE from the drop down menu.

There are the following options:

1) If advance payments and / or other particular recoupable costs are agreed on in your royalty contract, choose RECOUPABLE BY GROUPS.


Now click [+] on top right of the Costgroup Setup box and choose the cost group and the split e.g your contract includes an advance pament which is paid against royalties 100% you add the costgroup advance and give it a split of 100.
If your contract also includes a recoupable split of 50% on remix costs, just add the cost group Remix and give it a split of 50.
100% of the advance payment and 50% of the remix costs will now be paid against royalties.

It is essential that your costs have the correct COST GROUP. ”details” automatically identifies the costs by its cost group so that these will be accounted according to the above settings.

2) If all RELEASE RELATED COSTS and all PRODUCT RELATED COSTS are recoupable costs (e.g. 50/50 deal), choose GENERAL RECOUPABLES and type in the split.


Please note that advance payments have a default split of 100%. You can adjust the amount if necessary once it’s been accounted in the Recoupables Box right next to the Setup box or while you account the advance payment separately on RELEASE / COSTS.

3) If you do not have any RECOUPABLES included in your contract, choose NO RECOUPMENT.

Once you have entered the RECOUPABLES and set up / double checked the settings of the ROYALTY CONTRACT you can account them. ”details” will then automatically transfer all ACCOUNTED AMOUNTS to the related ROYALTY ACCOUNT.

There are multiple ways to account RECOUPABLES.

To account recoupables in a batch across all releases & products go to Royalty / Recoupables.
Select a start and end date of your current royalty period and add more filters if needed.
To account all, click the Account All Button at the bottom of the page.


To exclude single items of the compiled list, you can still tick IGNORE and these will not be accounted as recoupables.

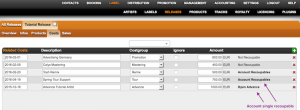
Alternativley you can account single recoupable costs where you have previously set them up, e.g.
after you have added costs on the RELEASES subtab COSTS you can account them by clicking on the bold text ACCOUNT RECOUPABLES which will appear according to the royalty settings of the selected RELEASE. If it appears NOT RECOUPABLE instead, you will need to adjust the royalty settings.


It will be the same workflows for product related costs on the products subtab costs.

Once you have accounted the recoupables, they will be set off against royalties in your next royalty statement.

How to set up royalty statement emails for .shares


For giving a person access to the B2B section you first need to set up the person as an External User.
(see HERE how to set up external user).


When this is done go to SETTINGS – IDENTITIES and choose the invoice layout.


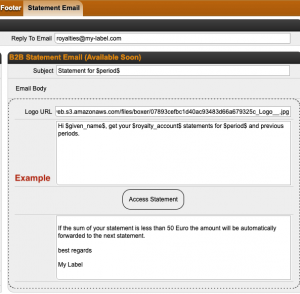
(Then go to the SHARES EMAIL tab and fill out the subject. It is possible, but not mandatory, to add a variable period to the subject field, so the respective period(s) will automatically be inserted to the email subject.
Please note that the period is the only variable that can be used in the subject.

To insert the period variable in the subject you need to add $period$(e.g. “Statement for $period$”


For the email text you can create a standard text with the variables GIVEN NAME $given_name$, ROYALTY ACCOUNT NAME $royalty_account$ and PERIOD $period$.

e.g. “Hi $given_name$,( get your $royalty_account$ statements for $period$ and previous periods.”

You also be able to add a trailing text, that will appear under the ACCESS STATEMENT Button.


(To add your logo to the email you need to follow this steps unless you have not already uploaded a logo into Details:


1) go to CONTACTS / FILES and upload your new picture, logo file etc. to FILES.(NOTE: Don’t forget to name the file in a way that you will allow you to find it again.


2) Right Click on the uploaded file and select “Copy link location”.(This will copy the link of the file into the clipboard and allows you to paste the URL to the Logo URL field. ((


Bildschirmfoto_2022-01-11_um_14.34.44.png


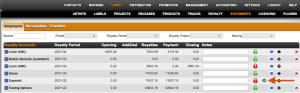
To have an overview of all Royalty Accounts that give access to external user we’ve added a new icon.
Bildschirmfoto_2022-01-11_um_13.28.45.png

In the LABEL – ROYALTY ACCOUNT – STATEMENT list and in the LABEL – STATEMENTS list overview you will find the icon beside all relevant statements.


(All statements showing this icon allow one or more external user(s) access to the royalty account. By clicking on the icon you will find all users that have access to the respective account.

Please note, that only locked statements allow access to external user and will be used for the reporting overview.

If you want to add the complete statement history (incl. unlocked statements) to the B2B data you can go to LABEL – ROYALTY – SELECTED ROYALTY ACCOUNT – STATEMENTS.
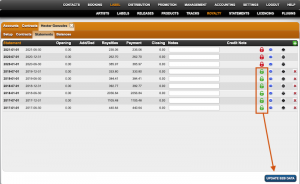
(There you find the button UPDATE B2B DATA.


By clicking this button all unlocked statements will be locked and all sales data will be included to the sales history in the B2B account.
(By sending the statement, every external user will receive a link for a landing page where to register or to log in.