How to Manage Non-Musical Products and Services


In details, not every product represents a musical release. Labels and companies often need to manage services, promotions, or manufacturing jobs they provide alongside traditional music products. To keep your catalog structured, it is best practice to group your service offers under dedicated container releases .

► Why use a container release?

Products can never exist independently they must always belong to a Release. If you add services or non-musical products without structuring them, they will mix with your artist releases, making cost tracking and royalty handling confusing.

By creating a dedicated release (e.g. Services , Manufacturing , Promo Packages ), you create a clear container under which you can add each service or job you provide as a product.

Key idea: One container release = multiple non-musical products. This keeps them separate from music releases but still manageable in the same catalog.

► How to set it up

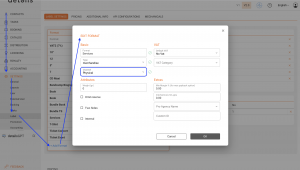
Step 0: Define Format in Settings

  1. Go to SETTINGS / LABEL.
  2. Create clear, consistent formats that help with filtering and reporting. Give it a descriptive title (e.g. Services, Promo Packages, Manufacturing).
  3. The type is not relevant, best is a a less non-musical option, e.g. merchandise.
  4. For Channel use Physical, so you can create invoices out of your products later on and bill clients.
  5. Add more information in the fields if generally applicable for the format.
Step 1: Create a container release

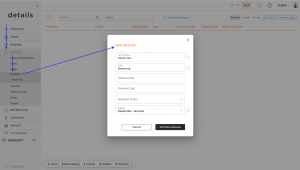
  1. Go to CATALOG / RELEASES.
  2. Create a new release and give it a descriptive title (e.g. Services, Promo Packages, Manufacturing).
  3. Use your Label or company name as the artist to keep it consistent.
  4. Choose your Label or create a designated “Service Label” to evaluate business performance besides from different revenue sections.
Step 2: Add service products under this release

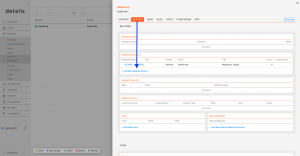
Within the container release, go to RELATIONS / PRODUCTS and add products such as:

  • Mastering Single (Format: SERVICE)
  • CD Digifile 500 Units (Format: MANUFACTURING)
  • Digital Distribution EP (Format: SERVICE)
  • Social Media Campaign (Format: PROMOTION)
► How to use non-musical products in orders

Once you have set up container releases and added your non-musical products, they can be used as order items to create invoices or offers.

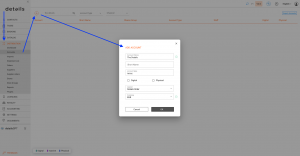
Step 1: Create an Order Account

  • Go to DISTRIBUTION / ACCOUNTS and set up an order account for the client you want to bill by clicking the [+].
    This is required so that any invoices can be issued in their name.
  • Connect the Account to an Invoice Contact – you might have to create this one in the Contact Database if not already existing.
 

Step 2: Create a new Order

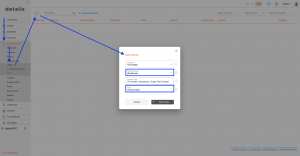
You can create a new order in two ways:

  • Go to DISTRIBUTION/ORDERS and click on the [+].
  • Or when you create an order out of the Distribution Account in the Orders Section.

Choose Invoice Order as the type if you want to generate a client invoice.
 

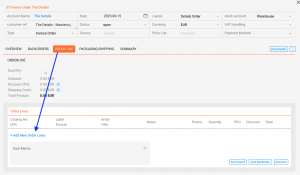
Step 3: Add Orderlines from the Container Release

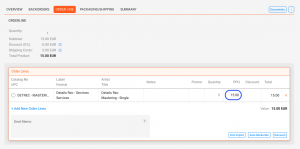
Add new orderlines and choose the relevant Products from your container release (e.g. Mastering, Pressing, Distribution, Promotions). These predefined products keep your invoicing structured and standardized.
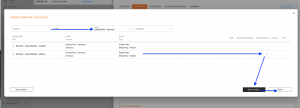


Step 4: Define Pricing

If a product already has a Price Code set, the price will autofill. Otherwise, enter the correct price manually (e.g. per track for mastering, per unit for pressings).
 

Step 5: Generate Documents and Invoice

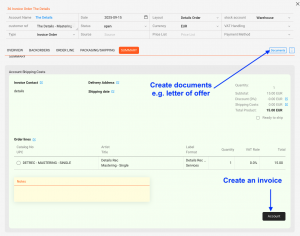
  • You can create offer proposals via a template in [Documents]. If you need a template for this, please contact the details-Team.
  • To finalize the order in the system, account.
  • Then you can generate and send the invoice to the client.
► Best practices

  • Keep container releases general (e.g. one Services release) rather than creating a new release for every job.
  • Use clear, short product titles so service items are instantly recognizable.
  • Define formats consistently e.g. don t mix SERVICE and PROMOTION formats if they mean the same thing.
MONEY SECTION variables

details offers a very flexible way to create all kinds of customized Deal Memos in your HTML templates.

Here is the full story:

We have some OLD variables for the money section like
[% ph.guarantee_fee %]
[% ph.guarantee_fee_duedate_dd %]
[% ph.booking_fee %]
etc.

Those however should no longer be used in templates, because now we have NEW variables, which are FAR MORE powerful and flexible.

Truth is with flexibility also comes complexity, so yes, it’s a bit more complicated to use NEW variables.
Trust us, it’s worth it!

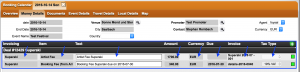
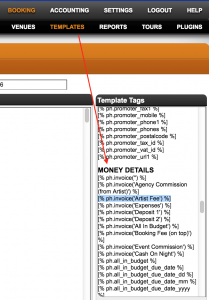
Variables for the Money Section of a template can be found in BOOKING / TEMPLATES under MONEY DETAILS.


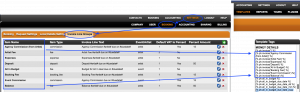
The NEW variables include the name of the respective INVOICE ITEM from MONEY DETAILS in parentheses.

INVOICE ITEM for can be customized in SETTINGS / BOOKING / INvoice Line Groups.
[% ph.invoice(‘Artist Fee’) %]
[% ph.invoice(‘Deposit’) %]
[% ph.invoice(‘Balance’) %]
[% ph.invoice(‘Expenses’) %]


And here is where it gets sophisticated: for EACH variable we have plenty of datapoints available!

If we focus one item only, say the booking fee for example
[% ph.invoice(‘Booking Fee’) %]

We can now pull any piece of information related to the artist fee from MONEY DETAILS.


Here is how we pull he amount, the VAT, the VAT %, the description text all from one variable only by adding an extension:


Invoice number
[% ph.invoice(‘Booking Fee’).invoice_ref %]

net amount
[% ph.invoice(‘Booking Fee’).price %]

VAT rate
[% ph.invoice(‘Booking Fee’).tax_rate_percent | format(‘%.0f’)%]%

VAT amount
[% ph.invoice(‘Booking Fee’).price * ph.invoice(‘Booking Fee’).tax_rate_percent / 100 | format(‘%.2f’)%]

gross amount (Fee + VAT)
[% ph.invoice(‘Booking Fee’).price * (1 + ph.invoice(‘Booking Fee’).tax_rate_percent / 100) | format(‘%.2f’)%]

A more elegant way to get the same results with faster loading times is to define a global variable on top of your tempate and to pull all data in one go:


[% booking_fee = ph.invoice(‘Booking Fee’) %]

and then
Invoice number
[% booking_fee.invoice_ref %]

net amount
[% booking_fee.price %]

VAT rate
[% booking_fee.tax_rate_percent | format(‘%.0f’)%]%

VAT amount
[% booking_fee.price * booking_fee.tax_rate_percent / 100 | format(‘%.2f’)%]

gross amount (Fee + VAT)
[% pbooking_fee.price * (1 + booking_fee.tax_rate_percent / 100) | format(‘%.2f’)%]


Here is a list of extensions available per variable in the MONEY SECTION;

‘target_country’ => ‘United Kingdom’
‘booking_type’ => ‘fee’
‘text’ => ‘Artist Fee Superaki’
‘price’ => ‘1500.00’

‘tax_rate_percent’ => ‘19.000’
‘tax_name’ => ‘19% VAT’
‘tax_description’ => ‘19% MWSt’
‘vat_type’ => ‘1’

‘due_date’ => ‘2016-09-30’
‘created’ => ‘2016-01-25 17:40:02’


If you would like a due date to be displayed in continental european format, please use the following variables:

Booking Fee due date will be

[% booking_fee.due_date.split(‘-‘).2 %].[% booking_fee.due_date.split(‘-‘).1 %].[% booking_fee.due_date.split(‘-‘).0 %]


How to fix scrollbar overlapping content (V1 only)

Note: This issue only appears in the legacy Version 1 interface. If you are using Version 2, you are not affected. We strongly recommend switching to V2, as it is actively maintained and receives all updates and improvements.

On some systems, regular browser updates – especially in Firefox – can lead to display issues in details. One known issue is that the scrollbar may cover interface elements, for example in the LIST view.

This is not a bug in details, but rather a system setting on your device.

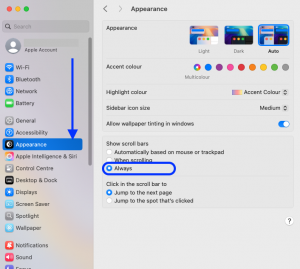
Example:


To resolve the issue, adjust the scrollbar settings on your Mac:

Open the system preferences and go to the APPEARANCE section. Set Show scroll bars to Always. After changing the setting, restart your computer.

How to sync your catalog and webshop orders via API


Use the Webshop API in details to (1) expose your catalog to a webshop and (2) push webshop orders into details for stock, invoicing, and reporting.

Important: The endpoints and keys below are examples. Replace placeholders like {API_KEY}, {ACCOUNT_ID}, etc. with your actual credentials and IDs. Keep your API key secret.

OVERVIEW

  • Catalog ► Webshop (GET): Provide Labels, Releases, Products, and Tracks as JSON feeds.
  • Webshop ► details (PUSH): Create orders in details via a parameterized request.

► Catalog export (GET endpoints)

Expose your catalog to the webshop via these read-only endpoints. The response format is JSON.

Labels

https://api.berlin3.com/api/noton/?action=labels&api_key={API_KEY}

Releases

https://api.berlin3.com/api/noton/?action=releases&api_key={API_KEY}

Products

https://api.berlin3.com/api/noton/?action=products&api_key={API_KEY}

Tracks

https://api.berlin3.com/api/noton/?action=tracks&api_key={API_KEY}

► Receive webshop orders (PUSH)

Create an order in details by calling the addOrder endpoint with URL parameters.

Endpoint

https://api.berlin3.com/api/noton/?action=addOrder&api_key={API_KEY}&account_id={ACCOUNT_ID}&invoice_project_id={INVOICE_PROJECT_ID}&webshop_order_id={SHOP_ORDER_NO}&internal_notes={NOTES}&order_date={YYYY-MM-DD}&order_type={ORDER_TYPE}&status={STATUS}&payment_method_id={PAYMENT_METHOD_ID}&currency_id={CURRENCY_ID}&vat_handling={VAT_MODE}&customer_no={CUSTOMER_NO}&email1={EMAIL}&company_name={COMPANY}&last_name={LAST_NAME}&address1={ADDRESS1}&city={CITY}&postalcode={POSTALCODE}&region={REGION}&country={COUNTRY}&order_source={ORDER_SOURCE}&contra_account_id={CONTRA_ACCOUNT_ID}&deliver_address_type=Address&deliver_name={DELIVER_NAME}&deliver_company={DELIVER_COMPANY}&deliver_address1={DELIVER_ADDRESS1}&deliver_city={DELIVER_CITY}&deliver_postalcode={DELIVER_POSTALCODE}&deliver_country={DELIVER_COUNTRY}&shipping_costs={SHIPPING}&order_value={ORDER_VALUE}&orderLines={PRODUCT_UUID}|{QTY}|{PPU}|1[&orderLines=...]

Tip: You can repeat orderLines multiple times to add more items.

Parameter reference

Parameter Description Example
api_key Your authentication token {API_KEY}
account_id Distribution account to book against {ACCOUNT_ID}
invoice_project_id Invoice project used for the order {INVOICE_PROJECT_ID}
order_type Order type identifier 1
status Initial order status open
payment_method_id Payment method (see table below) 1
currency_id Currency identifier 1
vat_handling VAT mode (1=including VAT, 3=no VAT) 1
orderLines One line per product: product_uuid|QTY|PPU|1 ab12cd...|2|12.00|1

Payment methods

ID Name
1 CREDIT CARD
2 SEPA LASTSCHRIFT
3 PAYPAL
4 BARZAHLUNG
5 VORKASSE

Order lines format

Each orderLines parameter represents one item in the order with the following pipe-separated format:

orderLines={PRODUCT_UUID}|{QTY}|{PPU}|1
  • {PRODUCT_UUID} the product UUID (fetch via the Products API).
  • {QTY} quantity.
  • {PPU} price per unit (net or gross depending on vat_handling).
  • 1 reserved constant.

VAT handling

vat_handling accepts these values:

  • 1 including VAT
  • 3 no VAT

How to Use the the Category Option for Products

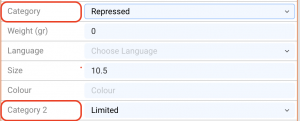
details offers the option to manage and distinguish between different categories of products.
In fact, details allows you to manage two different systems of product classification/types:
Category and Category 2.

Both are independent from each other and may be created and managed by customers according to their own specific business requirements.


Product categories are available in several places in the application:

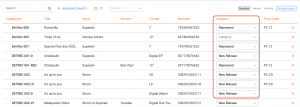
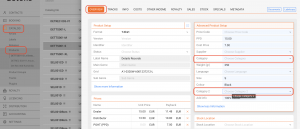
In the list of all products in CATALOG / PRODUCTS, Category is displayed and can be modified directly using the drop-down menu.

Category 2 is not shown in the list and should therefore be used for less dynamic parameters.

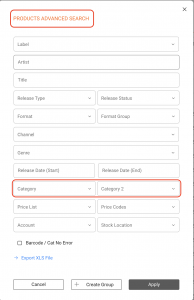
If you want to search your products by one or both categories or export a list related to a category, use the Advanced Search at the top right of the product list.


Both, Category and Category 2, are also visible in the overview of the respective product.


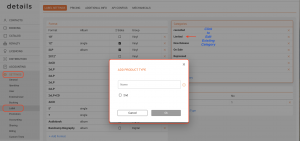
Categories can be created and modified in SETTINGS / LABEL /Label Setting :Categories.
Check the 2nd checbox if you want to add / edit an entry for category 2.


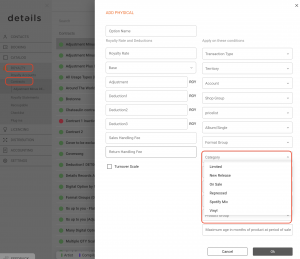
Beyond their use for day-to-day repertoire categorization, product categories can also be used as a parameter in the royalty calculation. Category can be assigned as a royalty condition for physical products (only).


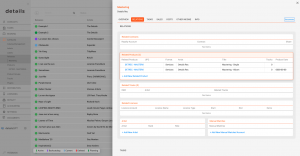
How to Remove a Confirmed Sales Import


If you need to remove a confirmed sales import (displayed in green), follow these steps:

Step 1: Navigate to the Sales Import

  1. Go to DISTRIBUTION > Imports.
  2. Locate and click on the green tile representing the sales import you want to remove.
  3. In the side window that opens, click on the statement.

Step 2: Open the Related Invoice

  1. In V2.0, at the top right of the side window, click on the button labeled Open Related Invoice.
  2. In V1, the button can be found at the bottom.

Step 3: Change Invoice Status

  1. If the invoice is still unlocked, click on Change Status. Otherwise make sure to unlock the Invoice first.
  2. Set the invoice status to Delete Invoice.

Note on deleting invoices:
Before you proceed, verify with your accounting department that you have permission to delete the related invoice. They may have already accounted the invoice!

Also , if a payment has already been made for this invoice, you must remove the payment before deleting the invoice.

In both cases, consider setting the invoice to Cancelled instead of deleting it. This keeps a trace of the transaction as a cancelled invoice, which can be more beneficial for record-keeping.

Note on deleting Digital Sales Statement Invoices

If the invoice is part of a digital sales statement, the deletion process might take longer due to the need to remove multiple data relations.

Step 4: Return to Distribution Imports

  1. After deleting the invoice, go back to DISTRIBUTION > IMPORTS.
  2. You will now see your import displayed in orange with the status matching complete.

Step 5: Delete the Sales Import

  • In V2.0: Click the x icon at the bottom left of the orange tile.
  • In V1.0: Navigate through the statement list, select the statement, and delete it from the list.

  • A prompt will appear asking, “Are you sure you want to delete the Statement?” Confirm by selecting Yes.

Advanced Royalty Layouts: How to Design Professional, Custom Templates


This article shows how to create visually appealing, professional royalty statements in details using your own HTML and CSS. You can completely control the layout and presentation while the system continues to calculate all values automatically.

Important: Everything described here happens inside your Invoice Project. No separate hosting or libraries are required. All templates render safely within details.


Where to Find These Settings

  1. Log in to your details account.
  2. Go to Settings  Layouts.
  3. Select the layout you use for royalty statements.
  4. Open the fields named Royalty Header, Royalty Template (not yet available coming soon!), and Royalty Footer.

These fields correspond to the database fields header_royalty, royalty_template, and footer_royalty. Additional customization areas include:

Field Purpose
style_royalty (not yet available coming soon!) Contains your CSS rules.
leading_text_royalty (not yet available coming soon!) Optional introduction above the statement.
trailing_text_royalty (not yet available coming soon!) Optional note or disclaimer at the end.
b2b_email_template Defines the email body used for statement notifications.

About the Structure

The final statement is rendered by combining the fields in this order:

style_royalty (CSS) header_royalty royalty_template footer_royalty

This means your CSS (in style_royalty) loads first, followed by the HTML from your header, then the main layout (royalty_template), and finally your footer or script area.

Data You Can Display

Your templates can display any information provided by details during statement generation. Common variables include:

Category Example Variables
Account royalty_account_name, currency_iso
Period start_date, end_date, royalty_period_id
Balances opening_balance, royalty_amount, amount_payable, closing_balance
Contracts contracts[] with contract_name, payment_net_all
Physical sales physical_sales.rows[] such as item, format, country, royalty_amount
Digital sales digital_sales.rows[] such as usage_type_textkey, net_sales, royalty_rate
Licensing licence_sales.rows[] such as licence_name, income, royalty_amount

Creating a Custom Header

You can include your logo, company information, and the current royalty period.

<table style=”width:100%; line-height:1.4em;”> <tr> <td style=”width:50%;”> <strong>{{ company_name }}</strong><br> {{ address1 }} <br> {{ city }}, {{ country }} </td> <td style=”width:50%; text-align:right;”> <strong>ROYALTY STATEMENT</strong><br> Period: {{ start_date }} {{ end_date }} <br> Currency: {{ currency_iso }} </td> </tr> </table> <hr>

Building the Main Template

Use your royalty_template section for structure, tables, and summary areas. Below is a minimal example showing physical and digital sections with conditional logic.

<h3>Physical Sales</h3> {{#if physical_sales.rows.length}} <table style=”width:100%; border-collapse:collapse;”> <tr><th>Item</th><th>Country</th><th style=”text-align:right;”>Amount</th></tr> {{#each physical_sales.rows}} <tr><td>{{ item }}</td><td>{{ country }}</td><td style=”text-align:right;”>{{ royalty_amount }}</td></tr> {{/each}} </table> {{else}} <p>No physical sales for this period.</p> {{/if}}


<h3>Digital Sales</h3> {{#if digital_sales.rows.length}} <table style=”width:100%; border-collapse:collapse;”> <tr><th>Type</th><th style=”text-align:right;”>Amount</th></tr> {{#each digital_sales.rows}} <tr><td>{{ usage_type_textkey }}</td><td style=”text-align:right;”>{{ royalty_amount }}</td></tr> {{/each}} </table> {{else}} <p>No digital sales for this period.</p> {{/if}}

Adding a Footer

Use footer_royalty for closing notes, bank information, or automatic print styles.

<div style=”font-size:10px; margin-top:30px; color:#555;”> <p>Calculated and issued by {{ company_name }} on {{ today }}.</p> <p>Bank details: {{ iban }} {{ bank_name }}</p> </div>


Important: For now, please use footer_royalty until access to the royalty_template section becomes available. You can download a sample file showing how to control CSS directly from footer_royalty here: Royalty Statement sample code .

Styling Recommendations

  • Use simple fonts and a clean hierarchy of headings.
  • Keep totals clearly separated from line details.
  • Reserve bold color accents for key figures only.
  • Add @media print rules to control page breaks for PDFs.

Example Layout Concepts

Classic Layout

A simple, print-friendly design:

  • Header with logo and address.
  • Summary table of balances and totals.
  • Detailed sections for physical, digital, and licensing.
  • Clean footer with contact and bank info.

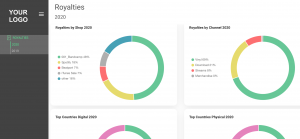
Dashboard-Style Layout

A modern, data-rich view inside the same statement:

  • Two-column summary (balances on one side, monthly totals on the other).
  • Expandable or filterable contract tables.
  • Light background sections and clear spacing.
  • Optional visual summaries (countries, stores, or top tracks) using your own charting method.

Email Template (Optional)

Use b2b_email_template to define the message that accompanies automatic royalty emails:

Hello {{ recipient_name }}, Your royalty statement for {{ period }} is ready. View or download your statement: {{ statement_url }} Best regards, {{ company_name }} Team

Best Practices

  • Start from a copy: Duplicate an existing layout before large changes.
  • Keep CSS unified: all styling in style_royalty.
  • Be concise: avoid unnecessary scripts or remote files.
  • Test thoroughly: check both screen and PDF outputs.
  • Maintain consistency: align statement design with your company branding.

Need Help?

If you d like assistance refining your layout, contact support@details.eu and include:

  • Your layout name (invoice_project_name)
  • A short description or screenshot of your current layout
  • What you d like to improve or achieve

Related

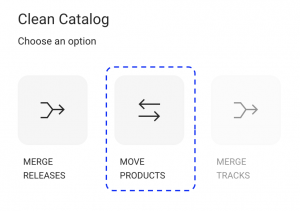
How To Move Products Between Releases

This article explains how to move a product from one release to another in CATALOG MANAGEMENT.

Moving a product is useful if a product was assigned to the wrong release or if releases need to be reorganized for catalog or royalty reasons.

This action affects catalog structure and contract relations. details will always validate the move before anything is changed.

► When to Use This Feature

Use Move Product if you need to:

  • Move a product that is linked to the wrong release
  • Group products under a different project or release
  • Align products with the same releases and royalty setup

This feature moves one product at a time.

► Start the Move Product Action

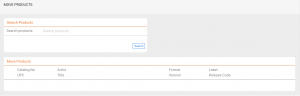
In CATALOG MANAGEMENT, search for the product you want to move using the Search Products box. You can search by artist, release title, barcode, or catalog number.

From the result list, select the product you want to move to another release.

► Select the Target Release

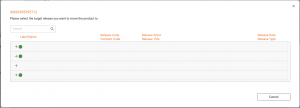
In the first modal, search for the release you want to move the product to.

You can search by artist, release title, or other identifiers.

Selecting a release immediately triggers automatic validation in the background.

► Validation and Blocking Rules

Before the move is allowed, details checks whether the product can be safely moved.

  • The move is blocked if the product is linked to contracts with track-based rata shares and the target release already has active contracts.
  • If conflicts exist, the system stops the process and explains why the move cannot continue.

No data is changed if validation fails.

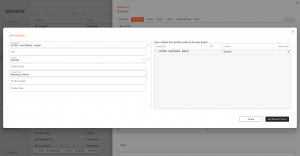
► Review Contract Relations

If validation succeeds, a second modal opens showing how contract relations will be affected by the move.

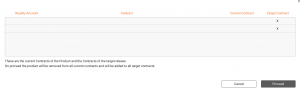
The table compares:

  • Royalty accounts
  • Contracts
  • Current contract relations of the product
  • Target contract relations of the selected release

This gives you full transparency before confirming the change.

If neither the product nor the target release has any contract relations, the system explicitly indicates that the move is safe.

► Confirm and Execute

Review the information carefully before proceeding.

  • [CANCEL] stops the process without any changes
  • [PROCEED] moves the product and updates all related data

On confirmation, the product is reassigned to the new release and all related catalog, contract, and reporting links are updated automatically.

► What This Feature Does Not Do

  • It does not merge release metadata
  • It does not change royalty shares manually
  • It does not fix invalid or conflicting contracts automatically

The feature only performs the move if all validation rules are met.

Important:
Even if the move is validated and completed successfully, we strongly recommend reviewing the product s ROYALTY tab afterwards.

If the product had existing contract relations, you should double-check that all contracts, shares, and rata settings are still correct after the move.

Example Code for Money Section

Here is a fine examples for the money section of booking templates:

This is for the Artist Fee and Booking Fee:


[% artist_fee = ph.invoice(‘Artist Fee’) %]
[% booking_fee = ph.invoice(‘Booking Fee’) %]

Artist Fee
[% IF artist_fee.tax_rate_percent > 0 %]
[% artist_fee.price %] + [% artist_fee.price * artist_fee.tax_rate_percent / 100 | format(‘%.2f’)%] VAT = [% artist_fee.price * (1 + artist_fee.tax_rate_percent / 100) | format(‘%.2f’)%] [% ph.currency %]
[% ELSE %]
[% artist_fee.price %] [% ph.currency %]
[% END %]

Booking Fee
[% IF booking_fee.tax_rate_percent > 0 %]
[% booking_fee.price %] + [% booking_fee.price * booking_fee.tax_rate_percent / 100 | format(‘%.2f’)%] VAT = [% booking_fee.price * (1 + booking_fee.tax_rate_percent / 100) | format(‘%.2f’)%] [% ph.currency %]
[% ELSE %]
[% booking_fee.price %] [% ph.currency %]
[% END %]

and for the Payment Details:


[% deposit_fee = ph.invoice(‘Deposit 1’) %]
[% deposit_fee2 = ph.invoice(‘Deposit 2’) %]
[% balance_fee = ph.invoice(‘Balance’) %]

Deposit
[% IF deposit_fee.tax_rate_percent > 0 %]
[% deposit_fee.price %] + [% deposit_fee.price * deposit_fee.tax_rate_percent / 100 | format(‘%.2f’)%] VAT = [% deposit_fee.price * (1 + deposit_fee.tax_rate_percent / 100) | format(‘%.2f’)%] [% ph.currency %]
[% ELSE %]
[% deposit_fee.price %] [% ph.currency %]
[% END %]

2nd Deposit
[% IF deposit_fee2.tax_rate_percent > 0 %]
[% deposit_fee2.price %] + [% deposit_fee2.price * deposit_fee2.tax_rate_percent / 100 | format(‘%.2f’)%] VAT = [% deposit_fee2.price * (1 + deposit_fee2.tax_rate_percent / 100) | format(‘%.2f’)%] [% ph.currency %]
[% ELSE %]
[% deposit_fee2.price %] [% ph.currency %]
[% END %]

Balance
[% IF balance_fee.tax_rate_percent > 0 %]
[% balance_fee.price %] + [% balance_fee.price * balance_fee.tax_rate_percent / 100 | format(‘%.2f’)%] VAT = [% balance_fee.price * (1 + balance_fee.tax_rate_percent / 100) | format(‘%.2f’)%] [% ph.currency %]
[% ELSE %]
[% balance_fee.price %] [% ph.currency %]
[% END %]