Order API (V1) – How to import Orders via JSON


How to import orders via the Order API (V1)

Use this guide to send orders into details via a POST request. This article documents the Order API V1.0 (2023) and keeps the V1 behavior.

Note: The endpoint expects a JSON array of orders in the request body. Identifiers can be provided as UUID, barcode, or catalog_no. Barcodes must be unique.

Where to find the endpoint

Go to SETTINGS / SHARING and open the open api box named [JSON Orders Import].

Endpoint & URL format

Base URL:

https://openapi.berlin3.com:10000/orders/json_import/

Path format (with credentials):

https://api.berlin3.com:10000/api/orders/json_import/<client_id>/<checksum>

Quick start

  1. Generate or locate your <client_id> and <checksum> in SETTINGS / SHARING.
  2. Build your POST request to the URL format above.
  3. Set header Content-Type: application/json.
  4. Send a JSON array of order objects in the request body.

Request parameters

Parameter Description In Expected Value
client_id Unique client identifier path details client_id
checksum API key path details open api key
params Array of orders body JSON

Payload schema (field overview)

Each order is an object. The table below lists available fields. Mandatory fields must be present in every order.

API Field Name Mandatory / Optional Data Type Expected Value Field Description
order_date Mandatory string YYYY-MM-DD Date of the order.
account_id Mandatory integer min e 1 Internal ID of the account.
contra_account_id Mandatory integer   Internal ID of the contra account.
invoice_project_id Mandatory integer   Internal ID of the invoicing project.
vat_handling Mandatory integer 1, 2, 3 1 = excluding VAT, 2 = including VAT, 3 = no VAT.
vat_territory Mandatory string   Territory for VAT calculation.
vat_rate1 Mandatory number   Primary VAT rate.
vat_rate2 Mandatory number   Secondary VAT rate.
orderlines   array   Line items of the order (see fields below).
shipping_type_id Optional integer   Internal ID of shipping type.
order_value Optional number   Total order value.
uuid / barcode / catalog_no Optional string   Item identifiers. Barcodes must be unique.

cURL example

curl -X POST 
  "https://api.berlin3.com:10000/api/orders/json_import/<client_id>/<checksum>" 
  -H "Content-Type: application/json" 
  -d '[
    {
      "order_date": "2015-06-01",
      "account_id": 167,
      "contra_account_id": 2,
      "invoice_project_id": 4,
      "currency": "EUR",
      "order_type": 1,
      "vat_handling": 1,
      "vat_territory": "EU",
      "vat_rate1": 19,
      "vat_rate2": 0,
      "orderlines": [
        {"uuid": "b1862090-469e-4035-a073-9f106d270502", "ppu": 12.50, "order_qty": 1},
        {"uuid": "c796d64c-90c6-493f-a8ea-0f244904069b", "ppu": 10.90, "order_qty": 3}
      ]
    }
  ]'

JSON schema (V1)

{
  "$schema": "http://json-schema.org/draft-07/schema#",
  "title": "import orders",
  "description": "import orders from json",
  "type": "array",
  "items": {
    "type": "object",
    "required": [
      "order_date",
      "account_id",
      "contra_account_id
How to Update a Product Track List


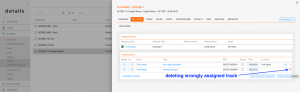
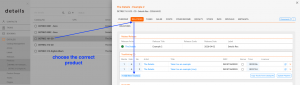
The Product Track List allows you to update, add, or move tracks between products in CATALOG / PRODUCTS. This is useful when correcting product assignments or adjusting track lists after release planning.

Accessing the Product Track List

  1. Go to CATALOG / PRODUCTS.
  2. Select the product you want to edit.
  3. Open the RELATIONS tab.
  4. Locate the Track Relations ( Track List ) section to view and manage assigned tracks.

Moving a Track to a Different Product

  1. Remove the Track from the current product by editing its track list.
  2. Add the Track to the new product by choosing [Add Existing Track] and searching for the track.

Note: Removing a track from one product does not delete it from the catalog. It simply breaks the product track relation.

How to Merge Releases

Merging releases is a smart way to clean up duplicates and unify your catalog.

Use this tool to combine two releases that refer to the same record but may differ in metadata, contract assignment, or track structure.

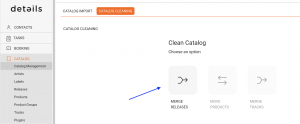
You ll find the Merge Releases function in CATALOG MANAGEMENT / CLEAN CATALOG.

Step-by-Step Guide


1. Open the [MERGE RELEASES] Option

To begin, click [MERGE RELEASES]. A side window opens.


2. Search for Merge Candidates

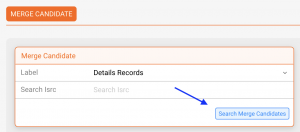
To narrow down your results, either use the dropdown to select the label whose releases you want to check OR enter an ISRC to find all releases containing a specific track. Then click [SEARCH MERGE CANDIDATES].

Note: Only releases from the same label can be merged. The system will show groups of releases that share the same artist & title or have matching identifiers.
 

3. Choose Two Releases

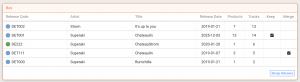
When you click [SEARCH], details will show you a list of releases that could potentially be merged. From the results table, choose:

  • one release to Keep
  • one release to Merge into it

Use the radio buttons in each row to mark your choices.

All data from the merged release will be transferred to the kept release. The merged release will then be deleted.
 

4. Check for Conflicts

If the two selected releases have different contract settings, you ll see a warning. Here you can either:

  • click [CANCEL] to stop the process
  • or click [SHOW CONFLICTS] to inspect what s incompatible
The conflict view will show contract details that don t match across the two releases. Contracts need to be harmonized in order to merge successfully.
 

5. Confirm the Merge

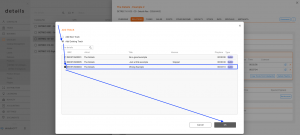
If there are no conflicts, a confirmation modal will appear showing both releases side by side:

  • Left: the release you want to keep (green background)
  • Right: the release to merge (red background)

Click [CONFIRM MERGE] to proceed.

Post-Merge Steps in Contracts

After merging, the system may prompt you to complete the process by handling missing contract data. Follow the modals that appear:

  •  

    Modal 1: Add Tracks to Contracts

    If new tracks were introduced, you ll be asked to assign them to contracts. Click [ADD TO CONTRACT] to complete this step, or [CANCEL] to abort.

  •  

    Modal 2: Add Products to Contracts

    If product-level data is missing, the system will show a list of items needing updates. Review and click [ADD TO CONTRACT].

  •  

    Modal 3: Final Check

    If needed, you ll see a list of tracks without contract assignments. This is only for your reference. Click [OK] to close the modal.

Done!

Your selected releases have now been merged. All tracks, products, and metadata from the merged release have been moved to the kept release. You can now manage this unified release as usual.

Notes & Tips

  • Merges are permanent. Be sure to review all data before confirming.
  • If you need to stop at any point, use [CANCEL]. Partial changes may or may not be saved depending on the step.
  • This process works similarly to Imports each step is modular and confirms your input before proceeding.

Let us know if you encounter errors or unexpected behaviors. Our support team is happy to assist.

How to work with the Track API


The Track API allows external systems to access track-level metadata stored in your details database. It is ideal for synchronizing catalog data, powering dashboards, or enabling custom integrations with other tools in your workflow.

What the API Returns

The Track API returns track metadata stored in your database, including but not limited to:

  • Track title
  • Artist name
  • Version
  • Playtime
  • ISRC
  • Track ID
  • UUID

The data is returned as structured JSON, ready for use in your own apps or services.


Use Cases

The Track API is suitable for:

  • Integrating track data into your internal systems
  • Enabling metadata syncs across services
  • Exporting or analyzing catalog data
  • Building custom dashboards or user-facing tools

Accessing the API

Each client has a unique API key and endpoint. To find yours:

  1. Log in to your details account
  2. Go to SETTINGS / SHARING / API Keys
  3. Locate the Track API section


Authentication

All API calls require your client-specific api_key. This key should be treated as a secret and must be included as a query parameter in every request:

?api_key=<your_key>


Endpoint Format

https://api.berlin3.com/api/<clientID>/?action=tracks&api_key=<your_key>

Sample Response

{
  "status": "ok",
  "results": [
    {
      "track_id": 14532,
      "uuid": "e73b8f30-b07d-4a68-8a6d-219ab9f9f742",
      "title": "The Story",
      "version": "Remastered",
      "artist": "Side Effect",
      "isrc": "FR9W12012717",
      "playtime": "00:03:45",
      "created": "2024-12-01T10:12:34Z",
      "last_modified": "2025-03-02T08:41:00Z"
    },
    ...
  ]
}

Field Descriptions

Field Type Description
track_id integer Internal ID of the track
uuid string Globally unique identifier for the track
title string Track title
version string Version info (e.g. Edit, Remix, Remastered)
artist string Name of the track s artist
isrc string International Standard Recording Code
playtime string Duration in format HH:MM:SS
created datetime Timestamp when the track was created
last_modified datetime Timestamp of last update

The API returns an array of matching tracks inside the results field. The status field confirms the success of the request.


Support

If you have questions about usage, performance, or custom integrations, feel free to contact our team at label_team@detailsdetails.eu.

Let details work for you.


How details pulls information from bookings to templates

A core functionality of our BOOKING module is to pull data from your bookings into templates for contracts, itineraries etc.

This article will explain you how this works:


1) The first step on the way from a booking to a fully featured template is to create a booking.

It is on the subtab “Documents” of any booking that you will be able to create documents such as contracts, itineraries, etc.
Obviously without a booking there will be no contract or itinerary.

There are two ways to create new bookings:

* create it manually by clicking on the Plus icon on any day in the Booking Calendar and work through the 4 steps of what we call the Booking Wizard (a. Date, City, Artists / b. Venue / c. Promoter / d. Contact)

* process an incoming Booking Request
Both workflows will already collect tons of information which you will be able to use for your documents later, for example
– the date
– the city and country
– the selected artist with all related infos
– the selected venue with all related infos
– the selected promoter with all related infos
– the selected contact with all related infos

All of these information can be pulled into your documents through your Templates

The way this works is that you can place variables in your templates that will be pulled for the specific document you are working on. You can find a list of all available standard variables here

2) Now in addition to standard information details also allows you to create custom fields.
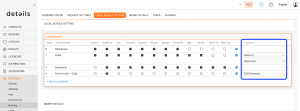
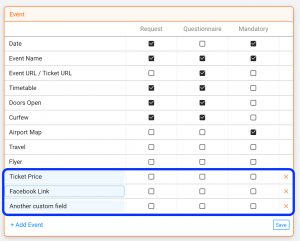
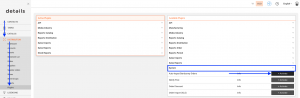
Examples for custom fields are all custom fields from REQUEST SETTINGS and LOCAL DETAILS SETTINGS:


Each of those fields will automatically make their a specific custom variables available.


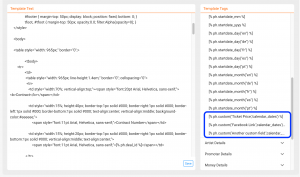
The custom variables for the custom fields “Ticket Price”, “Facebook Link” and “Custom field” would be
[% ph.custom(‘Ticket Price’,’calendar_dates’) %]
[% ph.custom(‘Facebook Link’,’calendar_dates’) %]
[% ph.custom(‘Another custom field’,’calendar_dates’) %]


NOTE: Please remember that the custom variables include the NAME of the custom field.
This also means that whenever you change the name of a field, you will change the custom variable and variables will only pull data from a field if the name is identical.

In other words: If you change the names of your custom fields, the custom variables will need to be adapted as well!
Old custom variables will not work once you change the field names!


3) The third and last step to understand how data is pulled into documents is how to include variables into TEMPLATES.

A detailed description of how variables are included in contracts can be found HERE.

Those articles also include a lot of tips and tricks to use additional logic in the templates such as specific date formats, IF ELSE clauses etc.

Bandcamp Order Ingestion Plugin


The Bandcamp Plugin in details allows you to synchronize and manage sales and catalog data between your details account and your Bandcamp store. It is designed for labels and distributors who sell music or merchandise directly via Bandcamp while keeping all reporting and royalty data centralized in details.

Overview

The plugin connects Bandcamp s sales and product data to details through automated imports. It enables the synchronization of catalog entries, sales reports, and accounting data to ensure that your Bandcamp activity is reflected accurately in your royalty statements.

This plugin is available under DISTRIBUTION / PLUGINS. Once activated, it appears as a separate module within the DISTRIBUTION section.

Setup

To activate and configure the plugin:

  1. Go to DISTRIBUTION / PLUGINS and locate Bandcamp in the plugin list.
  2. Click [ACTIVATE] to enable the plugin for your account.
  3. Once activated, open the plugin settings by clicking the Bandcamp icon.
  4. Enter your Bandcamp account credentials or API token (depending on your access type).
  5. Confirm your setup by clicking [SAVE].

The connection allows details to pull sales reports and catalog data directly from your Bandcamp shop, keeping both systems aligned.

Workflow

Once activated and connected, the Bandcamp Plugin performs two key functions:

  • Catalog Matching: The plugin automatically compares Bandcamp product data (albums, tracks, merchandise) with existing catalog entries in details. If matching identifiers are found, the products are linked automatically.
  • Sales Import: Bandcamp sales data (downloads, vinyl, CDs, merchandise) are imported and mapped to your royalty system. This ensures that all Bandcamp revenues appear in your distribution reports and artist statements.

Each import session generates a report under DISTRIBUTION / SALES IMPORTS, showing the number of matched, unmatched, and newly created entries. Unmatched lines can be manually linked to existing products or ignored if not relevant.

Notes & Limitations

The Bandcamp Plugin is intended for labels and distributors managing their own Bandcamp accounts. It does not support artist sub-accounts or third-party Bandcamp logins.

Automatic imports rely on your Bandcamp data export settings. Ensure your Bandcamp account has report access and that your login or token remains valid. If an import fails, check your API credentials or reauthorize the plugin.

The plugin is optimized for catalog synchronization and royalty reporting, not for direct content uploads or price management. Those actions must still be performed directly on Bandcamp.

Note: If you need to synchronize multiple Bandcamp accounts, contact support@details.eu for assistance. Each Bandcamp account requires its own API connection.

With the Bandcamp Plugin, your Bandcamp sales and catalog data stay in sync with details, ensuring complete and accurate royalty management for your artists and partners.

details Pricing Update 2025

The COVID crisis not only posed a severe threat to millions of lives worldwide, but also profoundly impacted the creative industries, both in Europe and globally.

The economic repercussions were significant for all companies in the music business. During this difficult period, we tried to support one another, find alternatives, and continue moving forward together.

Throughout the Corona crisis, the vital role of music in our lives became even more evident. It also highlighted the crucial importance of the music industry to social life, and the responsibility we share toward music and one another within the industry.

As an act of partnership and solidarity, details immediately provided a 50% Corona discount to all clients until December 2020.

Recognizing that booking agencies were particularly hard-hit, we extended further support by reducing the user fee for booking-only users to €25 per month, net of VAT, in 2021. We also waived charges for regular support for these clients throughout the year.


Standard User Fees

To ensure our sustainability and continued service, we had to return to our standard full user fees for all non-booking customers at the end of 2021. We will also adjust pricing for full users as follows:

Effective date Monthly fee Annual subscription
January 2022 €59/month €590/year
January 2025 €69/month €690/year

All prices are net of VAT.

Trust us, this decision was not made lightly. We are adjusting our pricing after careful observation of market requirements, technological benchmarks, and the competitive landscape.

This adjustment reflects the enhanced features we have already added, the features we will continue to add in the future, rising operational costs, and our commitment to making details a benchmark solution for independents.

We will continue to offer savings through annual subscriptions and referral rewards to support your long-term success.


Pricing Updates for Booking-Only Users

For Booking-Only users, we also need to gradually return fees to our previous rates. In accordance with our Terms of Use / Subscription Agreement, our published pricing will be adjusted as follows:

Effective date Monthly fee Annual subscription Note
January 2022 €29/month €290/year Gradual return after COVID discount
January 2023 €39/month €390/year Continued gradual adjustment
July 2024 €49/month €490/year Return to pre-COVID pricing
January 2025 €59/month €590/year Adjustment for ongoing improvements and operational costs

All prices are net of VAT.

The January 2025 adjustment for Booking-Only pricing reflects ongoing product improvements, rising operational costs, and the need to ensure fair alignment across all users.

We know price adjustments are never easy. That is why we continue to offer savings through annual subscriptions.

Should you have any questions or need further assistance, please do not hesitate to reach out to us.


Booking-Only User Definition

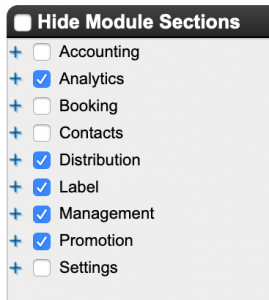
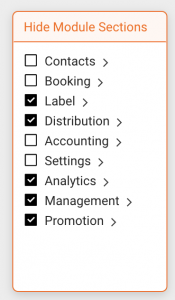
A booking-only user has access to the menu sections Contacts, Booking, Accounting, and Settings, but not to Label, Distribution, Promotion, or Management.

Module access for users should be configured independently by customers in Settings / User.

Booking-Only User Settings in V1 and V2

V1 V2


How to set up Importers (to import sales, costs, performance etc.)


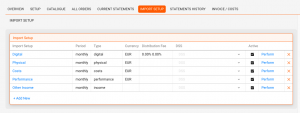
Each Distribution Account can be linked to one or more Import Setups or Importers. An importer defines how a specific type of statement (such as digital sales, physical returns, costs, or performance income) is processed and categorized.

Setting up importers is what enables the system to correctly interpret and handle incoming data from your distribution partners or any outside source. This allows you to handle a wide range of data ingestions with precision and flexibility.

Common importer types include:

  • Digital Sales
  • Physical Sales
  • Costs
  • Performance Income
  • Other Income (e.g. third-party income)
  • Publishing Income (coming soon)


To import different types of income/costs for an Account, you need to create multiple importers.

You can also create multiple importers for the same type for example, if you receive digital sales in different currencies, from different territories, or with different formats and conditions.


Where to Set Up an Importer

  1. Go to Distribution / Accounts
  2. Select the relevant distribution account
  3. Click on the►Import Setup subtab
  4. Click + Add New to open the Import Setup modal


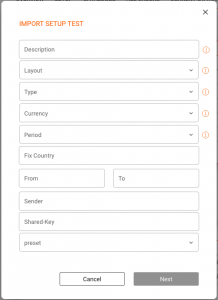
Import Setup Fields

The setup modal contains a number of fields. Depending on the selected Type, some fields may vary.


Mandatory Fields

Field Description
Description Name the setup clearly
(e.g. Spotify EUR , Word Of Sound – Vinyl PRO , “Monthly Costs”, etc.)
Layout Select the layout format for the importer
Type Choose from Digital, Physical, Costs, Performance, Income
Currency Set the statement currency (e.g. EUR, USD).
Only Cost Importers allow multi-currency imports.
Period Select how often the statement is received (monthly, quarterly, etc.)


Optional Fields

Field Description
Fix Country Limit import scope to a specific country
From / To Define a valid date range for imports
Sender Indicate the original sender of the statement
Shared-Key Used to identify matching statements across sources
Preset Apply a pre-configured format if available
DSS Select a DSS layout (if available for this partner)


Advanced Fields (depending on Import Type)

  • Fix Type Lock specific classifications (e.g. usage type, store)
  • Fix Store Used for filtering by store/DSP/platform (digital only)
  • Distribution Fee Sales Fee % deducted from sales
  • Distribution Fee Returns Fee % on returned items
  • Return Handling Fee Optional fixed or % handling fee

Note: Distribution fees are only applied to PPD amounts (not to PPU-based statements).


After Saving the Importer

Once saved, your importer appears in the list under Import Setup in the distribution account view where you can:

  • Use the Perform link to import statements
  • Edit or deactivate existing setups : To remove an importer from the list in the DISTRIBUTION / IMPORTS screen without deleting it, you can deactivate the importer.
    This will hide it from the import list, but preserve its configuration and data in the background. Do not delete an importer if it has already been used to import data. Use deactivation instead.
  • Add multiple setups for different statement types or variations

The new Importer now also appears in Distribution / Imports and you can start importing away.

Need help configuring layouts or presets? Contact label_team@details.eu.

Redesign and Booking Update June 2022

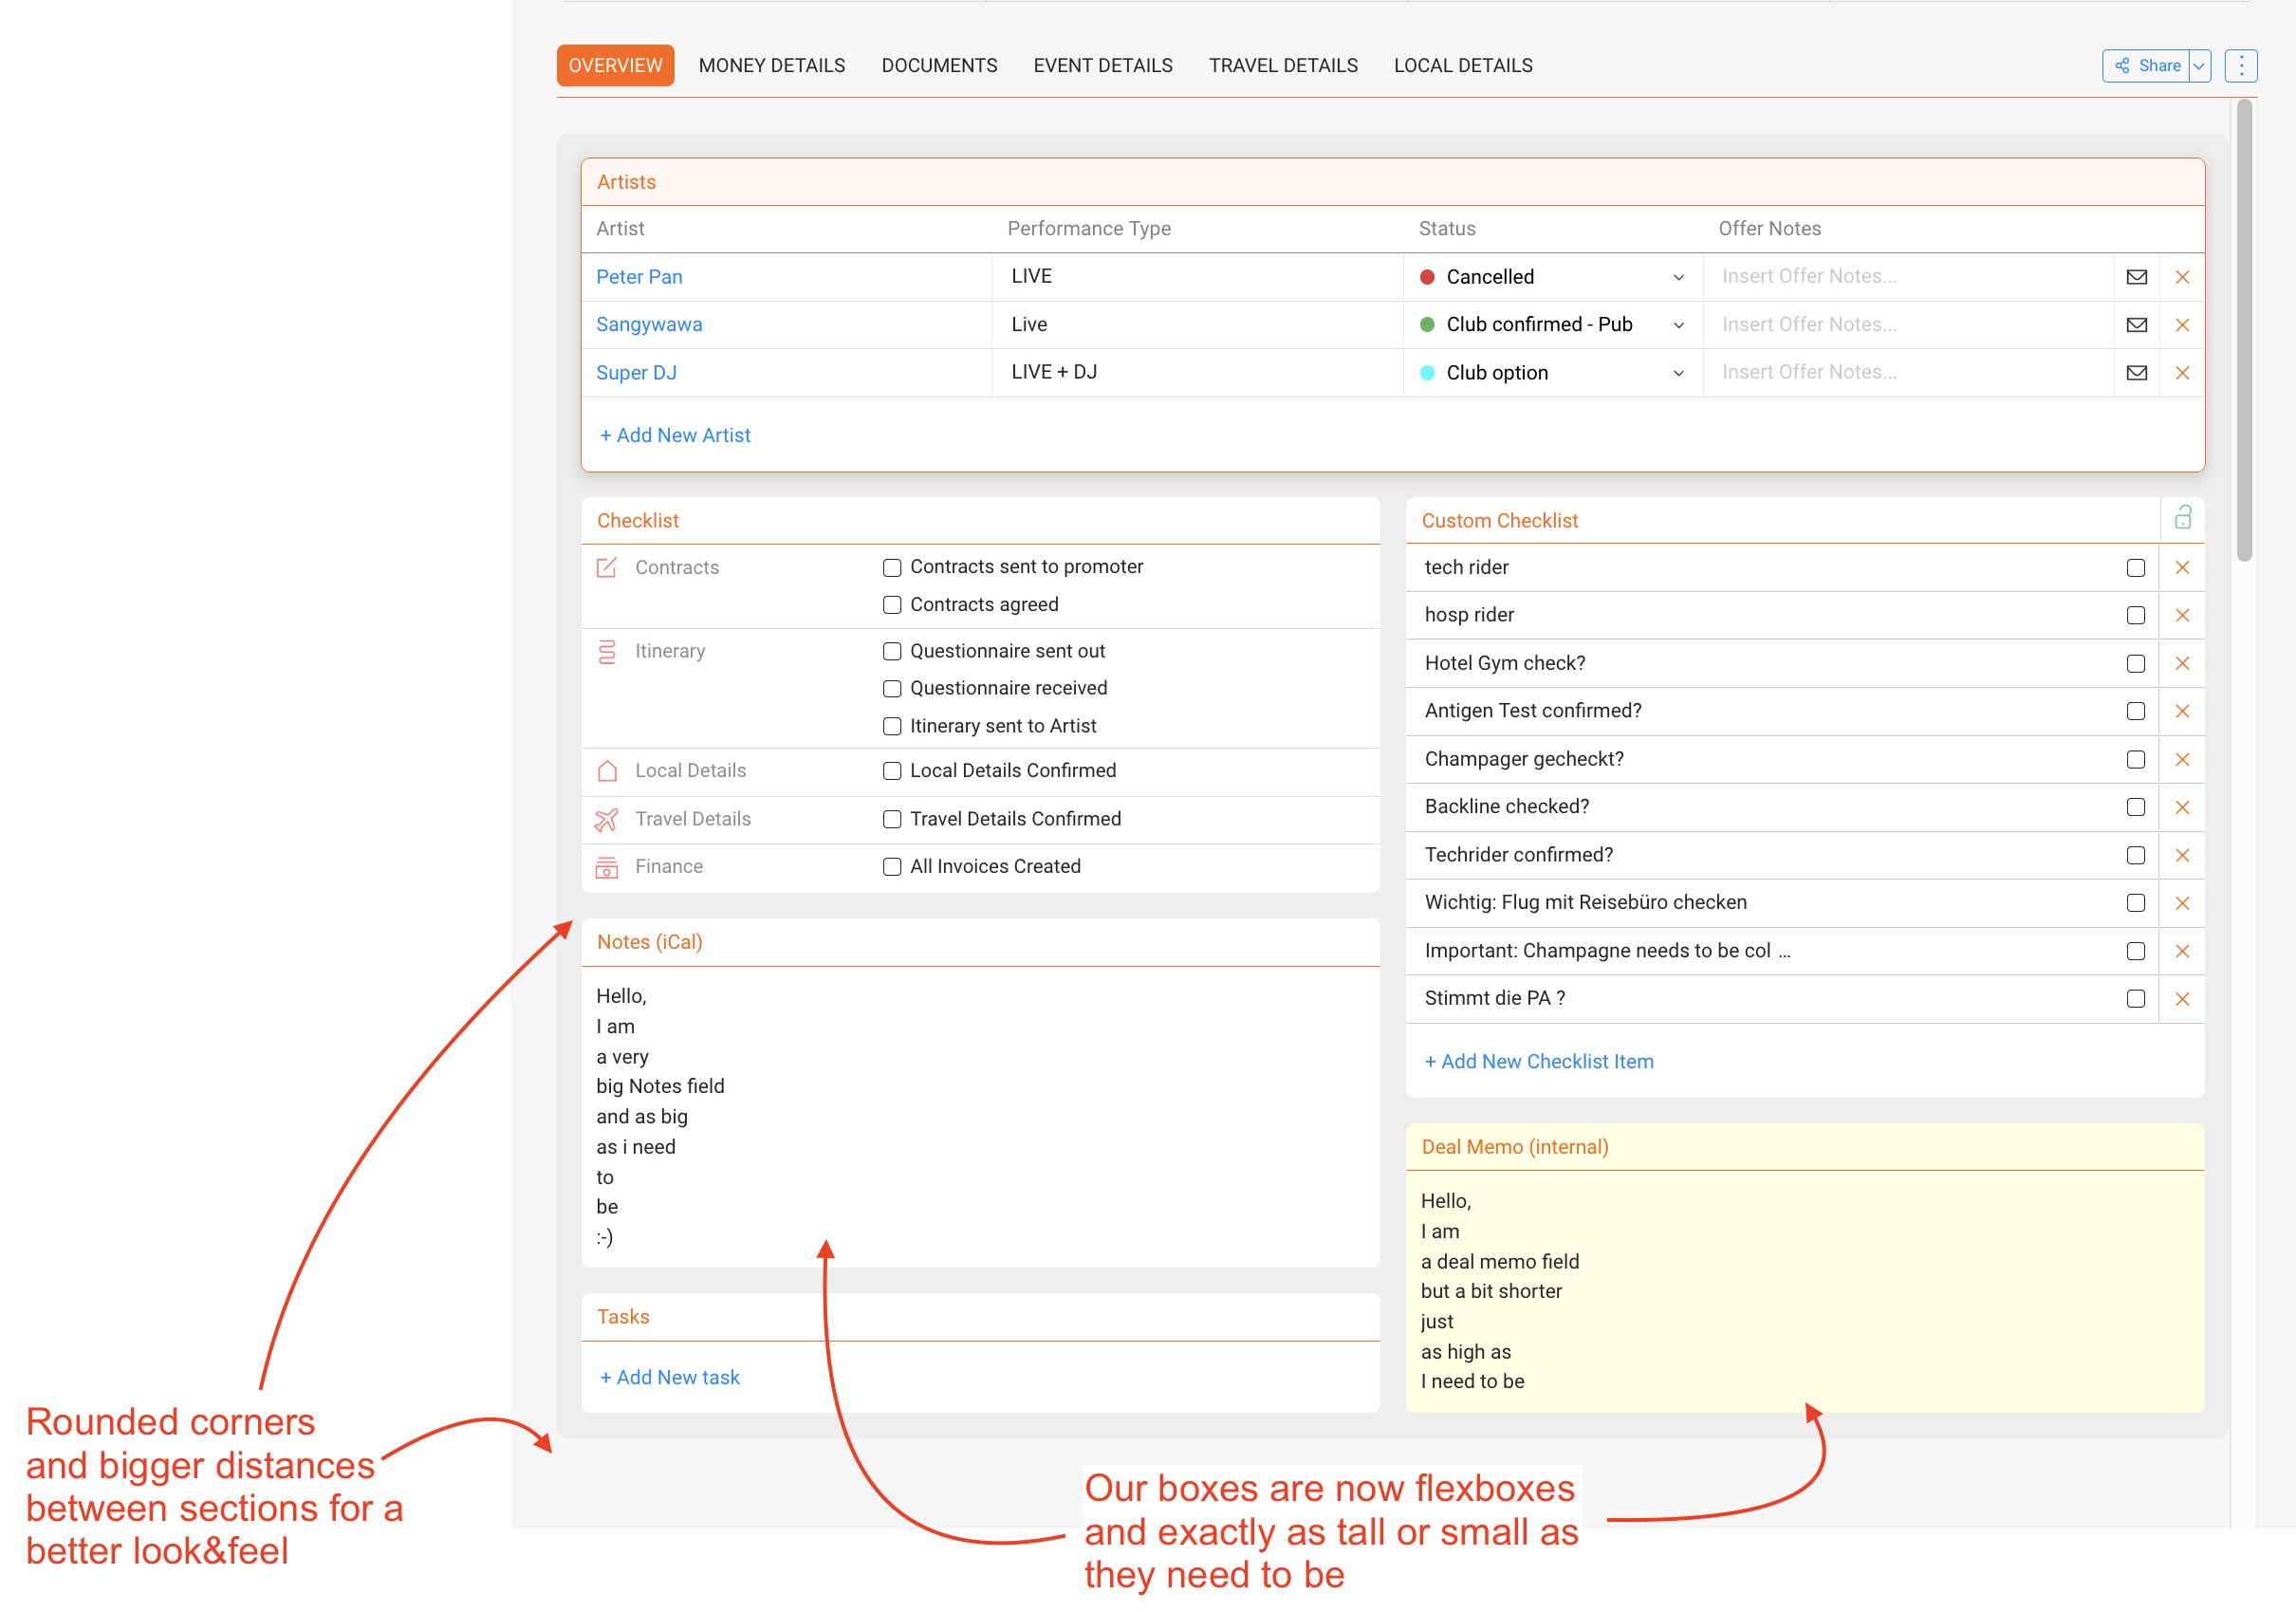
Great news for our BOOKING clients – we have been busy working on our redesign and are excited to release the latest update which includes a lot of fixes for our booking, contact, accounting and settings modules as well as some important design improvements

The most notable improvement is the introduction of “flexboxes . This means that now our boxes are exactly as big or small as they need to be. Pages look more organized, be they dynamic or static, which makes them more fun to work with.

We’ve also made a lot of tweaks to the overall “look & feel”, such as nice rounded corners, different background colors, and increased spacing between sections, etc. ZENDESK_-_BOOKING_UPDATE.png

—————————————————————————————————-

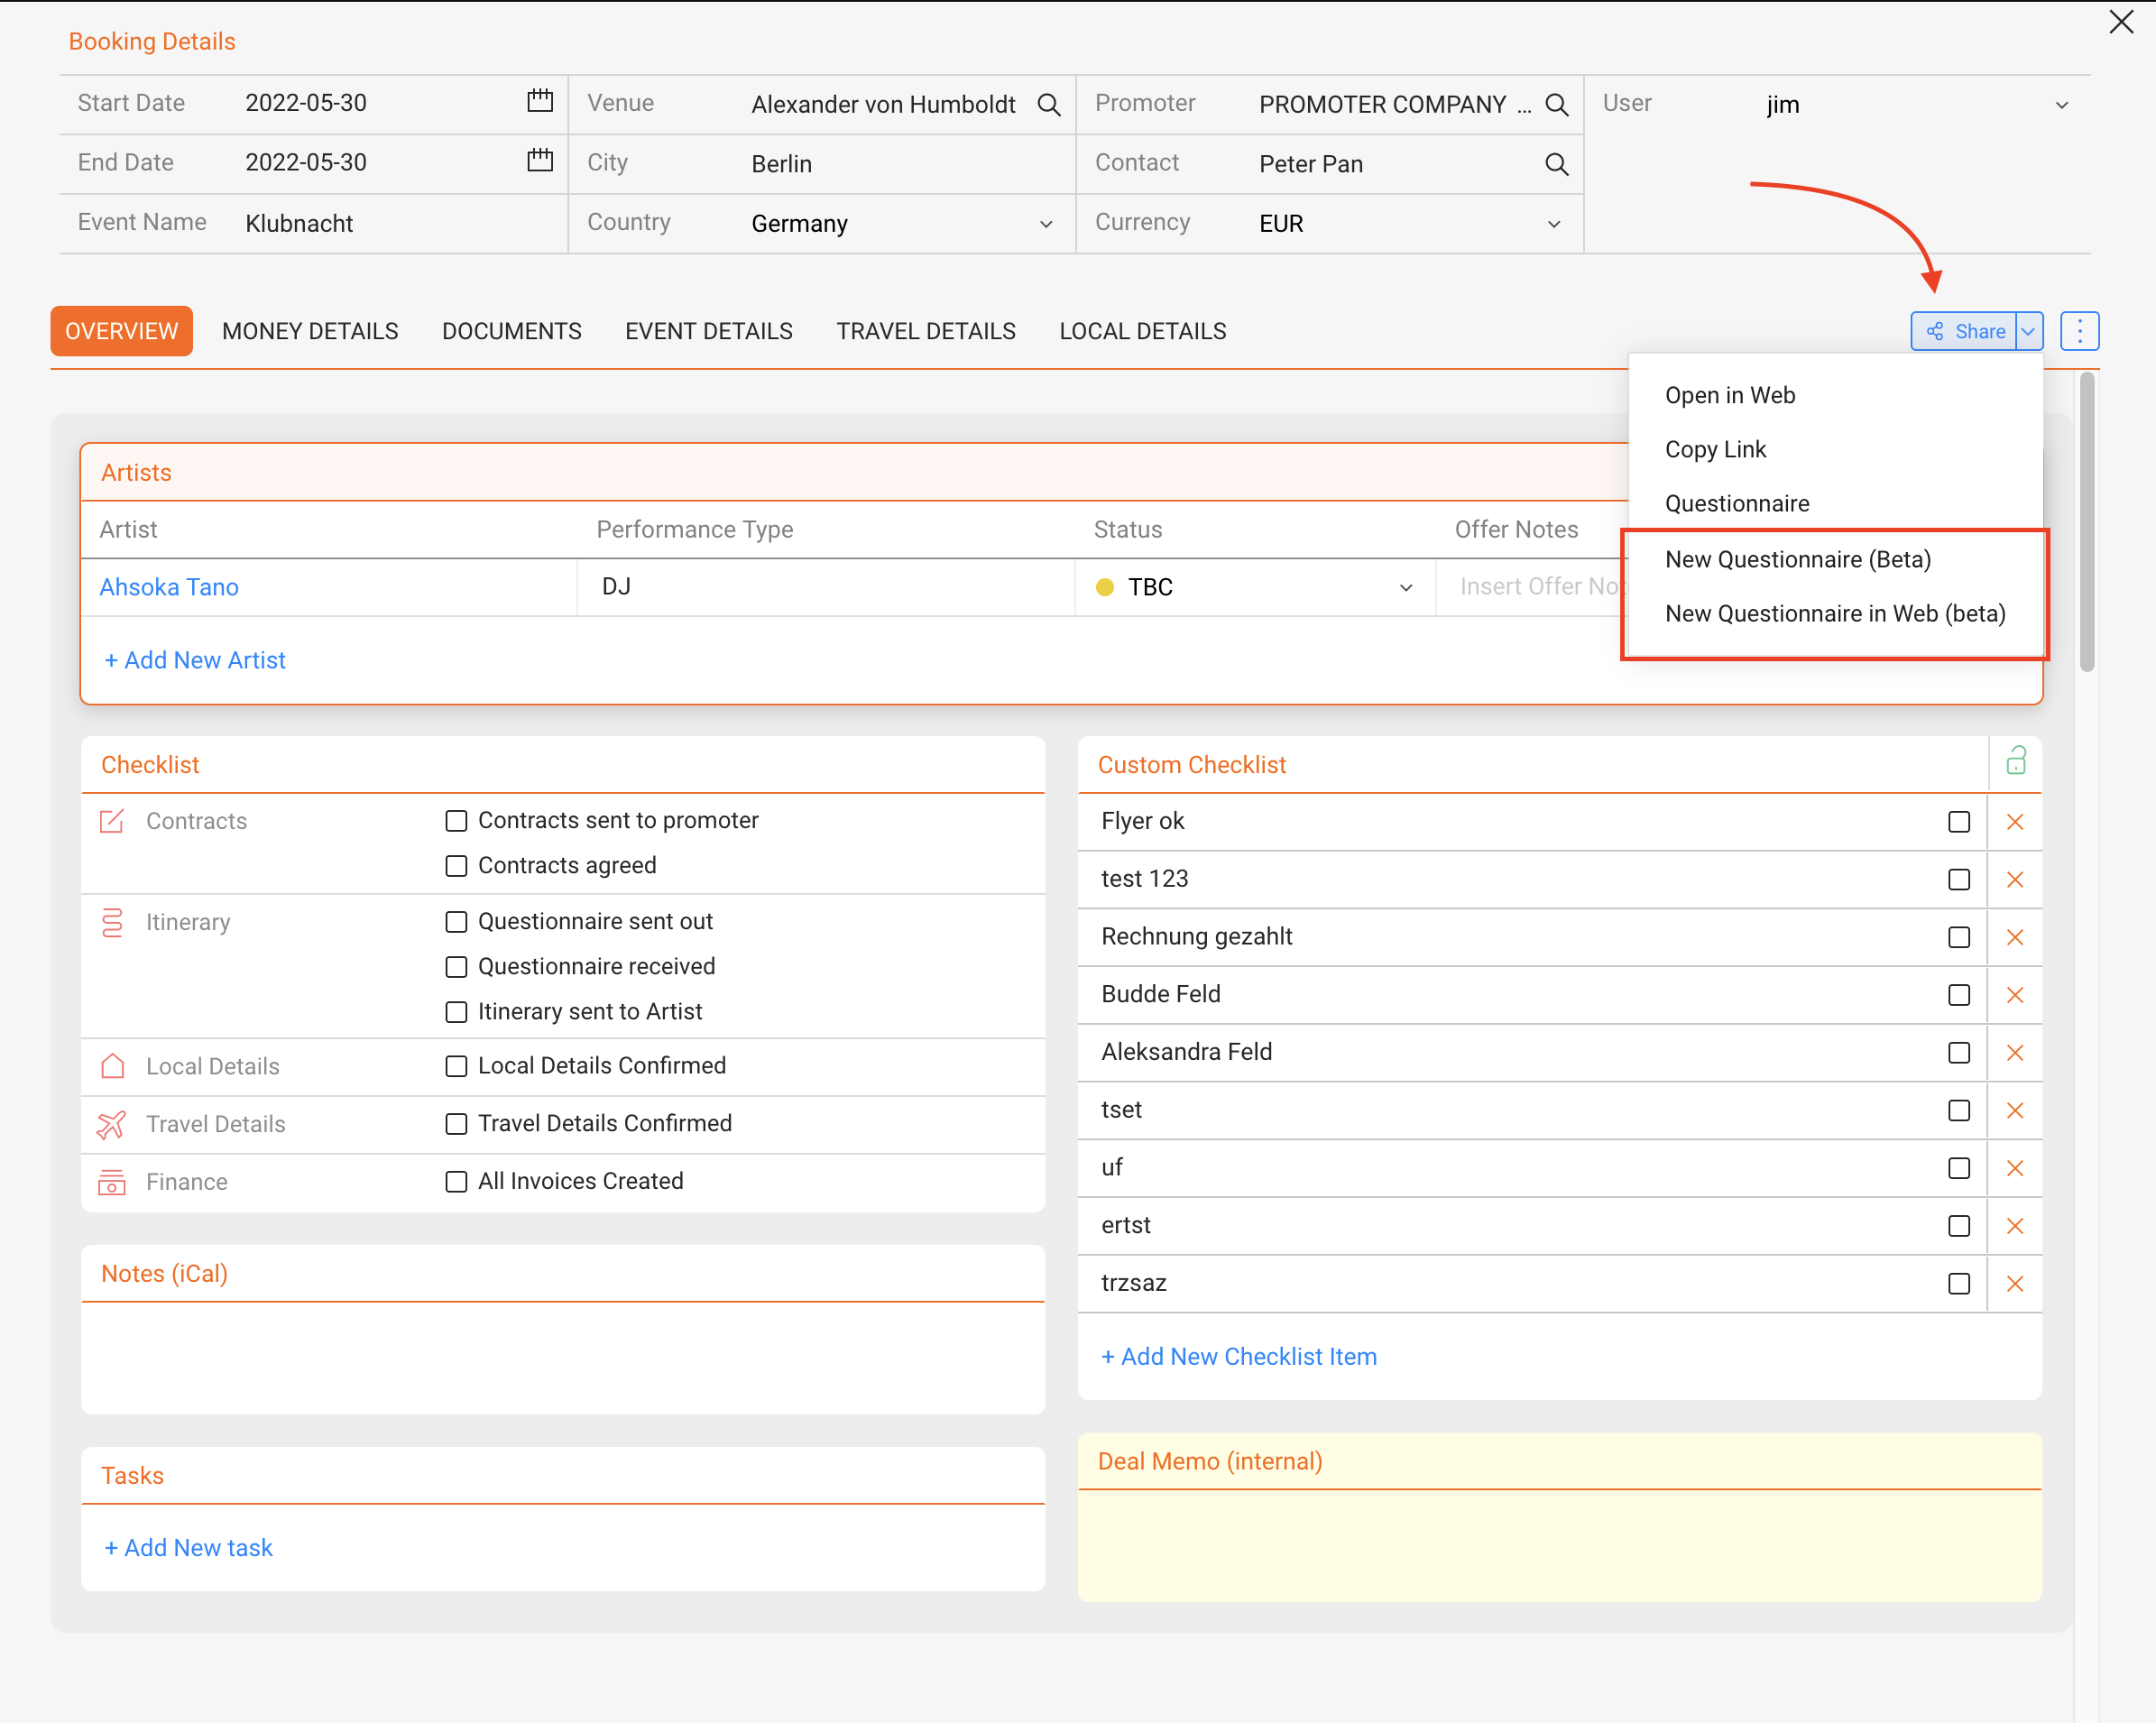
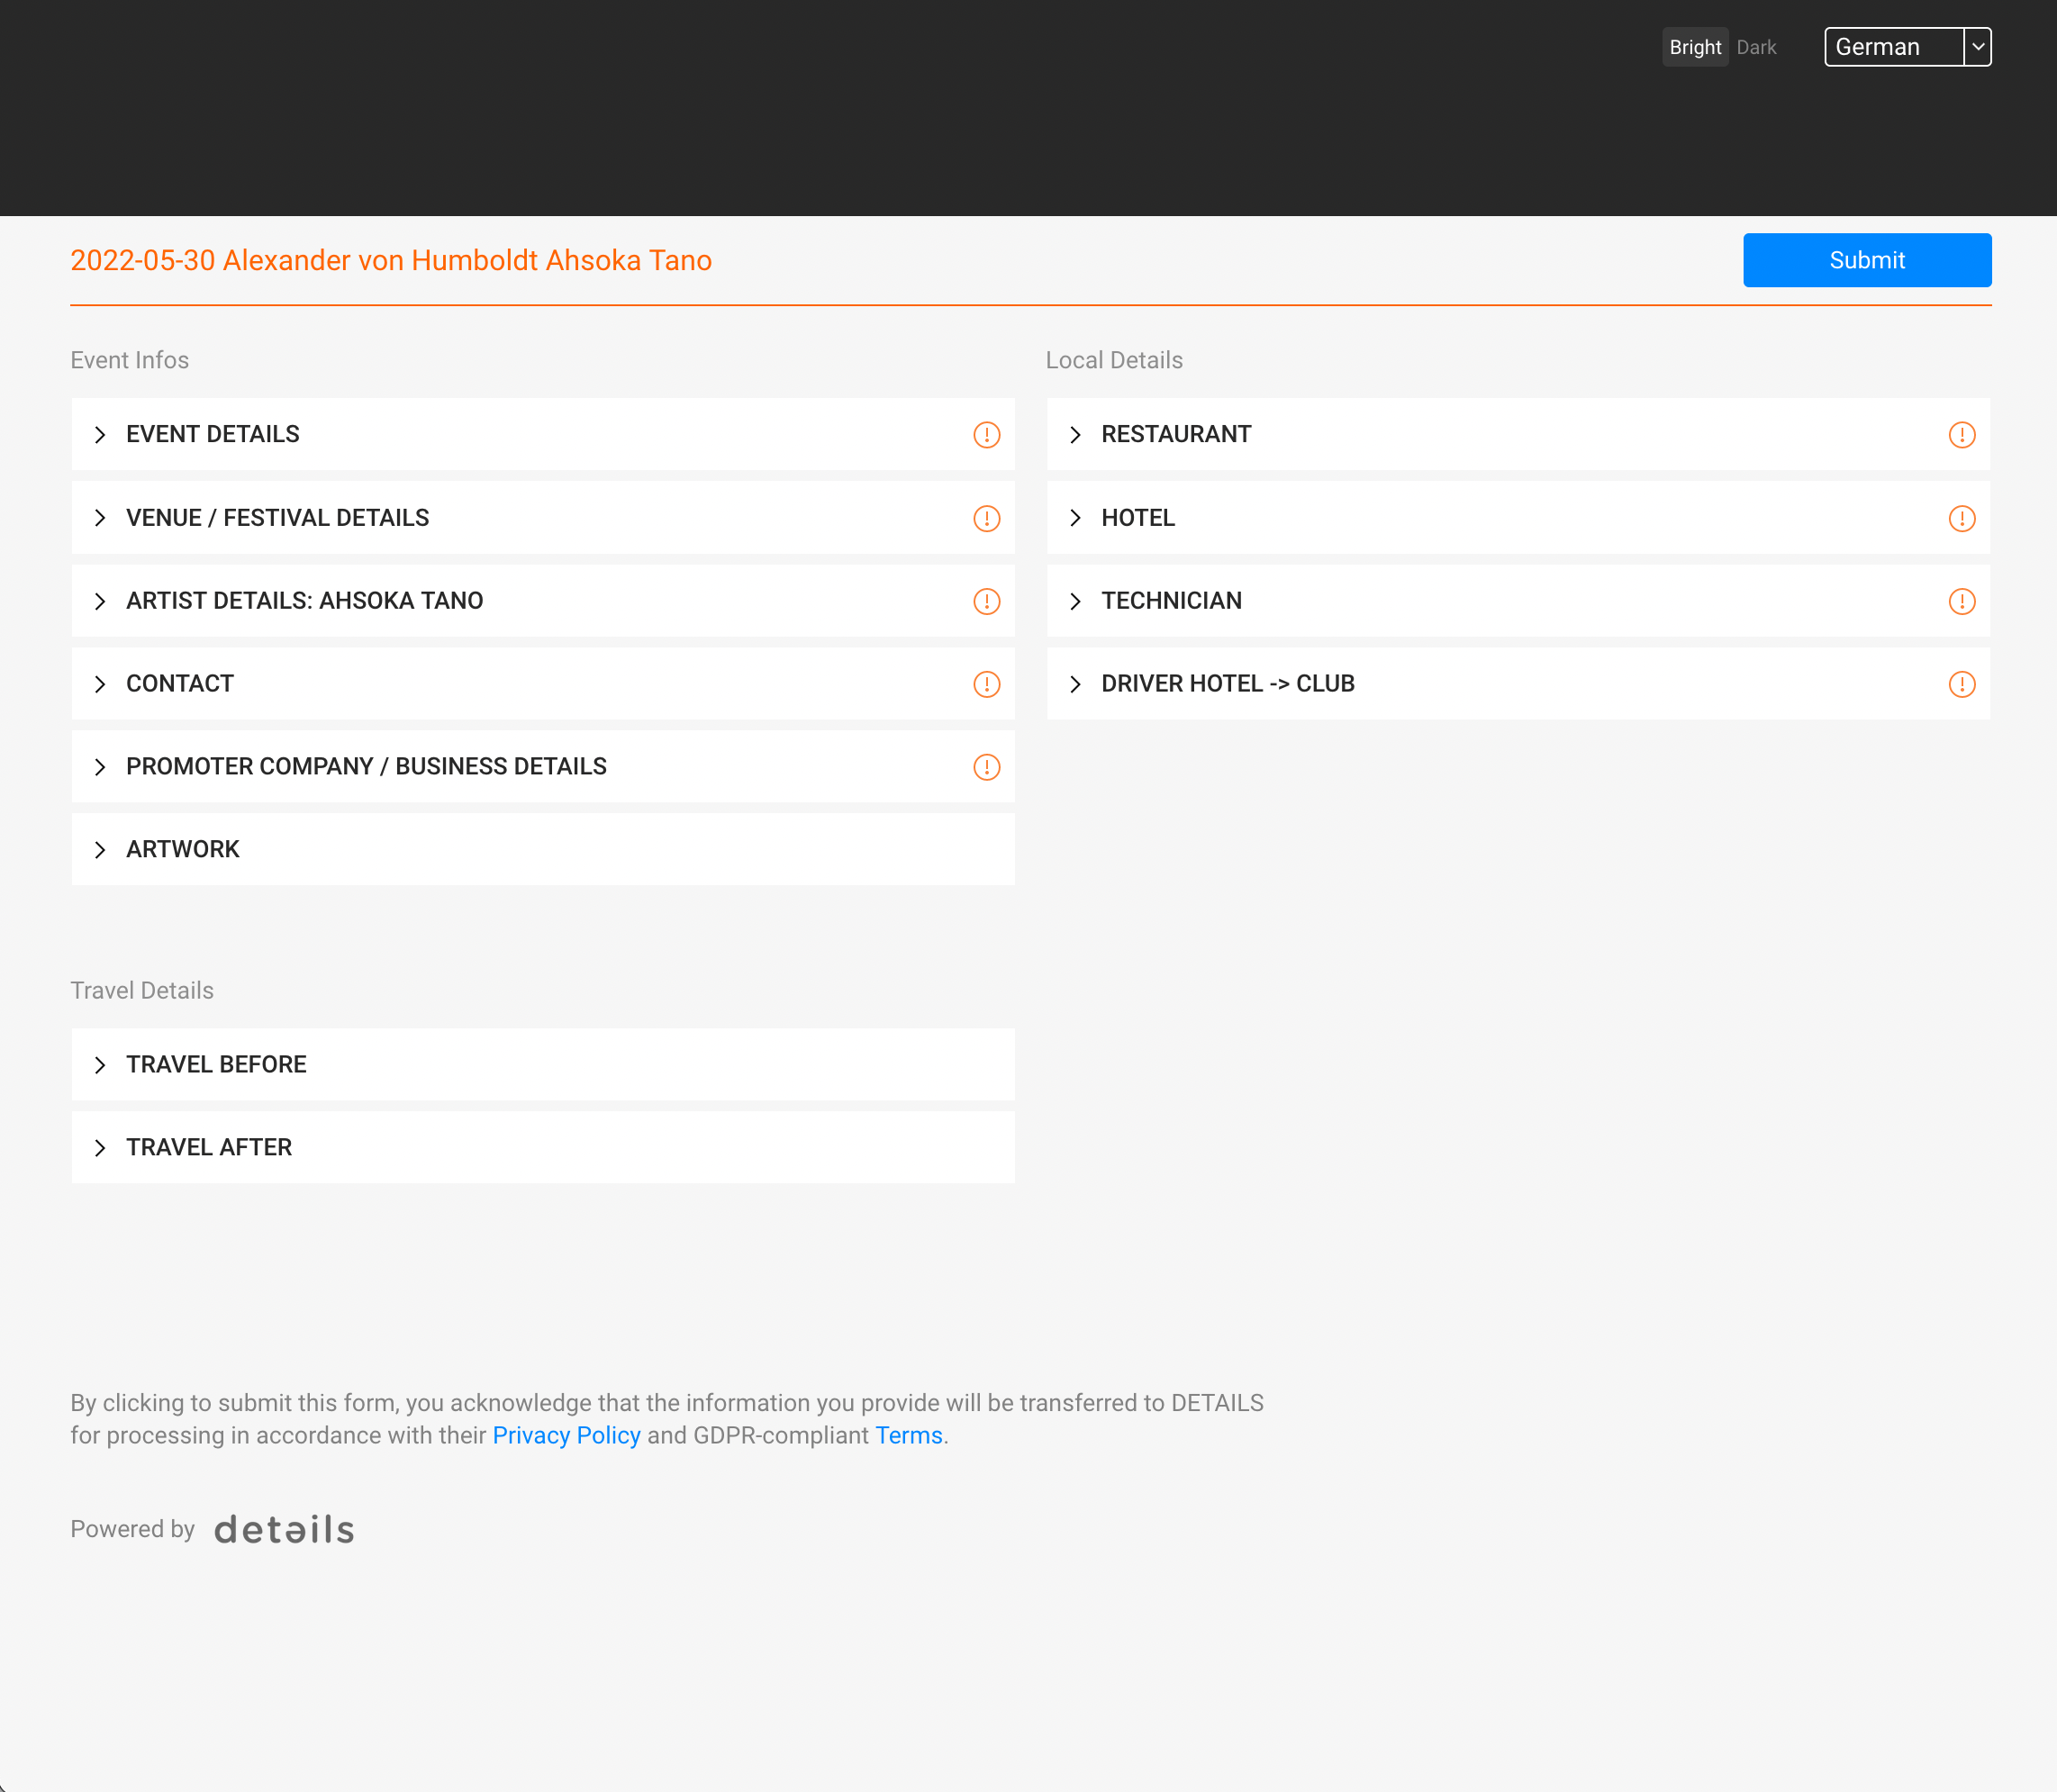
We have also fully modernized our questionnaires, which are now available in beta version.

You can find them below the previous questionnaire under SHARE -> New Questionnaire (beta).

ZENDESK_-_SHARE.png

This design was entirely updated and is of course working fine on mobile phones, too.►

NEW_QUESTIONNAIRE.png

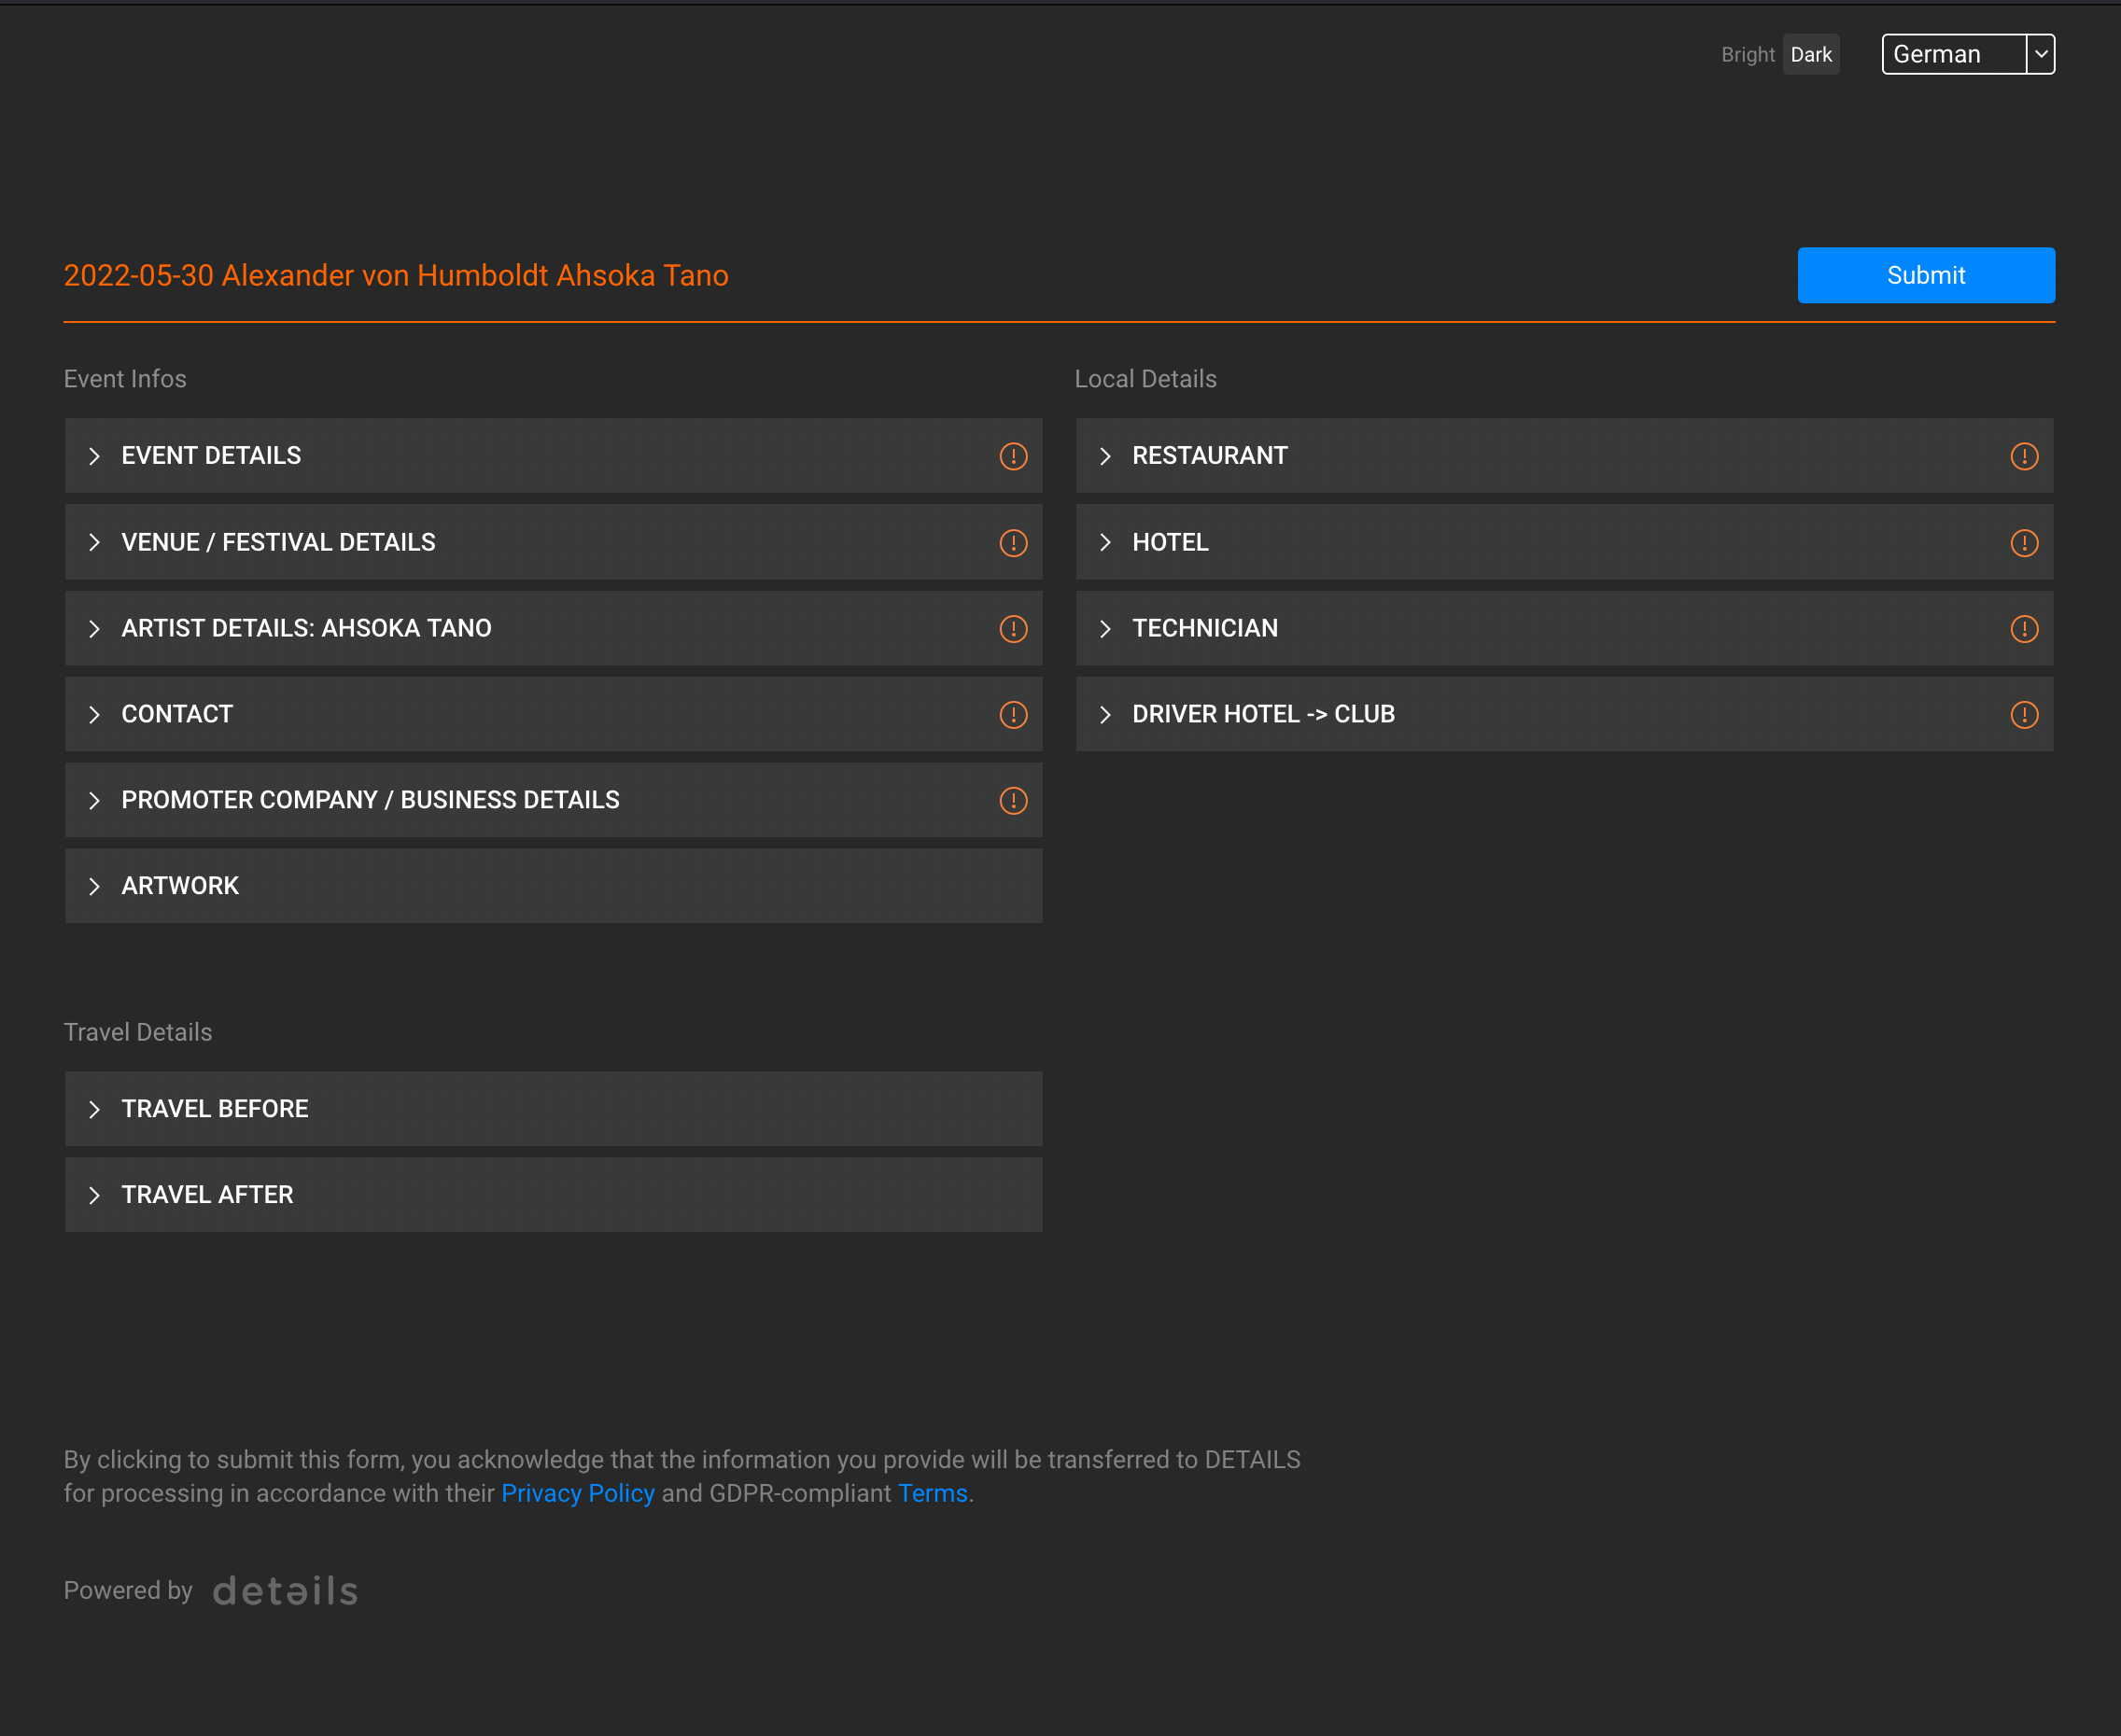
Furthermore, the new Questionnaire can also be displayed in dark mode.

ZENDESK_-_NEW_QUESTIONNAIRE_Dark.png

If you encounter any problems or bugs or have further suggestions, please contact simo@berlin3.com