How to import your catalog via IDOL Labelcamp

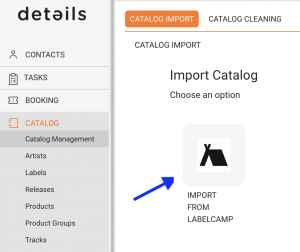
The Labelcamp Import feature is available in the Catalog Management section of details.

It allows you to connect your IDOL Labelcamp account and ingest new catalogue entries into your database all with a single click.

This import tool is designed to simplify catalogue updates and eliminate manual data entry. It supports automatic matching for products and tracks to prevent duplicates.


 How to Import Your Catalogue

Steps

  1. Go to CATALOG > MANAGEMENT.
  2. Select Labelcamp Import.
  3. Click Import Catalog to start the import process.

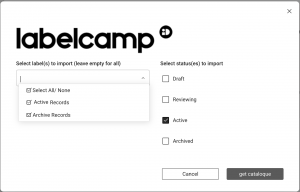
The system will connect to your Labelcamp account and load all labels connected to your account, plus the available product stati (e.g. Draft , Reviewing , Active , Archived ).

As a user, you should now select which label you want to collect products and tracks from you can select one, multiple, or all labels from your account.

You should also decide whether you want details to retrieve only Active products (recommended) or if you also need unfinished Draft, Reviewing, or Archived products.


Once your selection is complete, click Get Catalogue. The system will then retrieve all new products and tracks not already loaded into details.

Depending on your catalogue size, this may take a few minutes or longer.

Tip
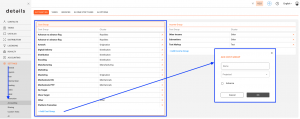
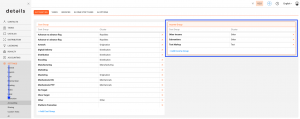
Keep your Labelcamp credentials saved in SETTINGS > LABEL > Additional Info API Configs to allow faster imports in the future.

► Import Logic

Matching Rules

  • Products are matched by UPC (barcode).
  • Tracks are matched by Artist, Title, and ISRC.
  • Only new products and tracks will be added; existing items are skipped automatically.
  • Metadata from existing products or tracks is not updated during import.

► Initial Setup Required

One-Time API Connection

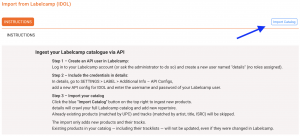
Before using the import feature, a one-time API setup is required to connect details with your Labelcamp account.

  1. Create an API user in Labelcamp:
    An administrator from your team must log in to Labelcamp and create a user named details. This user should have no assigned roles or permissions.
  2. Enter credentials in details:
    In SETTINGS > LABEL > Additional Info API Configs, create a new configuration for IDOL and enter the username and password of the Labelcamp user.
  3. Activate the plugin:
    Go to LABEL > PLUGINS > API and activate Auto-Ingest new products from idol.io. This enables the secure API connection.

► Support and Further Tools

If you need assistance during setup or encounter issues with the import process, our support team is available to help.

Explained: Costs & Other Income

Every music release or product generates both expenses and sometimes additional income streams.

Costs typically arise at different stages:

  • Production recording sessions, mixing, mastering, artwork, and manufacturing (for physical formats).
  • Marketing & Promotion press campaigns, radio plugging, social media ads, video production.
  • Distribution & Sales digital distribution fees, shipping, warehousing, and retail margins.
  • Operational legal, accounting, or administrative costs linked to releasing music.

On the other side, there may be income beyond direct sales:

  • Marketing budgets contributed by partners (e.g. distributors, DSPs, brands).
  • License flat fees for syncs, compilations, or other usage rights.
  • Subsidies or funding from cultural institutions, grants, or sponsorships.

details allows you to manage both sides:

  • Assigning and tracking costs directly to the corresponding release or product.
  • Recording and reconciling additional income streams, ensuring they are included in royalty calculations where relevant. This gives a clear financial picture of each release or product.

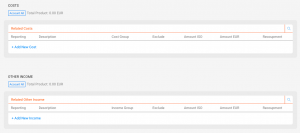
► Costs

Costs represent all outgoing amounts that reduce the income of a release, product, or track. They can be created manually, imported via Excel, or generated automatically from royalty statements.

  • Cost Groups: Defined under SETTINGS / ACCOUNTING, they structure your costs into categories (e.g. Marketing, Promotion, Manufacturing).
  • Advances: A special cost group, always 100% recoupable.
  • Recoupment: If costs need to be recouped against royalties, you can define the recoupment rules in the contract setup. More information in the ROYALTY section.

► Income & Other Income

Income normally comes from sales, streams, or licenses. In addition, Other Income can be managed to represent subsidies, sponsorships, or any type of additional funding.

  • Income Groups: Defined under SETTINGS / ACCOUNTING, they structure additional income sources and can be assigned to releases and products.
  • Contract Logic: As with costs, income can be added globally or assigned to specific groups, depending on the contract.

► Interaction in Catalog

The catalog structure defines where costs and income are placed and how they interact:

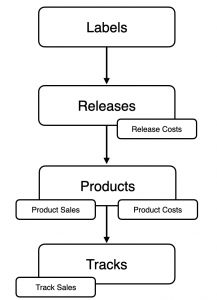
  • Releases act as the central hub all financial flows are anchored here.
  • Products (physical and digital) create costs and income that belong to them.

► Proofs

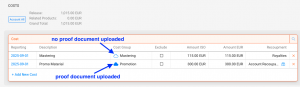
For both Costs and Other Income, you may upload proofs on the Release and Product level. These documents ensure transparency and provide traceability for internal use or for sharing with royalty partners or artist managements.

  • Invoices and Documents: Attach supporting files directly to financial entries.
  • Transparency: Enables partners to review the original documents behind costs or income.

Key points:
” In details, you can track all release- or product-related costs and record additional income streams (like marketing budgets, flat fees, or funding) for a complete financial overview.
“Costs and Other Income are structured by Groups in SETTINGS / ACCOUNTING.
” Proofs can be attached to Releases and Products for both Costs and Other Income.

How to ingest Your Catalog with API (Json Import)

This API allows external partners to send catalog metadata to the details platform, including full release, product, and track-level information. This is useful for onboarding your catalog or sending new metadata directly into the system.


What You Can Do with This API

With a single POST request, you can submit structured catalog data including:

“Labels

“Releases (title, artist, release code, release date, genres, etc.)

“Products (barcode, format, territory rights, etc.)

“Tracks (artist, title, ISRC, language, rights, metadata, credits, etc.)

Each request can contain one or more labels and their associated releases, products, and tracks.


Endpoint Details

URL: https://openapi.berlin3.com:10000/label/json-import

Method: POST

Content-Type: application/json


Authentication

You need to include a valid api_key and clientID in the request body.


Example JSON Structure

{
  "clientID": "yourClientID",
  "api_key": "yourAPIkey",
  "email": "you@example.com",
  "labels": [
    {
      "label": "MyLabel",
      "releases": [
        {
          "release_artist": "Various Artists",
          "release_title": "Album Title",
          "release_code": "ABC123",
          "release_date": "2023-05-20",
          "release_type": "Album",
          "release_status": "Current",
          "release_genre_main_1": "Electronic",
          "release_genre_sub_1": "Techno",
          "products": [
            {
              "catalog_no": "ABC123",
              "barcode": "1234567890123",
              "format": "Vinyl",
              "product_version": "Limited Edition",
              "download_yes_no": "Yes",
              "streaming_yes_no": "Yes",
              "excluded_countries": "",
              "identfier": "ABC123-LTD",
              "metadata": [
                {
                  "metadata_set": "set1",
                  "metadata_name": "territory",
                  "data": "Europe"
                }
              ],
              "tracks": [
                {
                  "media": 1,
                  "track_no": 1,
                  "track_artist": "DJ Test",
                  "track_title": "Banger One",
                  "version": "Original Mix",
                  "isrc": "DE-XYZ-25-00001",
                  "track_language": "English",
                  "p_year": "2025",
                  "p_text": "MyLabel",
                  "explicit_rights": "No",
                  "digital_rights": "Full",
                  "track_genre_main_1": "Electronic",
                  "track_genre_sub_1": "Techno",
                  "track_credits": [
                    {
                      "type": "writer",
                      "name": "DJ Test",
                      "publisher": "Test Publishing",
                      "share": "100"
                    }
                  ],
                  "metadata": [
                    {
                      "metadata_set": "set2",
                      "metadata_name": "BPM",
                      "data": "128"
                    }
                  ]
                }
              ]
            }
          ]
        }
      ]
    }
  ]
}


Response Codes

200 OK Catalog data successfully ingested.

400 Bad Request Invalid request format.

401 Unauthorized API key or client ID incorrect.

404 Not Found Endpoint does not exist.

500 Internal Server Error Server-side error.

501 Not Implemented Feature not available.


Notes

“You can submit multiple labels and releases per request.

“Fields like track_credits, metadata, and publisher are optional but recommended for royalty tracking.

“The more complete your metadata, the better the system can match and report on your catalog.


Need Help?

If you re unsure how to prepare your data or need help with testing, please contact our support team:

label_team@details.eu

Explained: Order types and their stock movements

Order types define how details treats stock movements and whether invoices are generated automatically. Each order type represents a different kind of transaction between your Distribution Accounts and Stock Accounts.

You can choose the order type when creating a new order under DISTRIBUTION / ORDERS or when working directly from a Distribution Account.

► Overview of Order Types

The following table shows how each order type affects stock and invoicing. This helps you decide which type to use for a specific scenario.

Order Type Description Stock (Account) Stock (Stock Account) Invoice
Invoice Order Used for regular sales to clients or retailers. Creates an invoice automatically once accounted. Neutral Decreased Yes
Consignment Used when delivering goods on consignment. Stock is moved to the account but no invoice is created until items are sold or returned. Increased Decreased No
Return Credit Note Used for returns from customers. Increases stock in the warehouse and creates a credit note invoice for accounting. Neutral Increased Yes
Promo Order Used for promotional shipments such as giveaways or review copies. No invoice is created. Neutral Decreased No
Defects Used for damaged or defective products being removed from stock. Not invoiced and not credited. Neutral Decreased No
Price Adjustment Used to correct pricing on already delivered goods without physical stock changes. Neutral Neutral Yes

► Choosing the Correct Order Type

Selecting the correct order type ensures accurate stock tracking and accounting results. Use the following guidelines:

  • Invoice Order ► For standard customer orders that require invoicing.
  • Consignment ► For partner accounts that handle sales reports later (e.g. shops or distributors).
  • Return Credit Note ► For returned goods from customers or partners.
  • Promo Order ► For marketing or free sample shipments.
  • Defects ► For defective products to be removed from stock.
  • Price Adjustment ► For correcting previously invoiced prices without new shipments.

If you are unsure which order type to select, review your contract setup or ask your accounting team which type applies to your process.

► Account and Stock Account Behavior

Each order type affects the two sides of an order differently:

  • Account: Represents the client or customer receiving (or returning) goods. Some order types, such as Consignment, increase the account s stock level.
  • Stock Account: Represents your warehouse or physical stock source. It decreases when shipping products and increases when receiving returns.

This logic ensures that your warehouse and account stocks remain consistent and transparent at all times.

► Translations

For teams working in multiple languages, here s an overview of common translations for order types:

English German French
Invoice Order Rechnungsauftrag Commande facture
Consignment Kommissionsauftrag Commande en consignation
Return Credit Note Gutschrift Note de crdit
Promo Order Promoauftrag Commande promotionnelle
Defects Defekte Dfectueux
Price Adjustment Preisnderung Ajustement de prix

Understanding these order types helps you manage stock movements precisely and ensures that your distribution accounting remains consistent across all transactions.

Basic Actions: Contact Groups

This article explains the basic actions you can perform when working with contact groups in details. It covers how to edit, delete, export your group data and create group mailing.

► Create A Group

To categorize your contacts, go to CONTACTS / GROUPS.

Examples of useful groups include:

  • Artists
  • DJs
  • Promoters
  • Labels
  • Venues
  • Record or digital shops

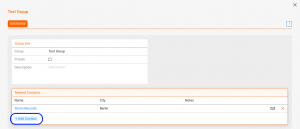
Use the [+] button at the top right to create a new group. You ll be redirected to the group detail page where you can add contacts via [+] and select them from the database.

► Editing a Group

Go to CONTACTS / GROUPS and select the group you want to edit.

On the group detail page, you can:

  • Change the group name
  • Add contacts via [+] and search.
    You can also add them in bulk by using the checkboxes.
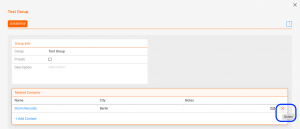
  • Remove contacts using [x]

► Deleting a Group

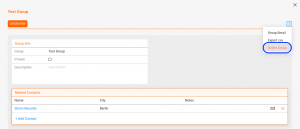
On the group page, click [DELETE GROUP] to remove it. This does not delete any contacts, only the group itself.

► Export as CSV File

You can select multiple contacts in the list view to export as CSV File.

On the group page, click [EXPORT CSV] to download the file.

► Generate copyable email list

You can display the selected contacts as plain text to copy their email addresses for group messages.

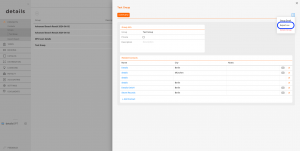
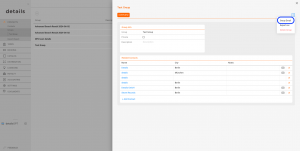
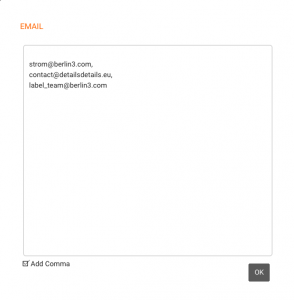
Therefore, click [GROUP MAIL] on the group page.

A window will open displaying the available email addresses for the group, which can be easily copied. It is also possible to separate the addresses with commas if necessary.

Explained: Formats & Format Groups


This article explains how Formats and Format Groups work in details, how they impact royalty calculation, and how to configure them safely. It is written for admins who maintain the product catalog and royalty settings.

Note: Choose Digital or Physical for a product and stick to it. Format attributes (VAT, weight, reserves, etc.) drive logistics and royalty logic. Use Format Groups to apply the same royalty rule to several formats (e.g., all vinyl formats).

► Where to manage Formats

Go to CATALOG / PRODUCTS to assign a format to a product. To define or edit formats themselves, open LABEL / SETTINGS and manage your label s format list.

Formats are customizable per label. You can keep them minimal or very granular (e.g., separate entries for different vinyl sizes, CDs, merchandise, tickets).

► Digital vs. Physical a binding decision

When you create a product, you must decide whether it is Digital or Physical. After a product has transactions, do not switch its channel between Digital and Physical.

Why this matters: Digital vs. Physical sales are calculated under different royalty regimes (e.g., splits vs. percentage of PPD). Switching would retroactively change which rules apply and can corrupt statements.

You may still change within Physical formats (e.g., from one vinyl size to another) as long as this does not conflict with existing accounting or logistics constraints.

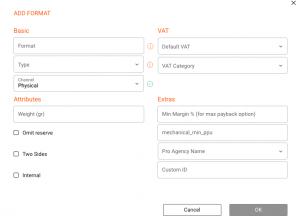
► Format fields & what they do

Core

  • Channel: Digital or Physical. This determines which royalty ruleset can apply. Treat this as immutable once in use.
  • Type: Mark whether the release is a Single, EP, Album, etc. Used for classification and reporting.

Tax (VAT)

  • VAT1: full VAT rate.
  • VAT2: reduced VAT rate.
  • NoVAT: no VAT (rare; for VAT-exempt products). Set this carefully and only if you are sure.

Cross border sales: VAT settings influence how invoices are calculated for shops in different countries. Configure defaults that match your typical tax treatment.

Weight

Define a default weight per format to support shipping cost estimates. Product level weight can override the format s default when needed.

Reserves

  • Omit Reserve: If enabled, this format will not create physical return reserves.

Background: In traditional physical distribution, labels often held back part of the payout (e.g., 20 25%) to cover expected returns after the release date. Use Omit Reserve for formats where returns are unlikely (e.g., limited runs, tickets).

Other attributes

  • Two Sides: Describes two sided media (commonly vinyl); relevant for some collection societies.
  • Internal: Marks a format intended for internal or non retail use (e.g., exclusive direct sales). Use only if your workflow requires it.

Extras (advanced)

  • Minimum Margin: Ensures a minimum distribution fee if exchange rates would otherwise erode your margin under fixed paybacks.
  • Mechanical Min PPU: Sets a minimum per unit mechanical for certain territories (e.g., U.S. mechanicals per Harry Fox rules). Configure only if you actually need this.
  • PRO Agency Mapping: Map the format to the receiving codes for your performing rights delivery (e.g., CD, LP, MP3). Only relevant if you deliver via a PRO agency.
  • Custom ID: Legacy/experimental. Do not rely on it for business logic.

► Deleting formats

  • You delete a format only if it is not used by any product. Once a product uses a format, deletion is blocked to protect accounting history.
  • To retire a format that is in use, first move affected products to another valid format (keeping the same channel), then delete the obsolete format.

► Format Groups

Use Format Groups to bundle multiple formats that should share the same royalty rule. Example: a VINYL group that includes all vinyl formats (7 inch, 12 inch, LP, Double LP).

Tip: Keep the group names short and predictable. This makes it easy to target them in royalty rules and reports.

Where groups are used

In LABEL / ROYALTY / SELECTED CONTRACT / ROYALTY RATES you can select a Format Group for Physical rate rules (Digital rules typically do not use format groups). This is where you apply common logic such as a discount on PPD or a reserve policy to all formats in the group.

► Best practices

  • Decide early: Set the channel (Digital/Physical) when creating the product and avoid a more complex changing process later.
  • Model reality: Create only as many formats as you need for pricing, logistics, and reporting. Too many formats create noise.
  • Use groups for rules: Build royalty logic on top of Format Groups rather than single formats to reduce maintenance.
  • Define defaults: VAT and weight defaults on the format save time and reduce errors; override per product only when necessary.
  • Handle advanced fields sparingly: Minimum Margin, Mechanical Min PPU, and PRO Agency mapping are niche configure only if required by your contracts and workflows.

Explained: !!! in Track List


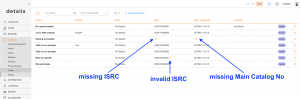
Tracks marked with !!! in CATALOG / TRACKS have errors that prevent correct reporting. This indicator ensures that incomplete or invalid tracks are corrected before billing.

Typical Causes

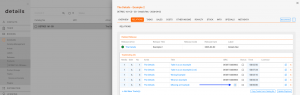
  • Missing Main Catalog Number: Every track needs a valid catalog number linked to a product. The missing connection to a product typically leads to a missing ISRC as well.
  • Missing or invalid ISRC: Without a valid ISRC, sales cannot be matched and reported correctly.
  • Invalid ISRC: An incomplete or repeatedly used ISRC can cause reporting and royalty issues.


How to Resolve

► Missing Main Catalog No

  1. Open the track in TRACKS / OVERVIEW.
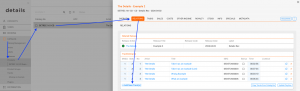
  2. Check if the Main Product is assigned in the RELATIONS tab.
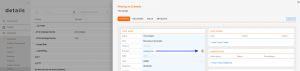
  3. If there is a relation, add in OVERVIEW / Track Setup / Product the Catalog Number by searching for the related product.
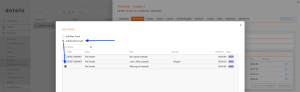
  4. If there is no relation, go to the CATALOG / PRODUCTS, search the product where the track should be on and add the track in RELATIONS / Tracklisting of the product.►
    Use the [Add Existing Track] Option.


  5. When added in the product tracklist, you can create the ISRC there as well.

► Invalid ISRC

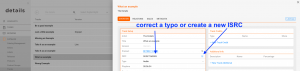
  1. Open the track in TRACKS / OVERVIEW.
  2. Verify that the track has a correct ISRC according to the standard ISRC Format.
  3. Correct the format if you are sure it was a typing error.
    Generate a new one for every other case (see Creating ISRC automatically).

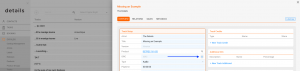
► Missing ISRC

  1. Open the track in TRACKS / RELATIONS.
  2. Make sure the track is connected to a Product
  3. Generate a new ISRC in OVERVIEW / Track Setup (see Creating ISRC automatically).

Once the missing or invalid data is corrected, the !!! indicator disappears automatically from the track list. You might have to refresh the page.

Practice: Always resolve !!! errors immediately. Tracks with unresolved errors cannot be included in royalty statements.

Related

Sales Imports – Distributor & Partner Workflows

This article explains how to import sales statements from external distributors and DSP partners into details. All partners follow the same logic: you need an Import Setup, then you work with tiles in DISTRIBUTION / IMPORTS.

Good to know

  • Always confirm the correct account, currency, and channel in the Import Setup before uploading.
  • After upload, details processes the file. Resolve any items under Import Matches, then verify totals in Import Result.
  • Some partners support automated ingestion (DSS). If a file is missing/outdated, re-trigger via Import Setup ► Perform ► Run Auto Import.
  • If your file format is not directly supported, contact label_team@details.eu a converter/toolkit may be available.

► Amazon

Amazon Imports

Amazon statements are fetched via sFTP at digital-music-ftp.amazonmp3.com (Port 22). Use an sFTP client such as FileZilla or Cyberduck, log in with your Amazon credentials, and download the monthly statement files.

  • Folder structure: organized by territory (ISO2) ► choose the monthly folder. Within each service folder, you ll find the respective sales files.
  • Services/tiers: separate files for tiers such as Prime and Unlimited. Summary files may contain per-item sales but often lack country information rename them with the country for clarity.
  • Currencies: each file includes one reporting currency (EUR, USD, GBP, or JPY). Set up one importer per currency for clean separation.
  • Zip archives: most files arrive as .zip; unzip before import.

Upload the corresponding files via DISTRIBUTION / IMPORTS. Consider creating separate importers by tier ► currency for more structured reporting.

Automated ingestion: Amazon supports DSS auto-ingestion. If a period appears incomplete or incorrect, open the related Distribution Account ► Import Setup, click Perform, select the Year/Period, then choose Run Auto Import.

Tip: If you receive multiple partial files for one reporting period (e.g., different Amazon services), import them sequentially within the same monthly tile to ensure correct aggregation.

Amazon importer overview

► Bandcamp

There are three ways to bring Bandcamp data into details.

1) Conversion Toolkit or Support

  • Use our external Conversion Toolkit to convert the RAW DATA REPORT into a pre-configured XLSX that you can import directly in DISTRIBUTION / IMPORTS.
  • If you want to run the toolkit yourself, we will provide a FileMaker-based runtime installer. Contact label_team@details.eu to receive it.
  • Prefer not to install software? Our team can perform the conversion for you at the regular support rate. Simply send the RAW DATA REPORT (or provide temporary access). We will return monthly digital/physical XLSX files ready for import.
Bandcamp Toolkit

Bandcamp Raw Data location

Raw Data Reports can be found in your Bandcamp account under Sales ► Reports.

2) Merch Orders API (optional)

If you want to ingest Bandcamp merchandise orders as individual DISTRIBUTION / ORDERS for picking/packing and fulfillment, we can enable an integration with the Merch Orders API.

  • All product orders are downloaded into DISTRIBUTION / ORDERS.
  • Each order can be processed end-to-end (receipt ► fulfillment) inside details.
  • For setup details, see the related Bandcamp Order Ingestion Plugin article.

Planned: DSS Auto-Import

For clients operating multiple labels via a Bandcamp Fulfillment Account, we plan an automatic ingestion using Bandcamp s Sales Report API.

Questions? Contact the Label Team: label_team@details.eu.

► FNAC

FNAC Imports

  1. Log in to your details account and go to DISTRIBUTION / IMPORTS.
    FNAC imports overview
  2. Select the relevant sales month and click the corresponding FNAC tile. Tiles are organized by week for FNAC sales.
    FNAC weekly tile setup
  3. Upload the FNAC weekly file. details automatically splits the file into daily imports and separates sales and returns.
  4. After processing, verify that all lines are correctly linked and the message Matching Complete appears. If not, manually link missing sales to products or add new products in details.
  5. Click the orange tile to review the import, then click [CONFIRM IMPORT] to finalize it.
  6. You ll be redirected to the FNAC Account Overview, showing all invoices ready for confirmation.
  7. Select all ready invoices and click [ACCOUNT ON MULTIPLE INVOICES].
  8. details automatically generates one invoice per day, using the FNAC sale date as the invoice date and including the FNAC reference in the subject line.

► IDOL (Labelcamp)

The IDOL Labelcamp integration enables a fully automated sales ingestion directly into details. Once set up, new monthly statements are fetched automatically. You can also manually re-trigger a transfer if needed.

► Automated Setup
  1. Log in to LabelcampAccounting ► Royalties.
    Login to your Labelcamp account
  2. In the main menu, go to Accounting ► Royalties.
    Navigate to Royalties
  3. Click [CREATE AUTOMATION] (or [NEW AUTOMATION] if others exist).
    Create new automation
  4. In the modal window, fill in the following details:
    • Contract: select your Labelcamp contract.
    • Service: choose details.
    • Details Client ID: the part of your app URL after https://app.details.eu/ (e.g., https://app.details.eu/MyLabel/MyLabel).
    • Shared Key: copy this from your detailsDistribution Account ► Import Setup.
    Labelcamp automation modal
  5. Click [SAVE]. Labelcamp will automatically push your monthly statements into your details Imports grid.

Multiple contracts? Create one automation per contract. Each will use its own Import Setup and Shared Key in details.

► Manual Re-Trigger (if automatic transfer fails)
  1. In details: go to DISTRIBUTION / IMPORTS and remove the interrupted import by clicking the ( ) icon on the tile. This clears the failed run so a fresh transfer can start.
  2. In Labelcamp: navigate to Accounting ► Royalties.
  3. Click [NEW EXPORT] (top-right).
    Labelcamp   New Export
  4. Configure the export:
    • Contract: choose the relevant contract
    • Service: details
    • Period: pick the period you want to re-transfer
    Labelcamp   Export configuration
  5. Click [CREATE] to trigger the transfer. In Labelcamp you ll see the status move to Waiting.
  6. Back in details: monitor the IDOL tile in DISTRIBUTION / IMPORTS. The status should move from Processing to Matching Complete when finished.
    details   processing to Matching Complete

If the automatic transfer repeatedly fails, contact the Label Team at label_team@details.eu.

► MERLIN

Set up automated sales ingestion from the MERLIN Network FTP into details. Once configured, new monthly files are pulled automatically and appear as tiles in DISTRIBUTION / IMPORTS.

Step 1 Open API Configuration

  1. Log in to your details account.
  2. Go to SETTINGS / SHARING (section: API CONFIGURATIONS) or open:
    https://app.details.eu/<yourClientID>/v2/#/main/settings/sharing
  3. Scroll to API CONFIGURATIONS.

Step 2 Add the MERLIN FTP Connection

Click [ADD API CONFIGURATION] and fill in the fields:

Field Example / Instruction
Notes merlin
Host ftp.merlinnetwork.org
Protocol FTP
Port leave empty
User your MERLIN FTP username
Password your MERLIN FTP password
Start Date optional month to start ingestion from

Then click [ADD].

Important: Credentials are client-specific and provided by MERLIN. details cannot supply or reset them for you.

Step 3 Create Distribution Account(s) for MERLIN Imports

After adding the API Configuration, create one or multiple DISTRIBUTION / ACCOUNTS to receive MERLIN sales.

  • Recommended: one account (e.g., MERLIN Network) to centralize all MERLIN-delivered DSPs. This lets you search for MERLIN and see all related DSPs in one view.
  • Alternative: separate accounts per DSP (e.g., MERLIN Spotify, MERLIN Deezer) if preferred for reporting.
  1. Ask the details Label Team to enable the relevant MERLIN DSS (Digital Statement Sources) for your client.
  2. Once permissions are set, activate the automated importer(s) under DISTRIBUTION / IMPORTS on the target account tiles.

Important: Using one shared account keeps MERLIN sales centralized; separate accounts help with DSP-specific reporting preferences.

Step 4 Scheduling and Updates

When active, the Auto Ingest Cron Job checks the MERLIN FTP regularly and imports new or changed files.

Typical MERLIN path structure: /sales/YYYYMM/<source>
Example: /sales/2025M07/spotify/&

Additional Notes

  • MERLIN may replace files under the same filename; details detects changes by comparing creation date and file size.
  • No manual uploads are required once automation is enabled.

Troubleshooting

  • If [ADD API CONFIGURATION] is disabled, ensure you have admin rights.
  • If MERLIN DSS options are not visible in DISTRIBUTION / IMPORTS, ask support to enable DSS ID 43 (MERLIN) for your client.

► PIAS (Physical)

Use the PIAS Toolkit to convert the file and deduct the PIAS return handling fee.

  1. Open the toolkit and upload the original PIAS file.
  2. Select sheet PHY and use the preset import (no manual mapping needed).
  3. Enter the return handling fee from the PIAS summary, choose a filename, export to desktop.
  4. Upload the exported file via DISTRIBUTION / IMPORTS.

Help: label_team@details.eu.

PIAS return handling fee field

► Republic of Music (ROM)

Republic of Music (ROM) statements may include both digital and physical sales. Each file can contain several tabs such as Sales, Summary, and Line Charges. To ensure correct imports, these tabs must be separated before uploading.

Step 1 Open the Original Statement File

Open the ROM statement file as provided by the distributor.

ROM original statement example

Step 2 Separate Tabs for Physical and Digital Sales

ROM statement files usually contain one tab per sales type. To prepare these files for import:

  1. Right-click the tab (e.g., Digital or Physical) ► select Move/Copy ► New Spreadsheet.
  2. Do not cut or delete data from the original file always copy to a new one.

Step 3 Save as XLSX

Save each new file with a clear name (e.g., ROM_Physical_2025-07.xlsx) in XLSX format.

Step 4 Prepare the File

  • Remove any auto-filters.
  • Select all cells (CMD+A) ► open Format ► Standard to ensure numbers are converted correctly.
  • Delete the last line (summary total) or remove it later inside details.
  • Save the cleaned file.

Step 5 Upload the File

Upload your new XLSX files to the correct month in DISTRIBUTION / IMPORTS.

Step 6 Check and Map Headers

Verify that headers match correctly in the import configuration.

Mandatory Fields: Artist, Title, Identifier (Cat#), Identifier2 (UPC), Net Units, Net Income, Net Payable, Country, Format, Shop.

Step 7 Proceed Import

Continue the import process and check the import preview in DISTRIBUTION / IMPORTS.

Step 8 Run Matching

Once the file is processed, use [RUN ID MATCHING] to match items. Check that all lines show Matching Complete.

Step 9 Verify Totals and Account

Compare the total in details against the original ROM statement (either Summary tab or bottom line in Sales tab). If values match, you can account the statement.

<summary style=”font-size: 1.5em; font-weight: