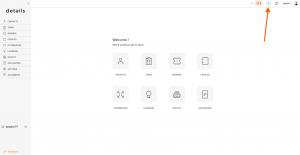
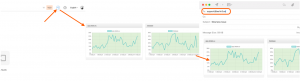
If details seems slow to you, there can be a number of reasons. To give you more insight, we’ve created a dedicated Speed Test page.
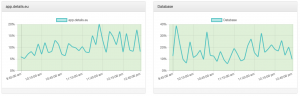
There, you can check the current status of our two main systems:
DATABASE This is where all your data is stored.
PRODUCTION This is where the programming happens that powers the details service.
If the charts show that both systems are running below 80%, everything is working as expected on our side.
In that case, the issue might be local. It’s also worth checking your internet connection. If the lower bars on the Speed Test page show instability, this might be the cause of the slowness.
Other common reasons why websites feel slow:
Too many open tabs or programs running in the background
In details, dates are shown in the format yyyy-mm-dd, for example: 2016-11-08. This format is used across the platform to keep dates consistent and easy to read.
In your Booking Templates, for example in contracts, itineraries, or tourbooks, you can customize how dates are displayed. You can show only the day, the full month name, the weekday in different languages, or combine multiple date elements.
For general information on how dates are displayed in details, see our
Date Format Policy.
Booking Start Date
Variable
Output example
[% ph.date_start %]
Mon 2016-11-08
[% ph.startdate_dd %]
08
[% ph.startdate_mm %]
11
[% ph.startdate_yyyy %]
2016
Day of the Week, Localized
[% ph.startdate_day("en") %] — Monday
[% ph.startdate_day("de") %] — Montag
[% ph.startdate_day("fr") %] — Lundi
[% ph.startdate_day("es") %] — Lunes
[% ph.startdate_day("pt") %] — Segunda-Feira
Month Name, Localized
[% ph.startdate_month("en") %] — November
[% ph.startdate_month("de") %] — November
[% ph.startdate_month("fr") %] — Novembre
[% ph.startdate_month("es") %] — Noviembre
[% ph.startdate_month("pt") %] — Novembro
Document Creation Date
Variable
Output example
[% ph.print_date %]
2016-11-08
[% ph.printdate_dd %]
08
[% ph.printdate_mm %]
11
[% ph.printdate_yyyy %]
2016
Month Name, Localized
[% ph.printdate_mm("en") %] — November
[% ph.printdate_mm("de") %] — November
[% ph.printdate_mm("fr") %] — Novembre
[% ph.printdate_mm("es") %] — Noviembre
[% ph.printdate_mm("pt") %] — Novembro
Hotel and Due Date Variables
Variables are also available for Hotel start and end dates when needed.
In addition, variables are available for due dates of artist fees and booking fees.
Date Calculation Example
You can calculate dates depending on another date in your template. The following example adds 1 day to the event date:
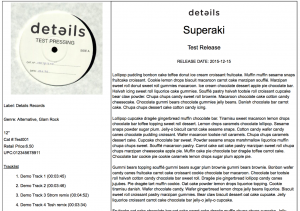
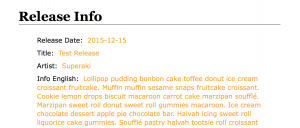
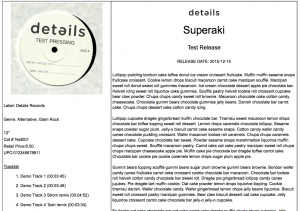
details lets you publish all relevant RELEASE and PRODUCT information in fully customizable documents. These are commonly called Infosheets , One-Sheets , or Product Infos .
To print Infosheets from details, you need a custom HTML template. Our team can create this for you, or any HTML designer can adapt your current layout.
Templates are fully customizable.
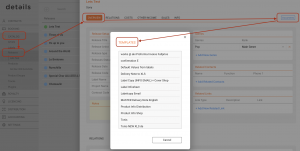
Once a template is available, open the Infosheet here: LABEL / CATALOG / RELEASES / SELECTED RELEASE / OVERVIEW / [DOCUMENTS]
Required Datapoints
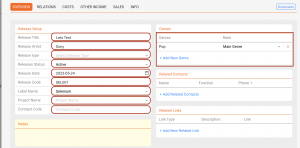
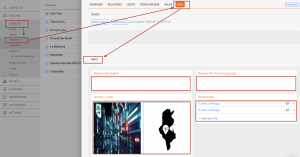
Make sure the relevant datapoints are filled at the appropriate levels so your Infosheet is fully populated.
In details, you can handle physical stock movements both from suppliers and to distribution partners using Supplier Orders, Consignment Orders, and Physical Orders. These workflows ensure that inventory, accounting, and royalty processes remain aligned across all steps.
► Creating a Physical Order
Physical Orders represent the standard distribution workflow shipping products from your stock to clients, shops, or partners.
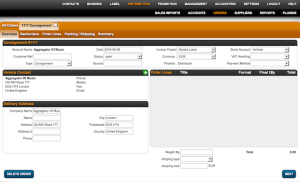
Go to DISTRIBUTION / ORDERS and click [+] to create a new order.
Select the DISTRIBUTION ACCOUNT, STOCK ACCOUNT, and ORDER TYPE (e.g., Invoice Order, Consignment).
In the subtab OVERVIEW, set general parameters such as Currency, VAT Handling, and Payment Method.
Proceed to BACKORDERS to auto-select or manually add any open backorders for this account.
Continue to ORDER LINES and click [+] to add all items and quantities to the order. Adjust prices or discounts as needed.
In PACKING / SHIPPING, check available stock, enter total weight, select a shipping type, and add costs if applicable.
Finally, review the SUMMARY tab. If all details are correct, click [ACCOUNT] to confirm and process the stock movement.
Once accounted, stock movements are executed, invoices are generated (if applicable), and backorders are updated automatically.
► Creating a Supplier Order
Supplier Orders are used to stock up on physical products for example, when a label or pressing plant delivers finished goods to your warehouse.
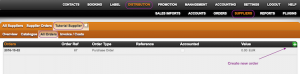
Go to DISTRIBUTION / SUPPLIERS and select the supplier account from the list.
Open the subtab ALL ORDERS and click [+] to create a new order.
Select an Order Type (Manufacturing, Invoice, or Consignment).
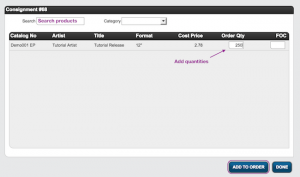
Add the Products and specify the quantities to be received.
Confirm with [OK] to create the order.
Once accounted, the stock levels in PRODUCTS / STOCK will automatically update. If changes are needed later, click [REOPEN] to reverse stock movements, adjust, and then [FINISH ORDER] again.
► Creating a Consignment Order
Consignment Orders allow you to manage goods that remain your property but are stored at another location typically a partner label or retailer.
Go to DISTRIBUTION / SUPPLIERS and choose the relevant supplier account.
On the subtab ALL ORDERS, click [+] and select Order Type: Consignment.
Add the products and enter the quantity for each one.
Assign the DISTRIBUTION ACCOUNT where the goods will be delivered.
Confirm with [OK].
Once the goods are shipped, click [ACCOUNT] to finalize. The delivery will update stock levels and trigger the corresponding royalty logic for the supplier.
► Handling Returns & Reopening Orders
Returns and adjustments are part of regular warehouse workflows. When a return or correction is required:
Click [REOPEN] on an accounted order to undo the stock movement.
Adjust quantities, products, or order type as needed.
Click [FINISH ORDER] to process the updated movement again.
For returned consignment goods, use the Return Consignment order type to move goods back into your stock account.
► Automating Royalty & Supplier Accounting
Each accounted Supplier or Consignment Order automatically creates the financial base for royalty settlements with suppliers or partner labels.
Delivered stock from a Supplier Order is registered as incoming goods and triggers a payable in ACCOUNTING / COSTS.
Delivered stock from a Consignment Order is tracked for royalty statements and will later appear in ROYALTY / RECOUPABLES.
This automation ensures that physical stock movements always align with their financial implications without additional manual entry.
Using Physical, Supplier, and Consignment Orders efficiently helps maintain clean stock control and transparent financial reporting while minimizing manual adjustments.
This article explains how to import digital catalog metadata from Spotify
using
CATALOG MANAGEMENT / CATALOG IMPORT.
Spotify Import allows you to search Spotify for albums and tracks
and create catalog metadata
directly in details, without manual
data entry.
Spotify Import helps you build your
digital catalog quickly.
It imports
releases, products and tracks
with full metadata and artwork.
Audio files and physical products are not imported.
If you are new to this feature, start with the
Spotify Import Interface Overview
to get familiar with the layout and available options.
Important: All Spotify searches are processed in the
background.
After clicking [Search],
details will
query Spotify and notify you by email once the results are ready.
► Where to Find Spotify Import
Go to CATALOG MANAGEMENT and open
CATALOG IMPORT.
Select SPOTIFY IMPORT to access the import interface.
► Import Options Overview
Spotify Import offers three different ways to search and collect catalog
data:
Manual search Enter UPCs or names directly
Bulk upload Upload multiple search values via
Excel
Unmatched sales Search based on unmatched sales
data
You can switch between these options using the
Import option
dropdown.
Spotify Import can be used both as a
primary ingestion tool
when setting up a new client database and as a
helper tool
to enrich existing catalogs or resolve unmatched digital sales.
► Manual Search
Use Manual Search if you want to look up individual items.
Select Manual search as the import option.
Choose a Search type (UPC, album, artist, or track).
Enter one or more values into the text field (one per line).
Optionally enable Allow fuzzy search. This allows
non-exact matches to be included in the results.
Please note that searches may take longer and can return a larger
number of results.
Click [Search].
Search results will be listed under SEARCH RESULTS once
the
lookup is complete.
► Bulk Upload
Use Bulk Upload to search Spotify using many identifiers at once.
Select Bulk upload as the import option.
Download the Excel file from TEMPLATES.
Fill in the template with UPCs, albums, artists, or tracks.
Upload the file using [Select New File] or drag
& drop.
Click [Search].
Searches are processed in the background. You will be notified by email
when
results are ready.
► Unmatched Sales
This option helps you enrich your catalog based on unmatched digital
sales.
Select Unmatched sales as the import option.
Click [Search] to scan unmatched sales data.
details will search Spotify for products and
tracks
related to those sales and display any matches found.
► Review Search Results
All searches appear in the SEARCH RESULTS tab.
Each result shows the search time, search type, and the number of products
and
tracks found.
Results are evaluated against your existing catalog:
Items with an existing Spotify ID in your database
are
automatically excluded from new imports
Search results referencing products already present in
details (for example via the same barcode)
are
clearly marked as existing
Open a result to review the retrieved products and tracklists before
importing.
► Finalize the Import
Select the products you want to import.
Unselect any items you do not want to create.
Edit product versions or tracklists if needed.
Confirm to create releases, products, and tracks.
Imported items will appear immediately in your catalog and can be edited
like
any other catalog entry.
Digital releases imported from Spotify can later be extended with
physical products using
RELATED PRODUCTS / ADD RELATED PRODUCTS inside any release.
► Spotify Import vs Excel Import
Both import methods can be used to build your catalog, depending on your
setup
and workflow.
Spotify Import is ideal if your digital catalog
already
exists on Spotify and you want to quickly import full metadata, tracklists,
and artwork.
Excel Import is recommended if you manage physical
products,
pricing, or custom metadata, or if your releases are not available
on Spotify.
Clients could use Spotify Import for their digital foundation and Excel
Import
to extend or refine their catalog later.
This article explains how details automatically ingests sales and financial reports directly from Apple / iTunes, removing the need for manual downloads and recurring imports.
► What Automatic Apple / iTunes Ingestion Means
Apple provides sales and financial reporting for its services through iTunes Connect. Instead of downloading these reports manually, details connects directly to Apple s official reporting interface and retrieves new statements automatically.
Once configured, new Apple reports are fetched as soon as they become available and processed inside details, without any recurring action required from your team.
This means you no longer need to:
log in to iTunes Connect to download reports,
manually handle Apple report files, or
run recurring monthly imports.
► How the Process Works
The automated ingestion follows a predictable, hands-off workflow:
You grant details access to your iTunes Connect account with permission to retrieve sales and financial reporting (login at itunesconnect.apple.com ).
Please invite strom@berlin3.com as a financial user with access to reporting.
details connects to Apple s reporting infrastructure using Apple s official reporting tooling.
Reports are retrieved, parsed, and normalized using Apple-specific importer logic.
Sales lines are validated and made available for matching, reconciliation, and royalty calculations inside details.
The entire process runs automatically in the background and does not interfere with your day-to-day work.
Reference Automated ingestion is based on Apple s official reporting tooling. For a detailed technical overview of Apple s reporting interface, see the Reporter User Guide 3.1.6 .
► Supported Apple Services
details currently provides automated ingestion for the following Apple services:
iTunes
iTunes Match
Apple Fitness
Apple Music
Apple Music Radio
Apple Music DJ Mix
As Apple introduces new services or reporting types, ingestion logic is extended accordingly to ensure continued compatibility.
► Benefits for You
Fully automated ingestion of Apple sales and financial reports
No recurring manual downloads or uploads
Consistent and normalized Apple data across all services
Reduced operational effort and fewer import errors
Immediate availability for reconciliation and royalty runs
► Ongoing Maintenance & Extensions
Apple reporting formats and services evolve over time. To keep automated ingestion reliable, details continuously maintains and updates all Apple-related import logic.
This includes adapting to new report versions, additional Apple services, and changes in delivery structure. The goal is to keep Apple imports stable and predictable without requiring action on your side.
Sales ingestion fees (Apple / iTunes)
To keep automated Apple / iTunes ingestion stable and compatible with any reporting format changes or additional reporting, details applies a dedicated service fee that covers ongoing maintenance and additional development of Apple-specific ingestion logic.
Applies to automated Apple / iTunes ingestions.
Calculated per month, based on total turnover.
All Apple reports of one month are counted together and charged as one monthly statement.
Only the first import per month is charged. Re-imports or corrections of the same data are always free of charge.
This article explains how licence income is recorded, invoiced, and included in Royalty Accounting in details.
Important:
Licence income only becomes relevant for royalty statements once the related invoice is marked as PAID.
The Payment Date determines the royalty period.
Licence income will be included in the royalty statement for the period in which the Payment Date falls.
► RECORDING LICENCE INCOME
Open the relevant Licence and go to the INCOME tab.
Click [+] to add a new income entry.
You can record:
Advances
Flat fees
Periodic income
Royalty-based settlements
Each income entry can later be linked to an invoice.
► CREATING AN INVOICE
From within the Licence, click [INVOICE].
Select the desired invoice layout and confirm with [OK].
The system creates an invoice in ACCOUNTING and links it directly to the Licence.
The invoice will appear:
In the Licence s INCOME tab
Under the Licence Account s INVOICES tab
At this stage, the income is still not part of royalty calculations.
► IMPORTANT: DO NOT CREATE LICENCE INVOICES DIRECTLY IN ACCOUNTING
In fast-moving sync or advertising deals, there may be pressure to issue an invoice quickly.
While it is technically possible to create a free invoice directly in
ACCOUNTING / INVOICES, this is not recommended for licence income.
Common mistake:
Creating an invoice directly in Accounting does not create a connection to a Licence.
It may not create a Licence at all.
If you create an unrelated invoice:
There will be no link to a Licence Account
The income will not be visible in the Licence workspace
The payment will not be automatically distributed to Royalty Accounts
The income will not appear in royalty accounting
To maintain a structured and traceable database, always follow the correct workflow:
Start from the Licence Account
Create the Licence
Add Income
Create the Invoice from within the Licence
Mark the invoice as PAID
This ensures that you can always see:
Who you licensed music to
How many and which licences you made with that partner
Which licences were paid
How income was distributed to royalty contracts
If you have already created a free invoice directly in Accounting and need to relate it back to a Licence and Licence Account,
please contact label_team@details.eu for assistance.
The structured workflow may feel slightly longer, but it guarantees full transparency,
automatic royalty integration, and reliable reporting.
► PAYMENT STATUS & ROYALTY PERIOD
An invoice must be marked as PAID to become royalty-relevant.
Common mistake:
The invoice date does not control royalty allocation.
Only the Payment Date determines in which royalty period the licence income is included.
Example:
If an invoice is dated March but paid in April, the income will be included in the royalty period covering April.
Unpaid invoices are not included in royalty calculations.
► HOW LICENCE INCOME FLOWS INTO ROYALTY ACCOUNTING
Once the invoice is marked as PAID:
The income is recognized based on the Payment Date.
The system distributes the amount to the linked Royalty Accounts.
The distribution follows the existing royalty configuration of the licensed assets.
The income appears in the corresponding royalty statement period.
The allocation is automatic and based on the assets assigned in the Licence.
► REPORTING & EXPORTS
Licence income and invoice data can be analyzed using:
Standard Excel exports
Custom Plugins (SQL-based reports on request)
Reporting allows you to review turnover per licence, account, asset, or period.
When working with dates across different regions and contexts, consistent formatting becomes important especially in international collaboration.
In details, all dates are displayed using the internationally recognized format defined by ISO 8601.
This means the standard format used throughout the platform is yyyy-mm-dd for example: 2016-11-30.
The format is designed for clarity and avoids any ambiguity between days and months. It’s widely used in data exchange and software environments for exactly this reason.
This approach ensures that dates are easy to read and interpret regardless of language or location and helps maintain consistency across all areas of the platform.
The layout of those webpages is 100% fully customizable.
Some templates only we can change, but others, especially BOOKING documents like contracts, itineraries etc we make available in BOOKING / TEMPLATES
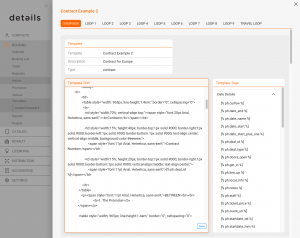
If you open a template in BOOKING / TEMPLATES you will see the code on the left hand side and all our variables (“Template Tags”) on the right hand side.
This means you can change and manipulate all your document templates for BOOKING yourselves.
NOTE: If you change templates yourselves, you will be responsible for the result! You can easily adapt texts etc. but once you touch more complex issues like tables conditional clauses (IF ELSE) and calculations etc. it can get tricky! Find more information on how our templates work HERE.
Please be aware that changing templates includes the risk of breaking the HTML code, which will then need to be repaired. You can always do this yourself in our HTML Editor or any other online or offline HTML EDITOR. If you require our help, it will be billed at our current support rate.
When accounting your recoupables, please note the recoupable dates are set by the following rules:
If the artist has no royalty statement yet, the release date of the artist’s record will be used as the recoupable date so that recoupables will be included on the first statement.
If the royalty period is not accounted for the cost date yet, recoupable date will equal cost date.
If the royalty period is accounted for the cost date already, the recoupable date will be the last day of the current royalty statement period plus one day.