Contract Templates


Updating Contract Templates and Setting Up a Dedicated Royalty Account

Details offers a feature to set up contract templates, which is especially useful for complex contracts as it saves time and ensures consistency.


Step-by-Step Guide

1. Set Up a Dedicated Royalty Account

Go to the LABEL / ROYALTY section.

Create a new royalty account specifically for your contract templates. We recommend naming this account something easily identifiable, such as “AAA Contract Templates.”

2. Create a New Contract Template

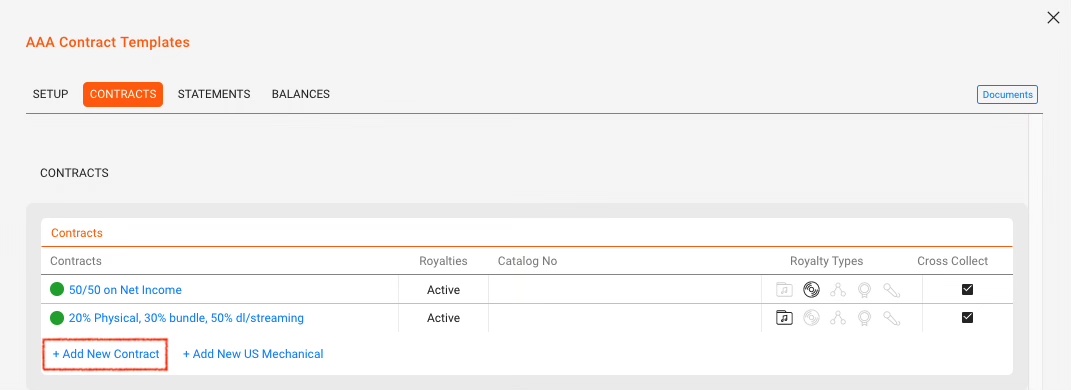
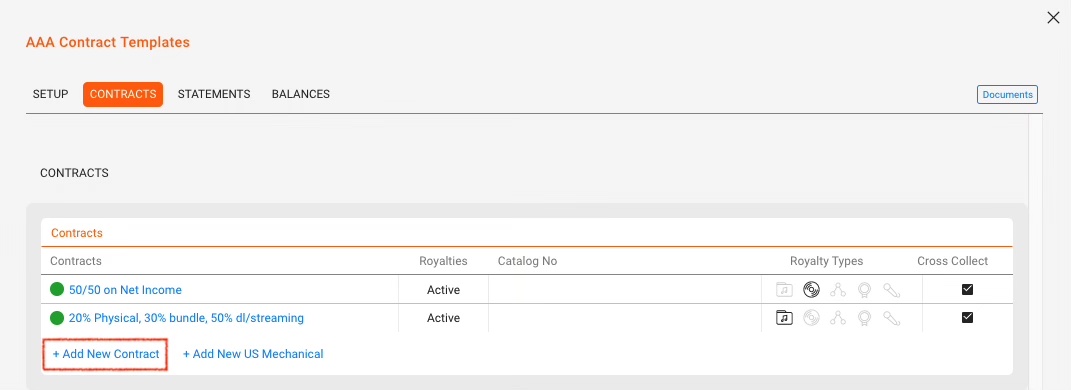
Within your dedicated royalty account, open the Contracts subtab.

Click the green PLUS icon to add a new contract.


3. Configure Contract Details

    • Enter the necessary information such as royalty rates, recoupable settings, and any other relevant details.

4. Save the Contract as a Template

Check the Use As Template checkbox.

Provide a unique name for your contract template.


5 Accessing Your Templates

All your template contracts will be available in the New Contract modal for easy access and use.

By following these steps and setting up a dedicated royalty account, managing and utilizing contract templates becomes more efficient and organized.


For additional guidance, read here how to copy an existing contract.


Setting up details-2-details auto-ingestion sales imports

At DETAILS we try to avoid inefficiencies and work duplication wherever possible.
One of these workflows that saves a lot of time and energy for our clients is that we allow a direct data transfer from one details-client to another – for example for sales, costs or licence information.


To comply with data safety and privacy regulations as per the EU GDPR regulations the automatic exchange of data between two details clients will only work when both parties agree on doing so.
For this reason a secret shared-key needs to be activly and deliberatly exchanged between both parties.
For your safety we log of the process.


To set up the data exchange we need to differentiate between a SENDER and a RECEIVER.

The SENDER is the client which will provide sales, costs or other information (typically the Label-Service or Distributor).

The RECEIVER is the client that will ingest the SENDER’s data into their own database (typically the distributed Label).


For the auto-ingestion to work, the SENDER and RECEIVER need to proceed with the following steps:


(1) SENDER details client :

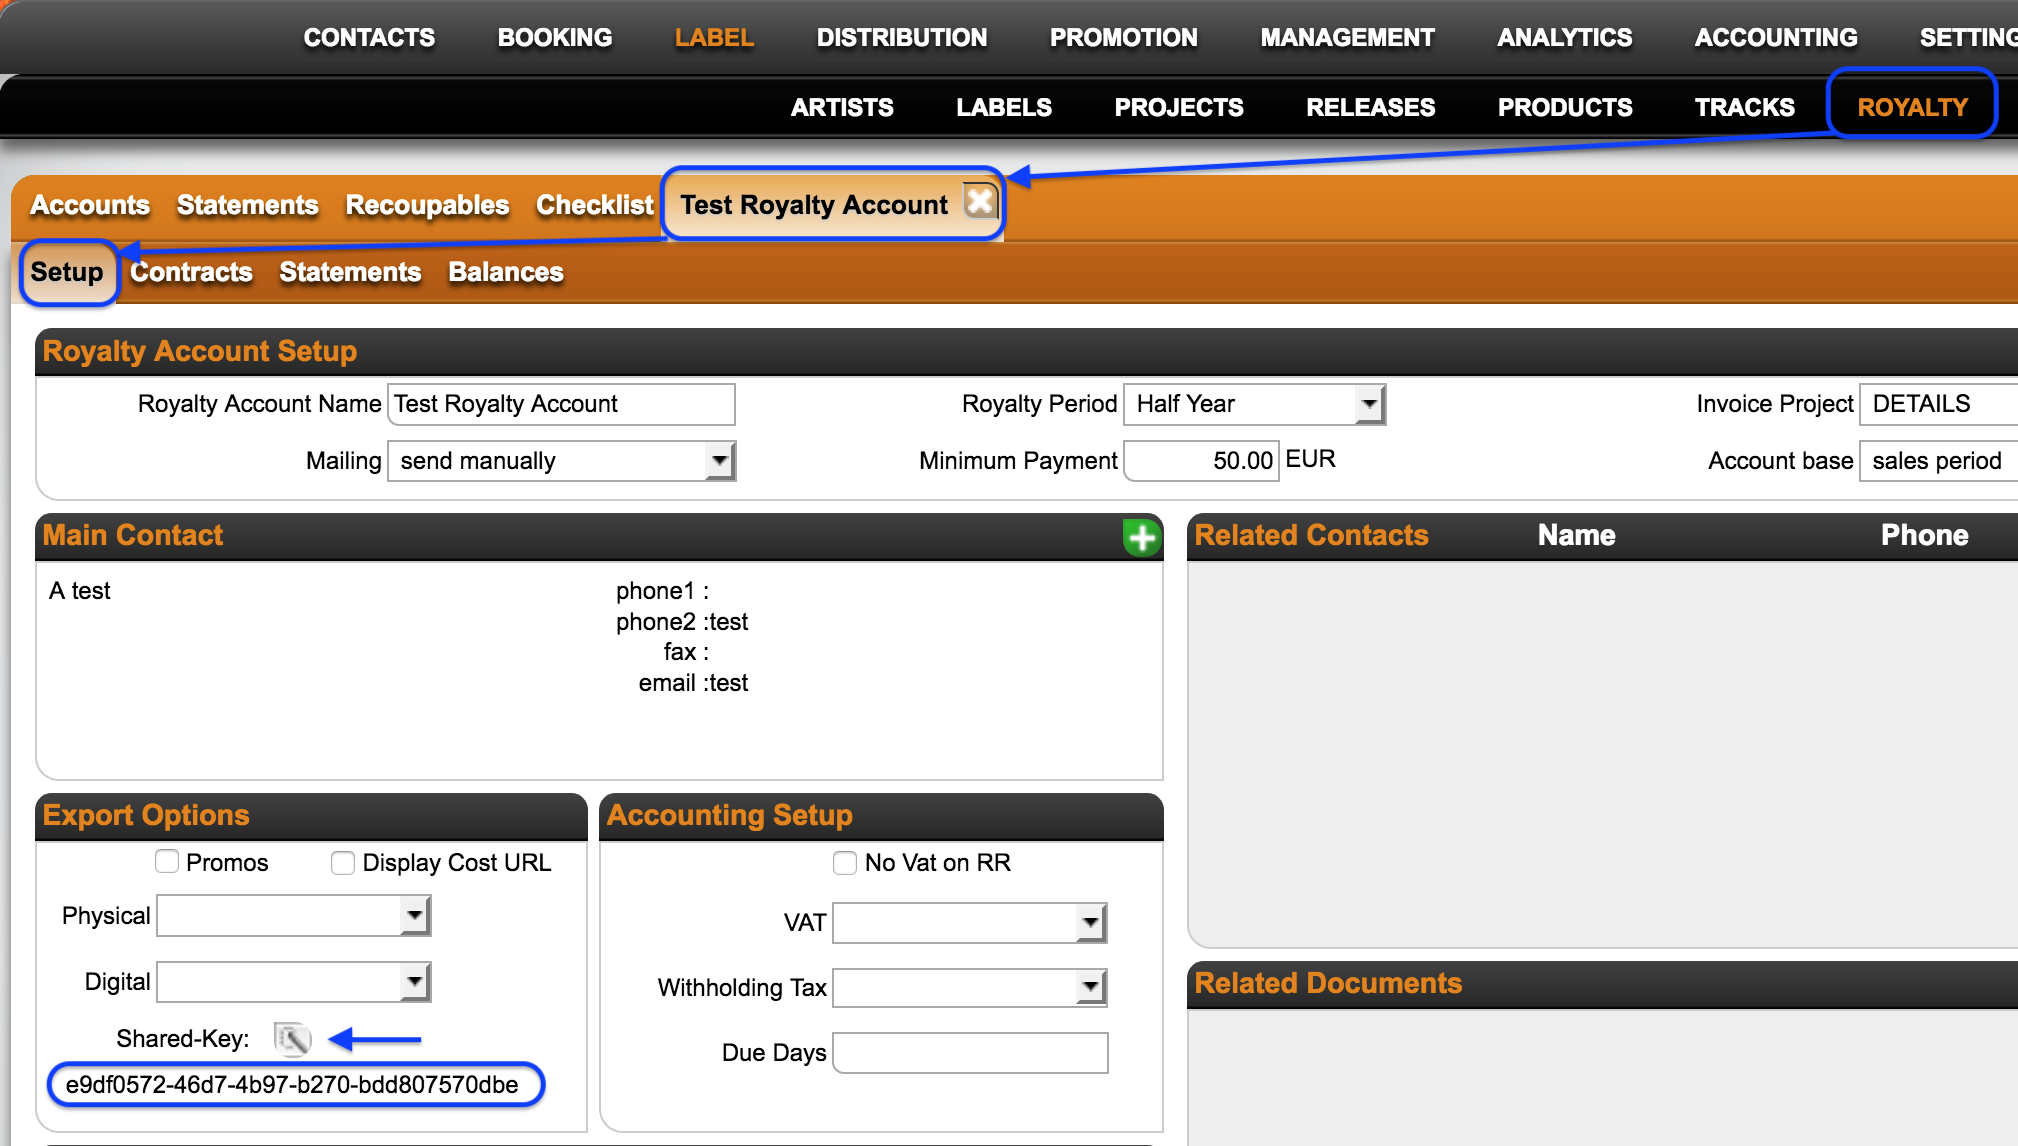
The SENDER needs to log into their details application, create a secret Shared-Key and transmit it together with it’s own client name to the RECEIVER in a secure way.

The Shared-Key is created in the ROYALTY ACCOUNT / SETUP which is designated to be shared:


The details-client name can be found the SENDER’s login link:
https://app.detailsdetails.eu/CLIENTNAME/


(2) RECEIVER details client :

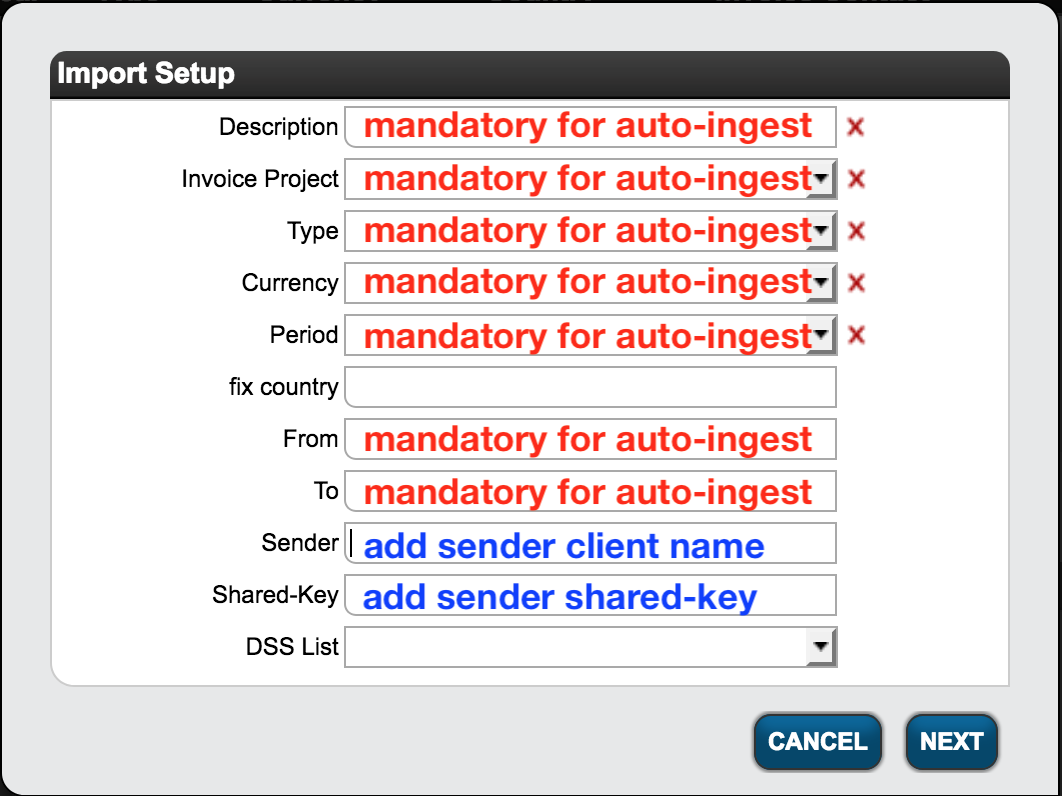
The Shared-Key and the SENDER’s details-client name now need to be included into the Import-Setting of the RECEIVER, designated to receive the respective data.


NOTE: Exchanged data may be sales OR costs and third party licences.
Each data type needs to be set up in SEPERATE Import setup!


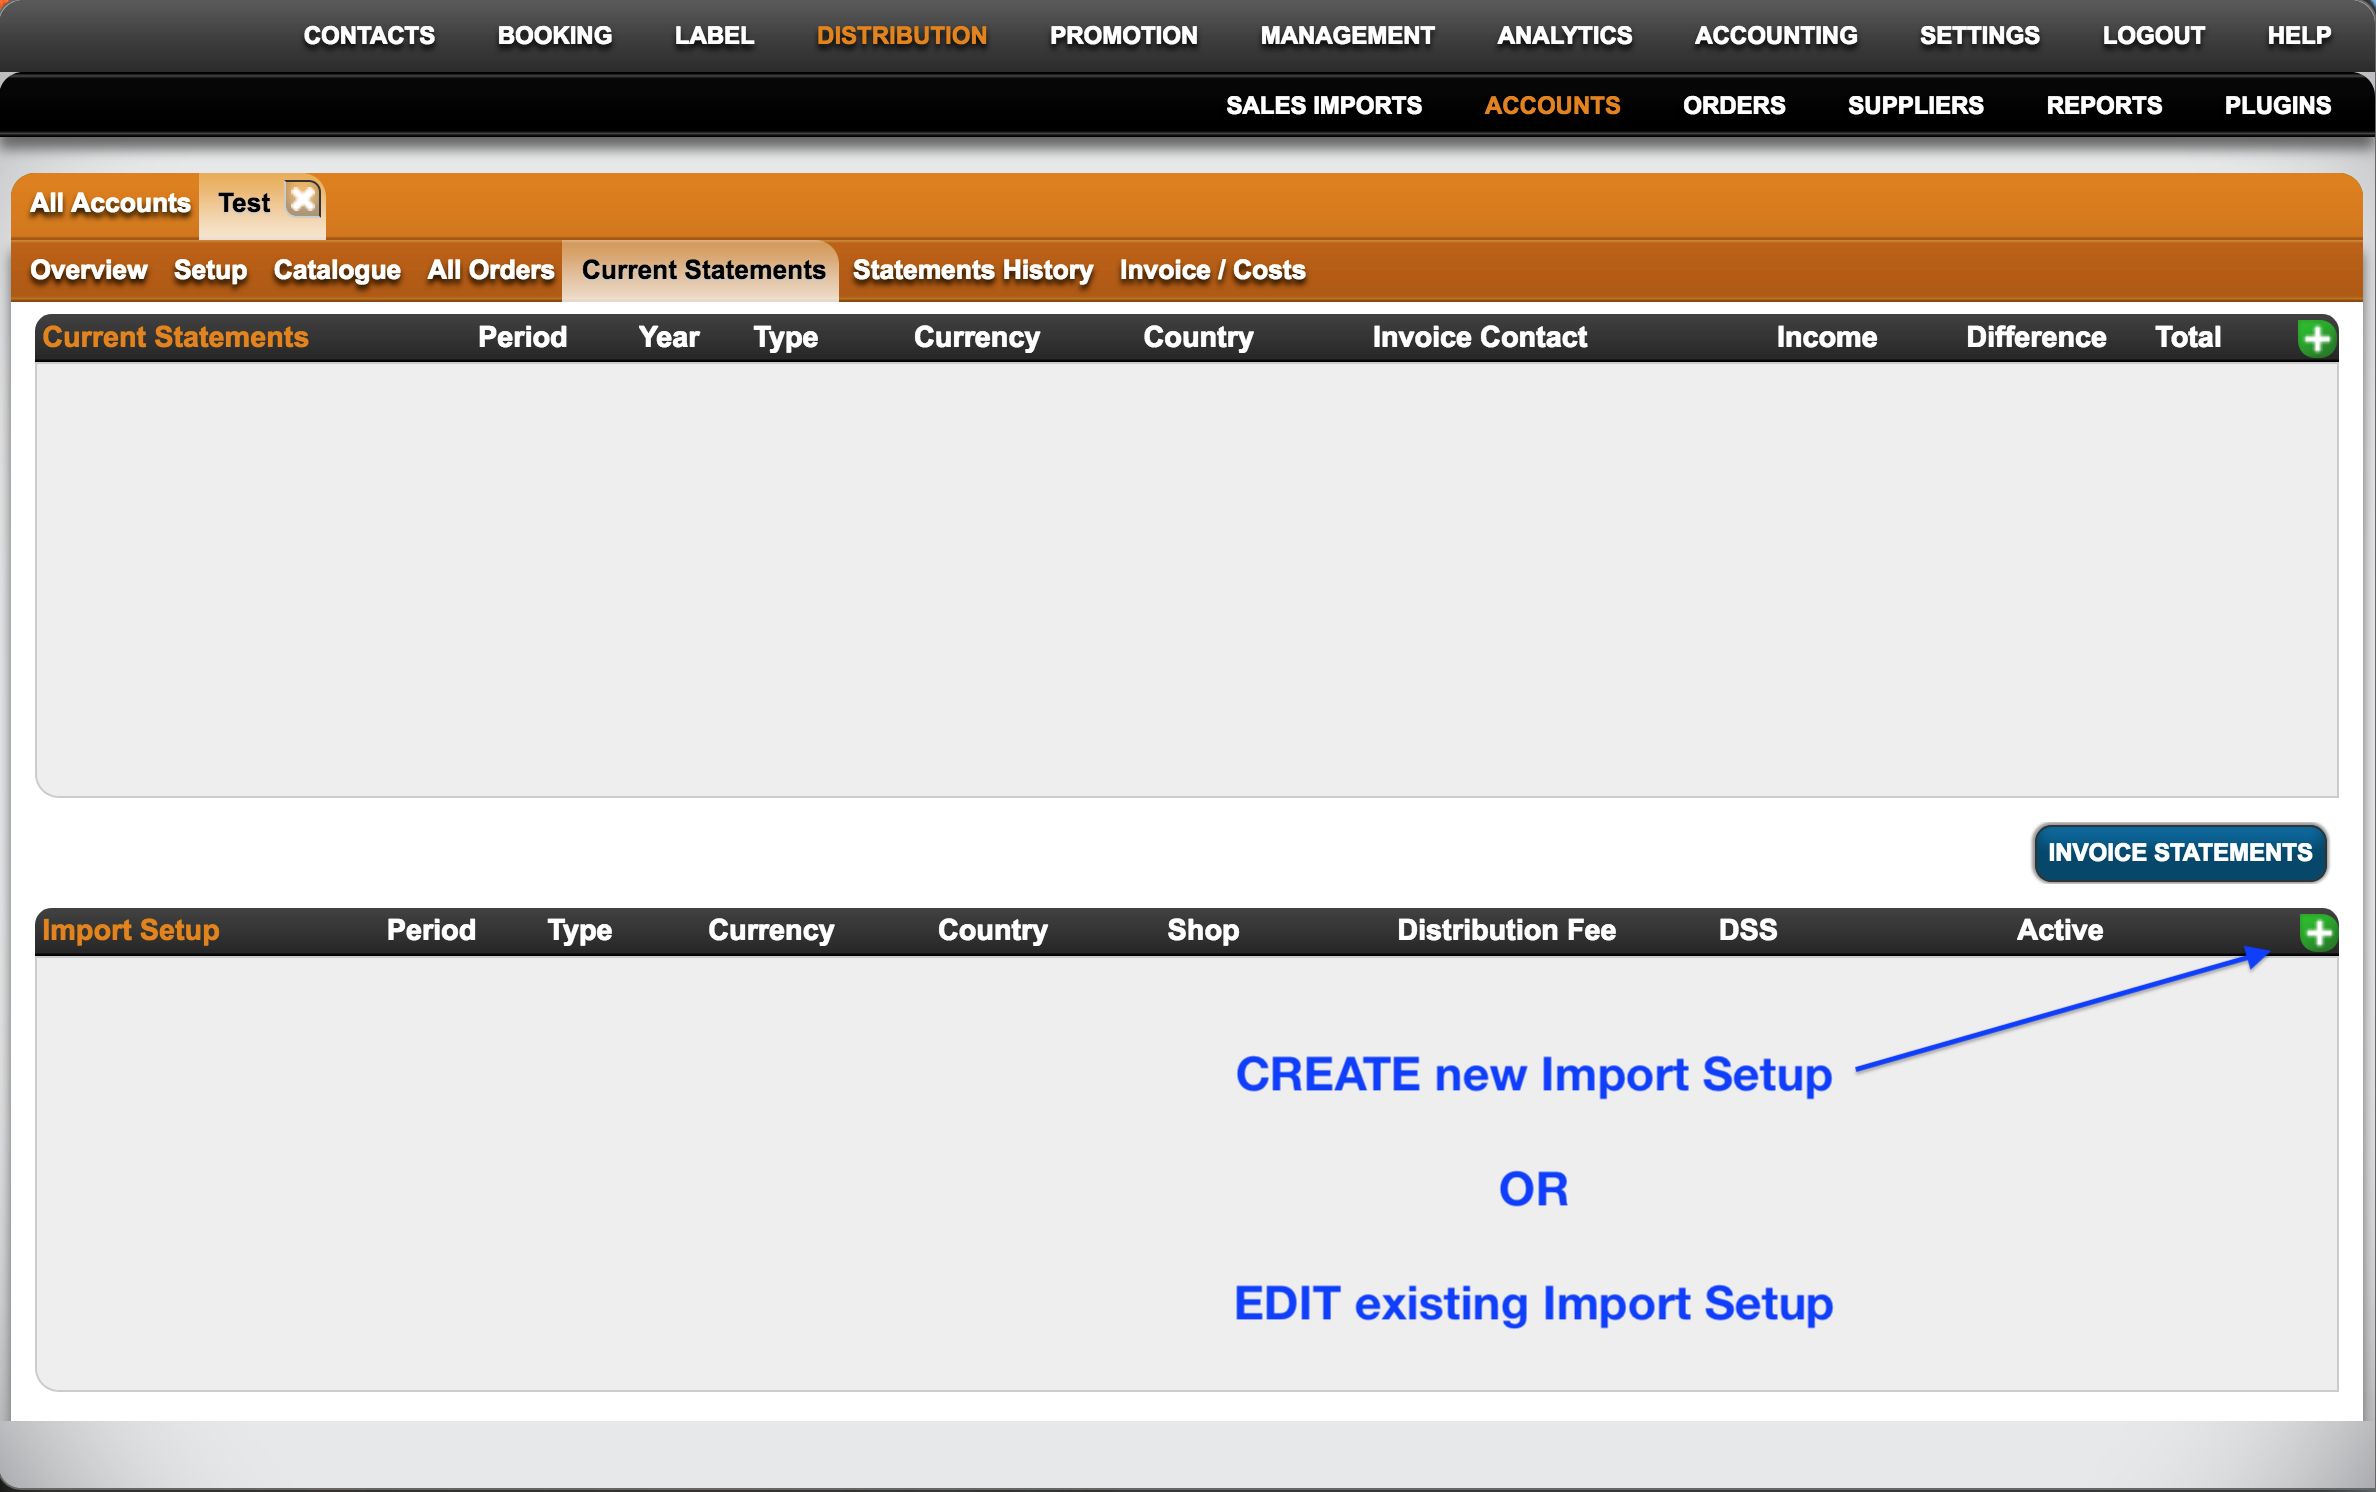
You can find the Import Settings in the DISTRIBUTION ACCOUNTS] / CURRENT STATEMENTS / IMPORT SETUP.


Template Tags / Variables

In BOOKING / TEMPLATES we use HTML templates to create contracts, itineraries and other documents. Within those templates we use variables – which we call “template tags” – and that will insert values from specific bookings, artists, etc. in your documents. This article lists the most used template tags for standard booking templates in our BOOKING section.

NOTE: There are more – less used tags available. For those and more fancy stuff with IF ELSE clauses and other conditions and definitions, please mail us

Event Date Details ||Template Tags |Example|| ||[% ph.date_start %]|Example|| ||[% ph.date_start_plus_one %]|Example|| ||[% ph.date_end %] |Example|| || | || ||[% ph.startdate_dd %]|Example|| ||[% ph.startdate_mm %]|Example|| ||[% ph.startdate_yyyy %]|Example|| || | || ||[% ph.startdate_day(“en”) %]|Example|| ||[% ph.startdate_day(“de”) %]|Example|| ||[% ph.startdate_day(“fr”) %]|Example|| ||[% ph.startdate_day(“es”) %]|Example|| ||[% ph.startdate_day(“pt”) %]|Example|| || | || ||[% ph.startdate_month(“en”) %]|Example|| ||[% ph.startdate_month(“de”) %]|Example|| ||[% ph.startdate_month(“fr”) %]|Example|| ||[% ph.startdate_month(“es”) %]|Example|| ||[% ph.startdate_month(“pt”) %]|Example||

[% ph.date_name %] Example
[% ph.doors_open %] Example
[% ph.get_in %] Example
[% ph.line_up %] Example
[% ph.curfew %] Example
[% ph.notes %] Example
[% ph.local_info %] Example
[% ph.event_url %] Example

Event Details

||[% ph.date_name %]|Example|| ||[% ph.doors_open %]|Example|| ||[% ph.get_in %]|Example|| ||[% ph.line_up %]|Example|| ||[% ph.curfew %]|Example|| ||[% ph.notes %]|Example|| ||[% ph.local_info %]|Example|| ||[% ph.event_url %]|Example||

Artist General Details [% ph.artist %] [% ph.artist_short_name %] [% ph.artist_url1 %] [% ph.artist_url2 %] [% ph.artist_url3 %] [% ph.announce_as %] [% ph.artist_names %] [% ph.person_name %] [% ph.person_address1 %] [% ph.person_birthday %] [% ph.person_city %] [% ph.person_company %] [% ph.person_country %] [% ph.person_email1 %] [% ph.person_fax1 %] [% ph.person_legalname %] [% ph.person_mobile1 %] [% ph.person_passport %] [% ph.person_phone1 %] [% ph.person_postalcode %] [% ph.person_vat_id %] [% ph.person_url1 %] [% ph.signature %]

Artist Event Details
[% ph.artist_qty %]
[% ph.artist_before %]
[% ph.artist_after %]
[% ph.date_hotel_start_dd %]
[% ph.date_hotel_start_mm %]
[% ph.date_hotel_start_yyyy %]
[% ph.date_hotel_start_day(“en”) %]
[% ph.date_hotel_start_day(“de”) %]
[% ph.date_hotel_start_day(“fr”) %]
[% ph.date_hotel_start_day(“es”) %]
[% ph.date_hotel_start_day(“pt”) %]
[% ph.date_hotel_start_month(“en”) %]
[% ph.date_hotel_start_month(“de”) %]
[% ph.date_hotel_start_month(“fr”) %]
[% ph.date_hotel_start_month(“es”) %]
[% ph.date_hotel_start_month(“pt”) %]
[% ph.date_hotel_end_dd %]
[% ph.date_hotel_end_mm %]
[% ph.date_hotel_end_yyyy %]
[% ph.date_hotel_end_day(“en”) %] [% ph.date_hotel_end_day(“de”) %] [% ph.date_hotel_end_day(“fr”) %] [% ph.date_hotel_end_day(“es”) %] [% ph.date_hotel_end_day(“pt”) %] [% ph.date_hotel_end_month(“en”) %] [% ph.date_hotel_end_month(“de”) %] [% ph.date_hotel_end_month(“fr”) %] [% ph.date_hotel_end_month(“es”) %] [% ph.date_hotel_end_month(“pt”) %]

Artist Bank Account Details
[% ph.artist_account_holder %] [% ph.artist_bankaccount_no %] [% ph.artist_bankaddress %] [% ph.artist_bankname %] [% ph.artist_bank_ Details %] [% ph.artist_iban %] [% ph.artist_invoice_address %] [% ph.artist_invoice_address_line %] [% ph.artist_money_account %] [% ph.artist_sortcode %] [% ph.artist_swift %] [% ph.artist_tax_id %] [% ph.artist_vat_id %]

Artist Default Infos
[% ph.artist_notes %] [% ph.catering_info %] [% ph.catering_info2 %] [% ph.guestlist %] [% ph.guestlist_tickets %] [% ph.hotel_classification %] [% ph.hotel_classification2 %] [% ph.hotel_info %] [% ph.hotel_rooms %] [% ph.hotel_stars %] [% ph.single_rooms %] [% ph.double_rooms %] [% ph.suites %] [% ph.performance_time %] [% ph.performance_time_contract %] [% ph.performance_type %] [% ph.stage_name %] [% ph.schedule_notes %] [% ph.setup_time %] [% ph.soundcheck %] [% ph.techrider %] [% ph.techrider2 %] [% ph.travel_info %] [% ph.travel_info2 %] [% ph.travel_option %] [% ph.travel_option2 %] [% ph.techrider_url %] [% ph.travel_qty %] [% ph.travel_qty_all_artists %]

Promoter Details
[% ph.expenses_promoter %] [% ph.payment_method %] [% ph.promoter_address %] [% ph.promoter_address1 %] [% ph.promoter_address2 %] [% ph.promoter_address_line %] [% ph.promoter_city %] [% ph.promoter_region %] [% ph.promoter_contact %] [% ph.promoter_contact_phone %] [% ph.promoter_contact_mobile %] [% ph.promoter_contact_email %] [% ph.promoter_contact_vat %] [% ph.promoter_company %] [% ph.promoter_legalname %] [% ph.promoter_country %] [% ph.promoter_email1 %] [% ph.promoter_emails %] [% ph.promoter_fax1 %] [% ph.promoter_mobile %] [% ph.promoter_phone1 %] [% ph.promoter_phones %] [% ph.promoter_postalcode %] [% ph.promoter_tax_id %] [% ph.promoter_vat_id %] [% ph.promoter_url1 %]

MONEY DETAILS
[% ph.deal_id %] [% ph.deal_type %] [% ph.first_offer %] [% ph.cash_on_night %] [% ph.deposit1 %] [% ph.deposit1_all_artists %] [% ph.deposit1_duedate_dd %] [% ph.deposit1_duedate_mm %] [% ph.deposit1_duedate_yyyy %] [% ph.guarantee_fee %] [% ph.guarantee_fee_duedate_dd %] [% ph.guarantee_fee_duedate_mm %] [% ph.guarantee_fee_duedate_yyyy %] [% ph.guarantee_fee_all_artists %] [% ph.guarantee_gross_amount %] [% ph.guarantee_vat_amount %] [% ph.guarantee_vat_rate %] [% ph.invoice(‘AgencyCommission(fromArtist)’) %] [% ph.invoice(‘BalanceFee’) %] [% ph.invoice(‘Expenses’) %] [% ph.invoice(‘Deposit’) %] [% ph.invoice(‘Deposit2’) %] [% ph.invoice(‘AllInBudget’) %] [% ph.invoice(‘BookingFee(ontop)’) %] [% ph.invoice(‘EventCommission’) %] [% ph.invoice(‘CashOnNight’) %] [% ph.invoice(‘ArtistFee’) %] [% ph.booking_fee %] [% ph.booking_fee_all_artists %] [% ph.booking_fee_duedate %] [% ph.booking_fee_duedate_dd %] [% ph.booking_fee_duedate_mm %] [% ph.booking_fee_duedate_yyyy %]

Travel Details
[% ph.travel_artist %] [% ph.travel_complete %] [% ph.travel_before %] [% ph.travel_after %] [% ph.travel_costs %]

Local Details
[% ph.locals(‘PickupDriver’,’name’) %] [% ph.locals(‘PickupDriver’,’mobile’) %] [% ph.locals(‘PickupDriver’,’notes’) %] [% ph.locals(‘Hotel’,’name’) %] [% ph.locals(‘Hotel’,’address1′) %] [% ph.locals(‘Hotel’,’city’) %] [% ph.locals(‘Hotel’,’postalcode’) %] [% ph.locals(‘Hotel’,’country’) %] [% ph.locals(‘Hotel’,’phone’) %] [% ph.locals(‘Hotel’,’ur

How to re-open an accounted sales statement


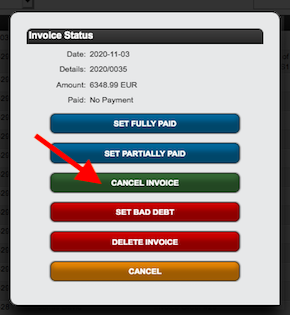
If you want to delete a sales import that has already been accounted, you need to cancel the invoice first (but make sure before, the invoice hasn’t been forwarded in the accounting process!)


1. ACCOUNTING / INVOICES

  • find the invoice connected to the sales import and cancel it via the Pen Symbol on the right.


2. DISTRIBUTION / ACCOUNTS

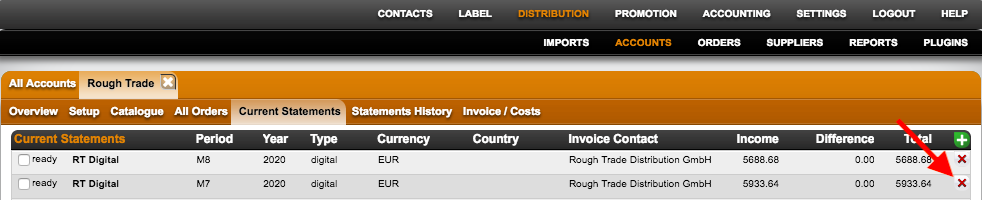
  • Once the invoice is cancelled, the sales import shows up again in the CURRENT STATEMENTS tab of the distribution account.
  • You can delete the sales import by clicking the red X.


TRY TO AVOID DELETING AND ALWAYS CONSIDER IF THERE IS ANYTHING CONNECTED TO THE DELETED ITEM.

How to set up the automated sales import from IDOL Labelcamp


Importing sales files manually can be a tedious and time-consuming process. We’re happy to partner with IDOL’s Labelcamp to offer a fully automated sales ingestion solution.
This integration eliminates the need for manual uploads and automatically loads your monthly sales reports into details once set up. How convenient is that?

Setting up a sales import automation from Labelcamp is a straightforward process.
Follow the steps below to automate your sales statement delivery.

  1. Login to Your Labelcamp Account

    • Open your browser and navigate to the Labelcamp login page.
    • Enter your username or email and password.
    • Click on the “Sign in” button.

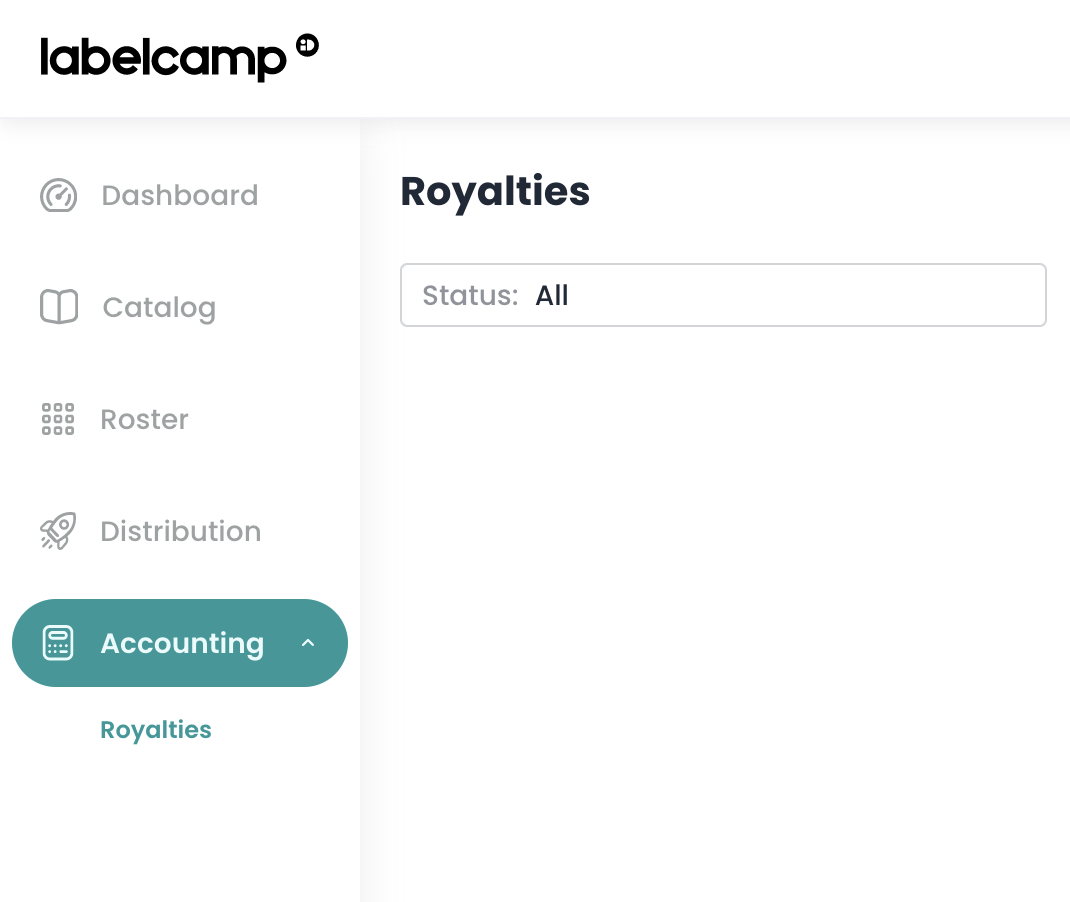
  2. Navigate to Royalties

    • On the main menu on the left side of the screen, select “Accounting.”
    • Then, select “Royalties” from the submenu.li

  3. Create a New Automation

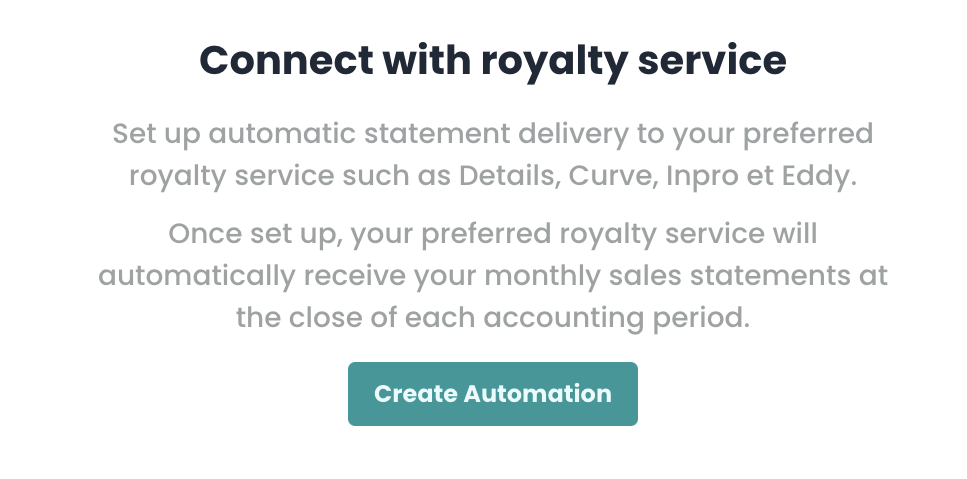
    • In the middle of the screen, click on “Create Automation.”
    • If you already have created other automations, select “New Automation.”

  4. Fill in the Automation Details
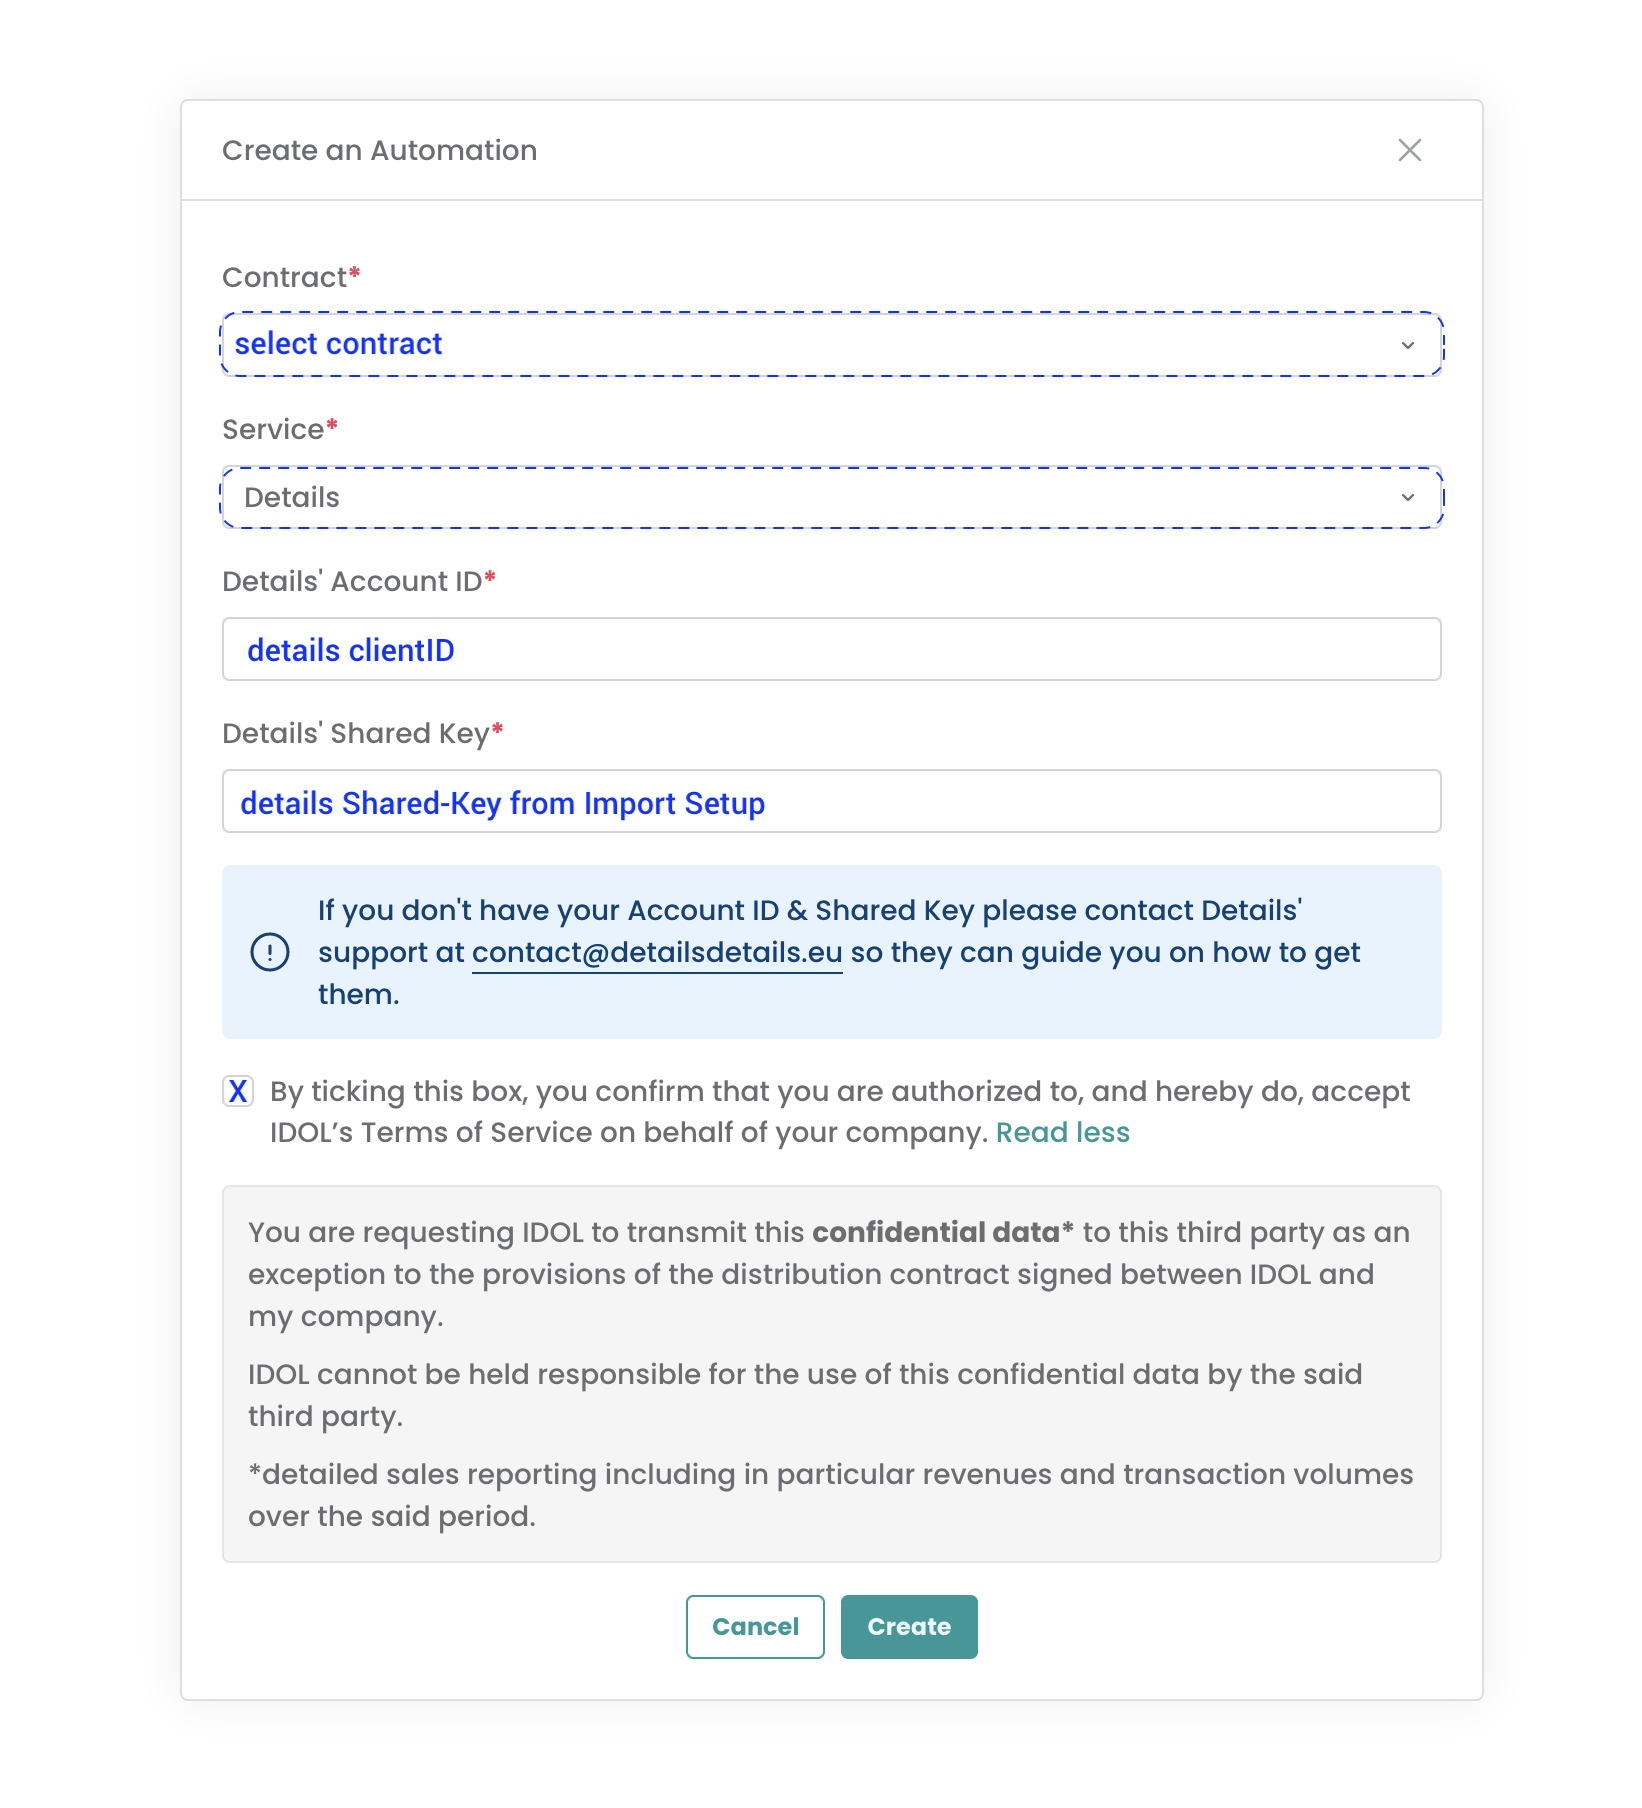
    • A modal window will appear to create your automation.
    • In the Contract dropdown, select your Labelcamp contract.
    • From the Service dropdown, select “Details.”
    • In the “Details’ Account ID” field, enter your Details client ID.
      This is what follows https://app.details.eu/ in your details login URL.
      For example, in https://app.details.eu/MyLabel/, the client ID is MyLabel.
    • In the “Details’ Shared Key” field, enter the shared key you ll find in your IDOL Import Setup in details under Distribution / Accounts / => Idol / Import Setup / open selected Import Setup => Shared-Key.

Note

  • You can create multiple import automations from Labelcamp to Details if you have multiple contracts in Labelcamp.
  • Each contract will have a dedicated import setup in Details and hence its unique shared key.
  • Sometimes, the automatic sales import transfer from LABELCAMP to details can be interrupted due to a disruption in the data flow. When this happens, the automatic sales ingestion may fail, leaving you with incomplete data. In that case read this article.


If you encounter any issues, please contact our label_team for assistance.

Deactivate Contracts

details now has a feature to deactivate royalty contracts.
This can be useful if your contract has ended or has been amended and you no longer wish to include that contract in the royalty statements.

The deactivation of a contract results in a contract being archived, but not deleted!

A deactivated contract stops processing any income or recoupables and will not be displayed in royalty statements.
In most cases, especially if there is a contract history, this is a much better option than removing contracts, which results in previous reporting periods being deleted from your database.

A deactivated contract will no longer

– not process any new royalties for sales, returns or licences

– not recoup any new advances, other incomes or costs

– not load any new repertoire via the autofetch function


A deactivated contract will however still

– forward previous closing balance of the previous period

– account contract balances if added manually

– account previously imported recoupables

– credit previous return reserves when due


NOTE : If previous balances, return reserve credits or closing balances are still existing, the deactivated contract will still be visible on the statement.


To deactivate a contract, you need a contract status set to inactive.

Go to SETTINGS / LABEL / ADDITIONAL INFO, add or edit a new status on the Label Status box and set section = Royalty Contract. For contract deactivation status check the [x] inactive checkbox!
Note : The deactivating contract function will only apply if also the inactive flag is selected!

Screenshot 2023-11-15 at 8.28.24/PM.png

Now, go to LABEL / ROYLATY / CONTRACTS, select a contract you want to deactivate and choose the inactive status from the dropdown menu.

Screenshot 2023-11-15 at 8.36.04/PM.png


Please note, the deactivation will start as you select an inactive status.
The contract start date and end date do not affect the deactivation!


How to Trigger Automated Sales Ingestions


details supports automated ingestion of sales statements from various digital service providers (DSPs), including all DSPs covered by MERLIN and Amazon.

By default, these ingestions are scheduled to run automatically twice per week. However, if an import is missing, outdated, or shows incorrect amounts, you can manually trigger a new ingestion any time.


Step-by-step: Manually Trigger a Sales Ingestion

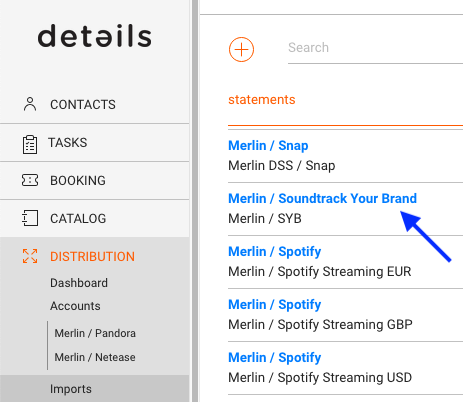
1. Go to Distribution / Imports

Navigate to Distribution / Imports in the left menu. Find the row corresponding to the account and importer you want to re-trigger.

2. Click on the Account Name

Click on the blue account name in the left-hand column. This will take you directly to the selected Distribution Account.

Example: Clicking “Merlin / Soundtrack Your Brand” will take you to that specific account.

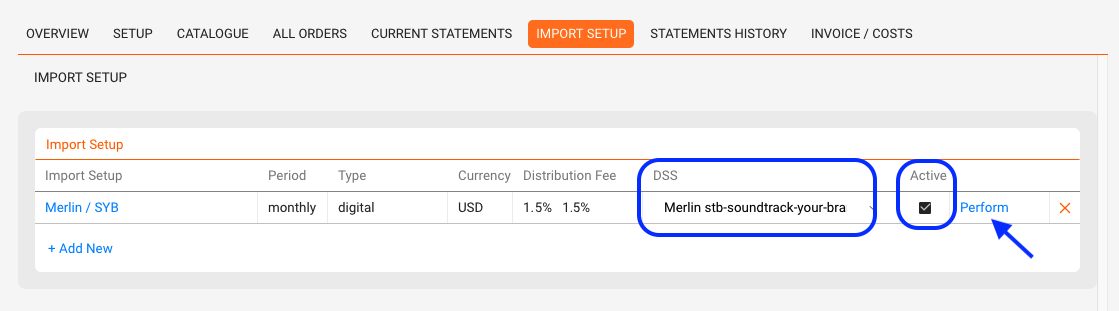
3. Go to the Import Setup tab

Once you’re in the account view, open the Import Setup tab.

Look for the active importer you want to trigger. Make sure it has a DSS value this indicates that the importer is connected to an automated ingestion service.

4. Click “Perform”

On the right side of the Import Setup box, click the Perform link.


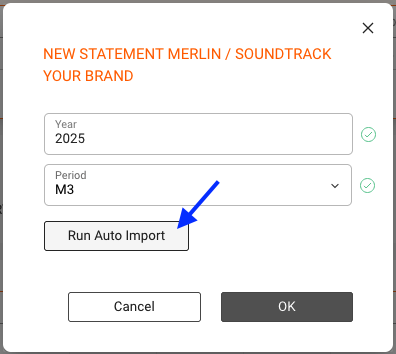
5. Select the Year and Period

In the modal that opens, select the Year and Period (e.g. M3 for March) for the statement you want to re-import.

6. Click “Run Auto Import”

Click the Run Auto Import button. This will trigger our system to connect to the distributor and request the latest available version of the file for that period.

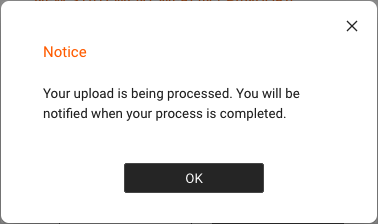
7. Confirmation

You ll see a confirmation message:

“Your upload is being processed. You will be notified when your process is completed.”


What Happens Next

  • If the request is successful, the updated file will be processed and matched automatically.
  • Once matching is complete, the correct statement amount will be displayed in the Imports overview.

Please Note

Depending on the size of the file and the statement contents, the process can take a few minutes.

During this time:

  • You may initially see a 0.00 amount in the tile.
  • The actual amount will appear once the file has finished processing.
  • Let the system work in the background and check back later.


If you encounter persistent issues with automated ingestion, feel free to contact label_team@details.eu.

details Sales Ingestion API


The Sales Ingestion API allows you to directly import sales data into the Details client databases via JSON/JSONL file transfer. This guide provides detailed instructions on using the API.


API Endpoint https://api.berlin3.com/api/clientID/


Required Parameters

When making API requests, include the following parameters:

  • clientID: Unique Client ID
  • file: JSON/JSONL file location to upload
  • action: The type of action (e.g., add_sales)
  • year: Sales Year (yyyy)
  • month: Sales Month (mm)
  • currency: ISO currency code
  • shared_key: Key to identify the statement source
  • api_key: Unique Client API Key

Your clientID is in the clients login link.
To find your api_key, log into your Details account and go to Settings > Sharing.
The shared_key(s) can be found in the Import Setups for any Distribution Account and are generated automatically. If you create a new Account, close and re-open it to find the Shared Key.


Data Format

The JSON file should be an array of objects, and the JSONL file should be a list of objects separated by a new line.

Field Descriptions

API Field Name Data Type Expected Value Description
identifier Text ISRC, UPC, SKU, VIDEO ID, etc. Main Identifier
identifier_product Text UPC, SKU, GRiD, etc. Secondary Identifier
artist Text   Artist Name
title Text   Title of Item
catalog_no Text   Catalog Number
country Text ISO2 Country Code Country
shop Text Name of DSP (Platform) Shop Name
usage_type Text “DL” for Audio Download, “DV” for Video Download, “STR” for Audio Stream, “STV” for Video Stream, “PROMO” for Platform Promotion Digital Sales Type
usage_type_description Text “Music Video”, “Music Compilation”, “Ringtone”, etc. Description of Digital Sales
qty INT Signed Quantity
ppd DECIMAL 25,15 Published Price to Dealers
ppu DECIMAL 25,15 Net revenue per unit
sales_date Date yyyy-mm-dd Sales Date (alternatively: End of Sales Month)
import_format Text “Bundle”, “Track”, “CD”, “LP”, “T-Shirt”, “Video”, “Box” Item Format
channel Text “d” for digital, “p” for physical, “n” for neighboring rights/performance Sales Channel
mechanical_pu DECIMAL 25,15 Cost per unit for mechanicals


Import Frequency

Sales Imports are usually performed monthly. However, weekly or daily imports are also possible depending on your needs. For example, one use case involves daily sales imports plus additional credit notes as needed.


Overwriting Previous Imports

New imports do not overwrite previous imports for the same month. Instead, each new import adds to the existing data for that month.


Handling Foreign Currency Sales

Imports are usually for one account (shop, company).
For each account, you can set up multiple import settings for different currencies.
It is important that each import setting (=shared_key) must be in one currency.


Importing Physical Sales

  • Quantity: Returns should be represented as negative numbers. A signed INT can include negative values for returns.
  • Usage Type: For physical sales, usage_type can be left empty or marked as ‘physical’. The documentation mainly mentions Promo, Downloads, and Streams.
  • Import Format: Use appropriate format descriptions like “LP,” “Box,” or “12”. Ideally, use the same format names as those in the details. If an unrecognized format is imported, the user will need to assign a format.
  • Channel: For physical sales, the value for the channel field should be “p”.


Test Environment Setup

If you need to test imports, we can set up a test shop (DSP/Platform) for you. Please contact us!

Note that unknown stores are not automatically set up and will be ignored.


Making API Requests

Important Notes

  1. POST Requests: Ensure that the POST requests are made with multipart/form-data content type. This is crucial for file uploads.

  2. Trailing Slash: The API endpoint should not have a trailing slash.
    In other words, use https://api.berlin3.com/api/clientID instead of
    https://api.berlin3.com/api/clientID/.

Example Usage with cURL

To make a POST request with file upload, use the following cURL command:

curl -X POST "https://api.berlin3.com/api/<client_id>/" 
-F "api_key=<api_key>"
-F "shared_key=<shared_key>"
-F "action=add_sales"
-F "year=2024"
-F "month=03"
-F "currency=EUR"
-F "description=TestImport"
-F "file=@path/to/detailsSampleData.json"


Sample JSON File

[
{
"identifier": "DEAK123456",
"identifier_product": "0123454712872",
"artist": "Superaki",
"title": "Paris Moskau (Strom Mix)",
"catalog_no": "Det Rec 002",
"country": "FR",
"shop": "iTunes",
"usage_type": "DL",
"usage_type_description": "Full Price Download",
"qty": 112,
"ppu": 0.53,
"ppd": 0.70,
"sales_date": "2018-11-30",
"import_format": "Track",
"channel": "d",
"mechanical_pu": 0.12345
}
]


API Response

The API returns an object with the following fields:

  • success: Always 1 when the call succeeds.
  • error: Contains a value if there is an error (e.g., period_already_id, shared_key_unknown, Invalid Request, Auth Failed).


Sample Response

{"success":"1","error":""}