Order Types Explained

Every order you create in details carries an Order Type — and it’s the single most important setting on the order. This article explains what an Order Type actually does, so you can pick the right one with confidence.

► Overview

The Order Type controls one business event: what happens to stock, and whether an invoice gets created. Two roles matter here — the Account, who’s receiving the goods (a shop, a distributor, or one of your own warehouses), and the Stock Account, where the goods are coming from (usually your own warehouse). Every Order Type answers two questions at once: does stock move, and if so from where to where — and does it produce an invoice?

► Where to Find This

You choose the Order Type in the “Type” dropdown when creating an order (see our article on creating a new order), under Distribution → Orders. You can see it afterwards in the order’s header, alongside the account and stock account.

[Screenshot: Type dropdown in the New Order pop-up]

► How It Works

Order types fall into two broad groups:

  • On account — Invoice Order, Return Credit Note, Defects Note, and Price Adjustment. These handle both the money and the stock quantity together: once goods move under one of these types, they’re sold to and owned by the recipient.
  • Commission — Consignment, Consignment Return, Defects Consignment, and Invoice Consignment. These track quantity only, until a later invoice settles it. The stock has physically moved, but it isn’t owned or billed to the recipient yet — think of it as being on loan.

Two types sit outside both groups: Promo Order (stock goes out for promotional use — press, in-store — with no invoice) and Return to Vendor (returning goods to your own supplier, e.g. in case of overstock — moves stock, but isn’t invoiced or tracked as consignment).

[Image: “On Account” vs “Commission” diagram — see attached on-account-vs-commission.png]

► Step-by-Step

A quick way to land on the right type:

  1. Selling goods that change ownership right away and need an invoice? Use Invoice Order.
  2. Crediting a return? Use Return Credit Note if the goods physically come back, or Defects Note if you’re crediting defective goods with no return.
  3. Sending goods to a shop or distributor to sell on your behalf, without invoicing yet? Use Consignment.
  4. Getting unsold consignment stock back? Use Consignment Return. Once it’s actually sold and you invoice for it, use Invoice Consignment.
  5. Sending stock out for promotional use (press, in-store)? Use Promo Order.
  6. Writing off faulty consignment goods that won’t be returned or credited? Use Defects Consignment.
  7. Correcting a price without moving any stock? Use Price Adjustment.
  8. Returning goods to your own supplier, e.g. overstock? Use Return to Vendor.

► Tips / Notes

  • Invoice Order – a standard sale: stock goes out, an invoice is created.
  • Consignment – a consignment delivery: stock goes out, no invoice yet.
  • Return Credit Note – a credit note after a physical return: stock comes back in.
  • Consignment Return – unsold consignment stock coming back: no invoice.
  • Promo Order – a promotional shipment (in-store, press): no invoice.
  • Defects Note – a credit note for defective goods, no return needed.
  • Defects Consignment – defective consignment goods, written off with no credit note.
  • Price Adjustment – a price correction: no stock movement.
  • Invoice Consignment – invoicing consignment goods once they’ve sold.
  • Return to Vendor – returning stock to your supplier: no invoice.

Not sure which type fits your situation? Get in touch with support and we’ll help you pick the right one.
How to Create a New Order

There are two ways to manage sales or returns in details. Digital sales, streaming and performance income, and licences are handled by importing files under Distribution → Imports (or, for licences, in the Licencing module). Physical products and merchandise can be imported this way too — but when you’re taking an order yourself rather than importing a sales file, that’s handled by creating an order under Distribution → Orders, which is what this article is about.

Use Orders whenever you’re actually taking an order for something with a price, usually stock, and a place to ship from and to. Services work the same way, just without the shipping part.

Note that Orders covers sales to your customers. If you’re the one ordering physical products or merchandise — for example from a manufacturer or supplier — that’s handled separately, under Distribution → Supplier Orders.

► Overview

An order links an account (who it’s going to) with a stock account (where the goods come from), and carries everything needed to get products packed, shipped, and — if needed — invoiced. Most of the setup happens automatically once you’ve picked the right account and order type, since pricing, currency and address details are pulled in for you.

► Where to Find This

There are two equally valid ways to start an order:

  • Go to Distribution → Orders and click the (+) icon.
  • Or open the account directly under Distribution → Accounts, go to its “ALL ORDERS” tab, and click “+ Add New Order”.

Both open the same “New Order” pop-up — starting from the account page just pre-fills the account for you.

[Screenshot: Distribution → Orders overview with the (+) icon highlighted]

► How It Works

In the pop-up, you fill in:

  • Account – who the order is going to (not needed if you started from the account page).
  • Stock Account – where the stock comes from, usually your own warehouse.
  • Customer ref – an optional reference, for example a PO number.
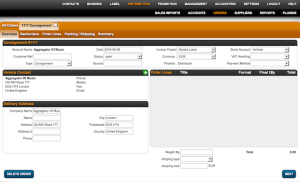
  • Type – the order type. Choose “Invoice Order” for a standard sale that needs to be invoiced. See our separate article on order types for the full picture.

[Screenshot: New Order pop-up with Account, Stock Account, customer ref and Type fields]

Once you click “Add Orders”, the order opens up with the account’s pricing, currency and address details already filled in. Before adding products, it’s worth setting VAT handling, payment method, shipping date, and — if needed — a whole-order discount percentage.

Context: Prices fill in automatically when a product is linked to a price code and the account has a matching price list. This keeps pricing consistent without a manual lookup on every order.

► Step-by-Step

  1. Start the order — either via Distribution → Orders → (+), or from the account’s “ALL ORDERS” tab.
  2. Fill in Account (if applicable), Stock Account, customer ref, and Type, then confirm.
  3. Set VAT handling, payment method and shipping date, and add a whole-order discount if needed.
  4. Check the Backorders tab for any outstanding items for this account, and pull them into the order if relevant.
  5. Go to the Order Lines tab and click “+ Add New Order Lines” to search for and add products — including promo or free-of-charge quantities if needed. For long lists, use “XLS Import” instead.
  6. Prices fill in automatically where possible; enter them manually if not. Add per-line discounts if needed.
  7. On the Packaging/Shipping tab, run “Auto Backorder” for anything short, set the Pack Status (reserved, then packed), and fill in weight, shipping method and costs.
  8. Generate any documents you need (order confirmation, proforma invoice, etc.) via the “Documents” button.
  9. Review the Summary tab, tick “Ready to ship” if applicable, and click “Account” to complete the order.

[Screenshot: Order Lines tab with the “+ Add New Order Lines” search pop-up]

► Tips / Notes

  • What happens when you click “Account” depends on the order Type you picked at the start — it can automatically create an invoice, a credit note, or neither.
  • Once an order is completed, you can only edit it again if its invoice is cancelled first — then use “Reopen”.
  • Double-check the account and its products beforehand: order details are pulled in automatically at creation and can’t be moved to a different account afterwards.

How To: Physical, Supplier & Consignment Orders

In details, you can handle physical stock movements both from suppliers and to distribution partners using Supplier Orders, Consignment Orders, and Physical Orders. These workflows ensure that inventory, accounting, and royalty processes remain aligned across all steps.

► Creating a Physical Order

Physical Orders represent the standard distribution workflow shipping products from your stock to clients, shops, or partners.

  1. Go to DISTRIBUTION / ORDERS and click [+] to create a new order.
  2. Select the DISTRIBUTION ACCOUNT, STOCK ACCOUNT, and ORDER TYPE (e.g., Invoice Order, Consignment).
  3. In the subtab OVERVIEW, set general parameters such as Currency, VAT Handling, and Payment Method.
  4. Proceed to BACKORDERS to auto-select or manually add any open backorders for this account.
  5. Continue to ORDER LINES and click [+] to add all items and quantities to the order. Adjust prices or discounts as needed.
  6. In PACKING / SHIPPING, check available stock, enter total weight, select a shipping type, and add costs if applicable.
  7. Finally, review the SUMMARY tab. If all details are correct, click [ACCOUNT] to confirm and process the stock movement.

Once accounted, stock movements are executed, invoices are generated (if applicable), and backorders are updated automatically.

► Creating a Supplier Order

Supplier Orders are used to stock up on physical products for example, when a label or pressing plant delivers finished goods to your warehouse.

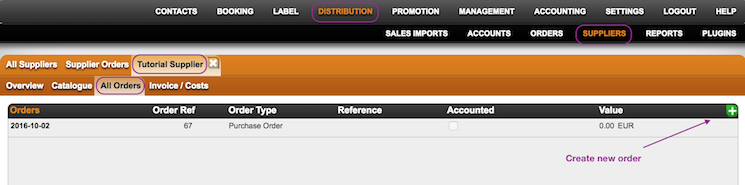
  1. Go to DISTRIBUTION / SUPPLIERS and select the supplier account from the list.
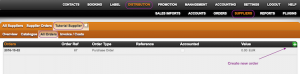
  2. Open the subtab ALL ORDERS and click [+] to create a new order.
  3. Select an Order Type (Manufacturing, Invoice, or Consignment).
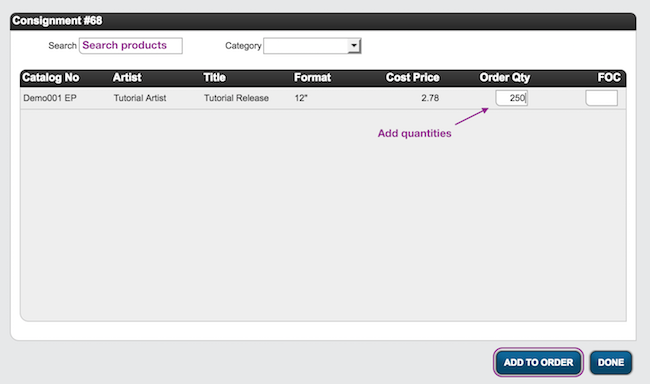
  4. Add the Products and specify the quantities to be received.
  5. Confirm with [OK] to create the order.

Once accounted, the stock levels in PRODUCTS / STOCK will automatically update. If changes are needed later, click [REOPEN] to reverse stock movements, adjust, and then [FINISH ORDER] again.

► Creating a Consignment Order

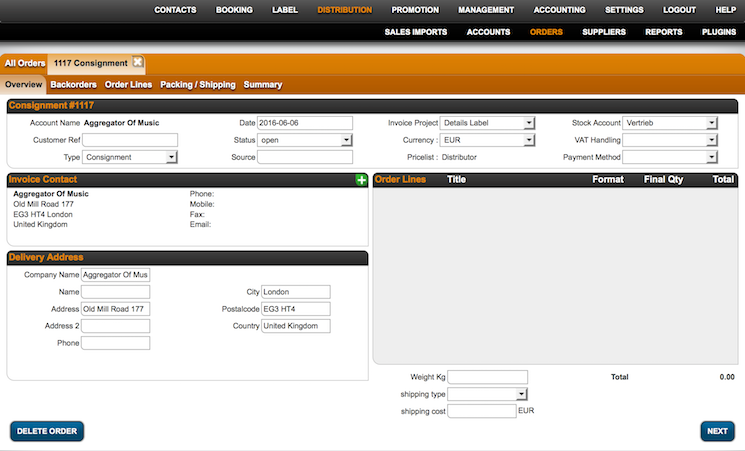
Consignment Orders allow you to manage goods that remain your property but are stored at another location typically a partner label or retailer.

  1. Go to DISTRIBUTION / SUPPLIERS and choose the relevant supplier account.
  2. On the subtab ALL ORDERS, click [+] and select Order Type: Consignment.
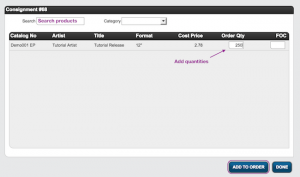
  3. Add the products and enter the quantity for each one.
  4. Assign the DISTRIBUTION ACCOUNT where the goods will be delivered.
  5. Confirm with [OK].

Once the goods are shipped, click [ACCOUNT] to finalize. The delivery will update stock levels and trigger the corresponding royalty logic for the supplier.

► Handling Returns & Reopening Orders

Returns and adjustments are part of regular warehouse workflows. When a return or correction is required:

  • Click [REOPEN] on an accounted order to undo the stock movement.
  • Adjust quantities, products, or order type as needed.
  • Click [FINISH ORDER] to process the updated movement again.

For returned consignment goods, use the Return Consignment order type to move goods back into your stock account.

► Automating Royalty & Supplier Accounting

Each accounted Supplier or Consignment Order automatically creates the financial base for royalty settlements with suppliers or partner labels.

  • Delivered stock from a Supplier Order is registered as incoming goods and triggers a payable in ACCOUNTING / COSTS.
  • Delivered stock from a Consignment Order is tracked for royalty statements and will later appear in ROYALTY / RECOUPABLES.
  • Accounted Physical Orders generate outgoing invoices and reduce warehouse stock automatically.

This automation ensures that physical stock movements always align with their financial implications without additional manual entry.

Using Physical, Supplier, and Consignment Orders efficiently helps maintain clean stock control and transparent financial reporting while minimizing manual adjustments.

How To: Physical, Supplier & Consignment Orders

In details, you can handle physical stock movements both from suppliers and to distribution partners using Supplier Orders, Consignment Orders, and Physical Orders. These workflows ensure that inventory, accounting, and royalty processes remain aligned across all steps.

► Creating a Physical Order

Physical Orders represent the standard distribution workflow shipping products from your stock to clients, shops, or partners.

  1. Go to DISTRIBUTION / ORDERS and click [+] to create a new order.
  2. Select the DISTRIBUTION ACCOUNT, STOCK ACCOUNT, and ORDER TYPE (e.g., Invoice Order, Consignment).
  3. In the subtab OVERVIEW, set general parameters such as Currency, VAT Handling, and Payment Method.
  4. Proceed to BACKORDERS to auto-select or manually add any open backorders for this account.
  5. Continue to ORDER LINES and click [+] to add all items and quantities to the order. Adjust prices or discounts as needed.
  6. In PACKING / SHIPPING, check available stock, enter total weight, select a shipping type, and add costs if applicable.
  7. Finally, review the SUMMARY tab. If all details are correct, click [ACCOUNT] to confirm and process the stock movement.

Once accounted, stock movements are executed, invoices are generated (if applicable), and backorders are updated automatically.

► Creating a Supplier Order

Supplier Orders are used to stock up on physical products for example, when a label or pressing plant delivers finished goods to your warehouse.

  1. Go to DISTRIBUTION / SUPPLIERS and select the supplier account from the list.
  2. Open the subtab ALL ORDERS and click [+] to create a new order.
  3. Select an Order Type (Manufacturing, Invoice, or Consignment).
  4. Add the Products and specify the quantities to be received.
  5. Confirm with [OK] to create the order.

Once accounted, the stock levels in PRODUCTS / STOCK will automatically update. If changes are needed later, click [REOPEN] to reverse stock movements, adjust, and then [FINISH ORDER] again.

► Creating a Consignment Order

Consignment Orders allow you to manage goods that remain your property but are stored at another location typically a partner label or retailer.

  1. Go to DISTRIBUTION / SUPPLIERS and choose the relevant supplier account.
  2. On the subtab ALL ORDERS, click [+] and select Order Type: Consignment.
  3. Add the products and enter the quantity for each one.
  4. Assign the DISTRIBUTION ACCOUNT where the goods will be delivered.
  5. Confirm with [OK].

Once the goods are shipped, click [ACCOUNT] to finalize. The delivery will update stock levels and trigger the corresponding royalty logic for the supplier.

► Handling Returns & Reopening Orders

Returns and adjustments are part of regular warehouse workflows. When a return or correction is required:

  • Click [REOPEN] on an accounted order to undo the stock movement.
  • Adjust quantities, products, or order type as needed.
  • Click [FINISH ORDER] to process the updated movement again.

For returned consignment goods, use the Return Consignment order type to move goods back into your stock account.

► Automating Royalty & Supplier Accounting

Each accounted Supplier or Consignment Order automatically creates the financial base for royalty settlements with suppliers or partner labels.

  • Delivered stock from a Supplier Order is registered as incoming goods and triggers a payable in ACCOUNTING / COSTS.
  • Delivered stock from a Consignment Order is tracked for royalty statements and will later appear in ROYALTY / RECOUPABLES.
  • Accounted Physical Orders generate outgoing invoices and reduce warehouse stock automatically.

This automation ensures that physical stock movements always align with their financial implications without additional manual entry.

Using Physical, Supplier, and Consignment Orders efficiently helps maintain clean stock control and transparent financial reporting while minimizing manual adjustments.