Basic Actions: Artists

 EDIT ARTIST

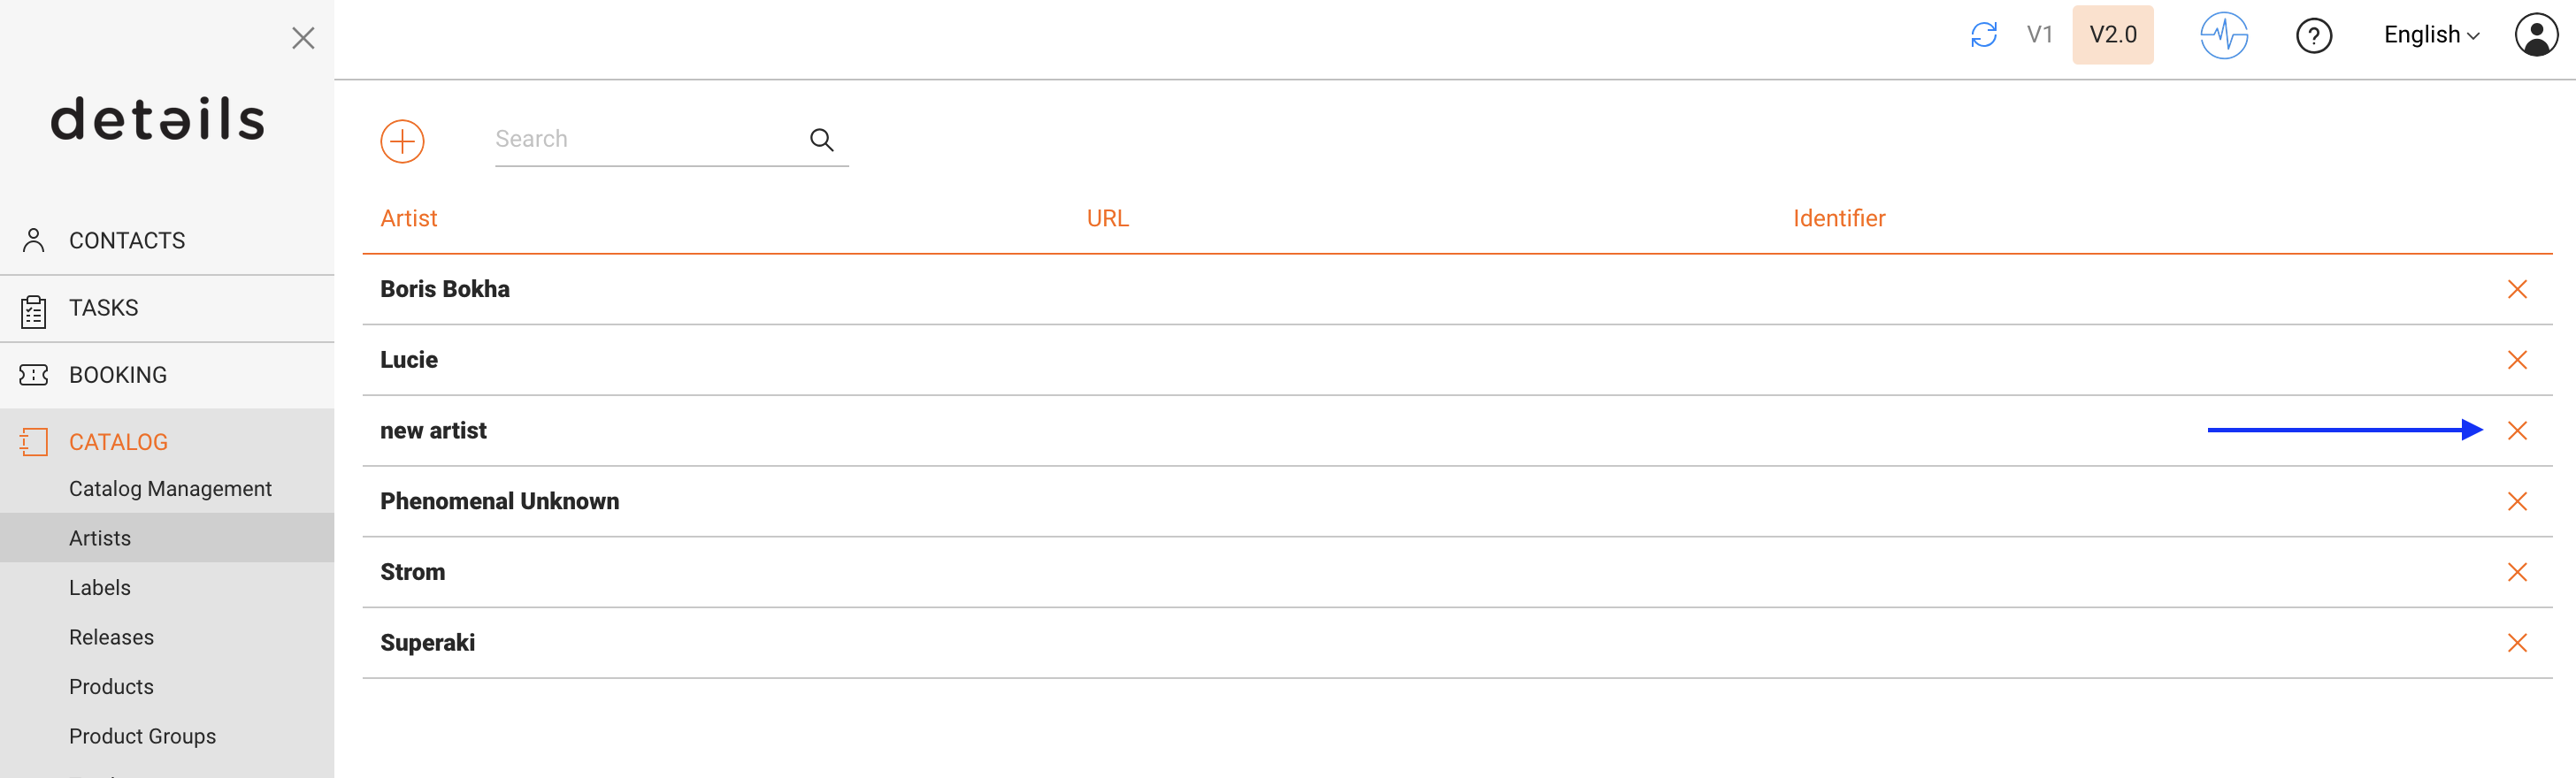
Click the artist s bold name to open the full artist interface and update any tab.

DELETE ARTIST

Click the [x] next to the artist s name in the list to remove the entry.

 LINK CONTACTS (MANAGERS & MORE)

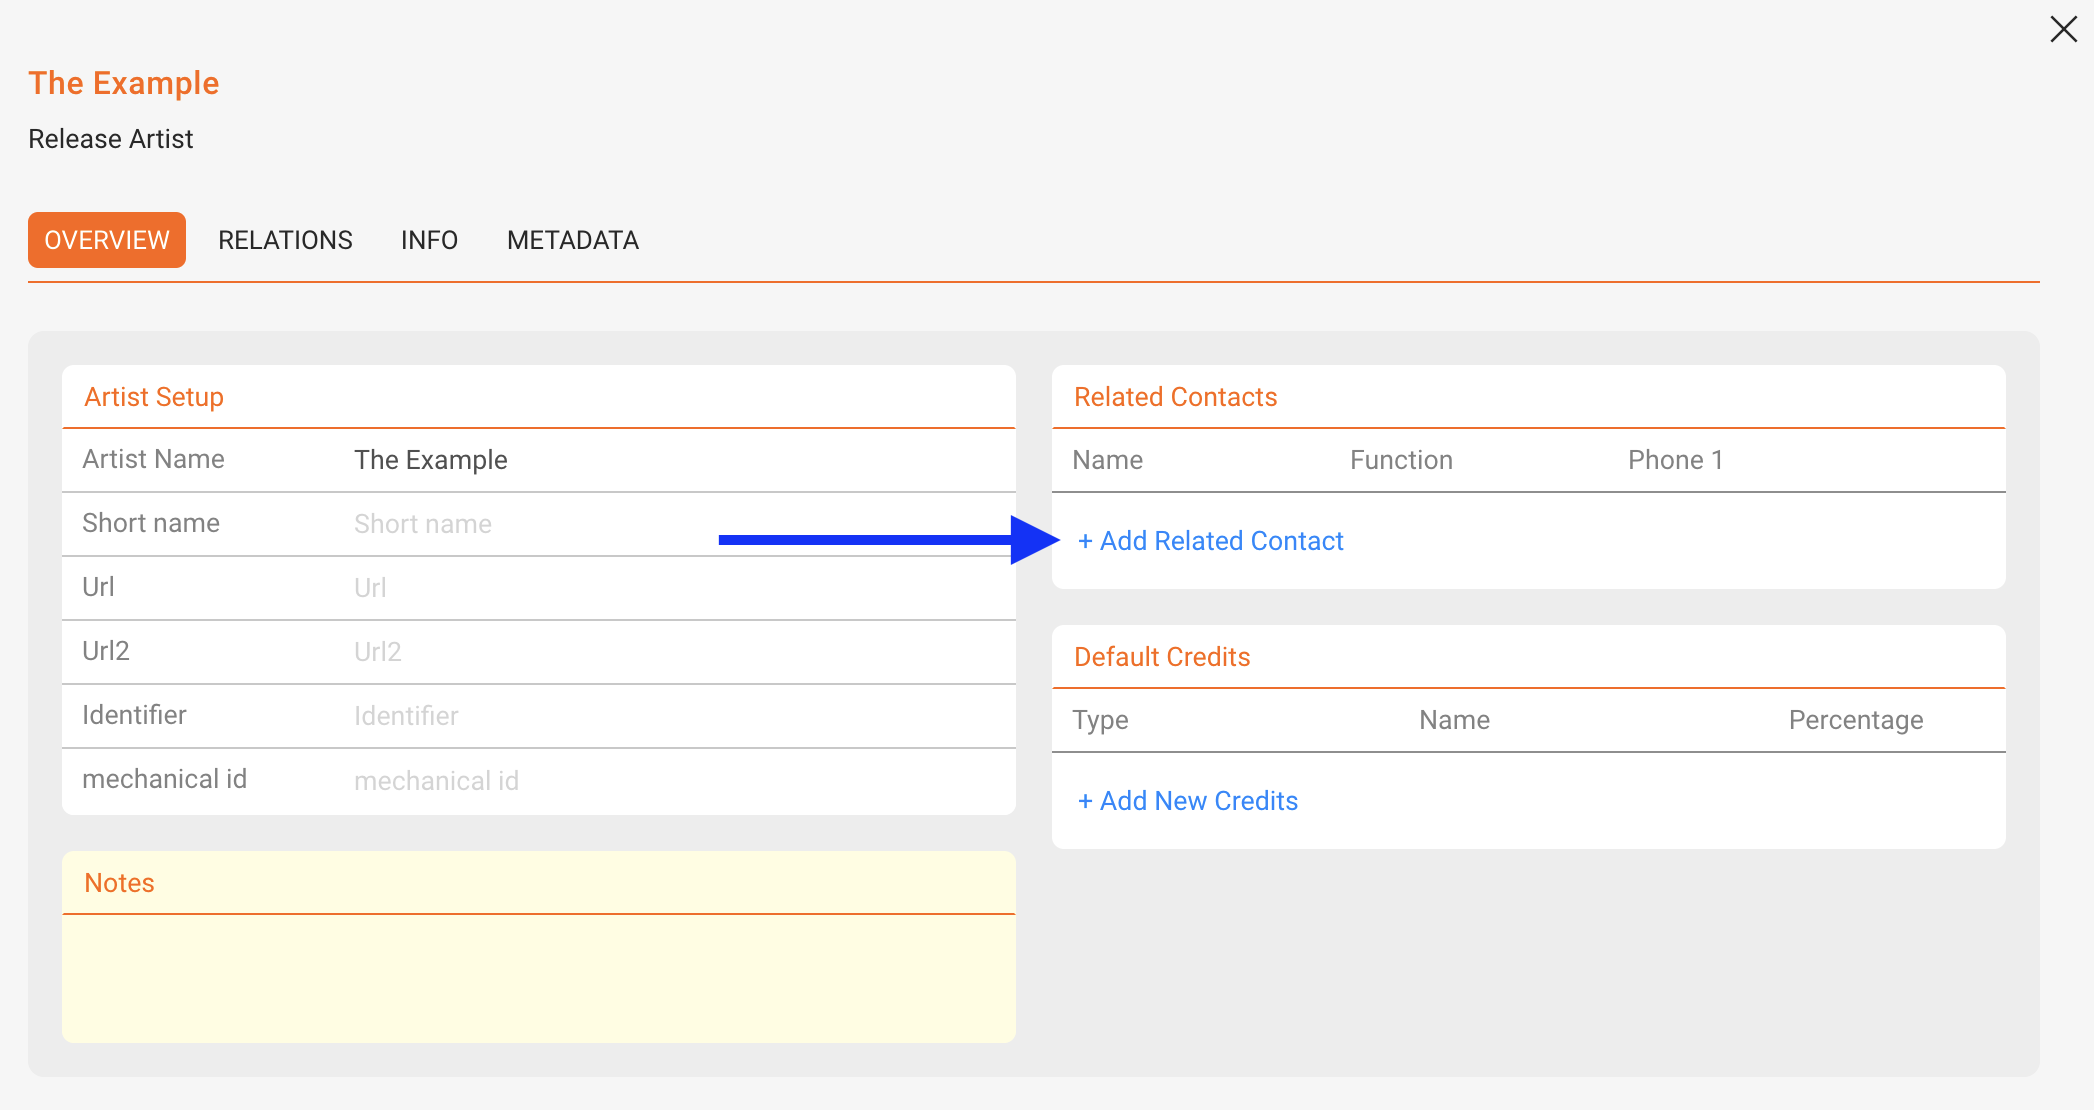
Open the artist, then link relevant contacts (e.g., managers) so your team can quickly find key people when working on releases or tasks.

 ADD RELEASE

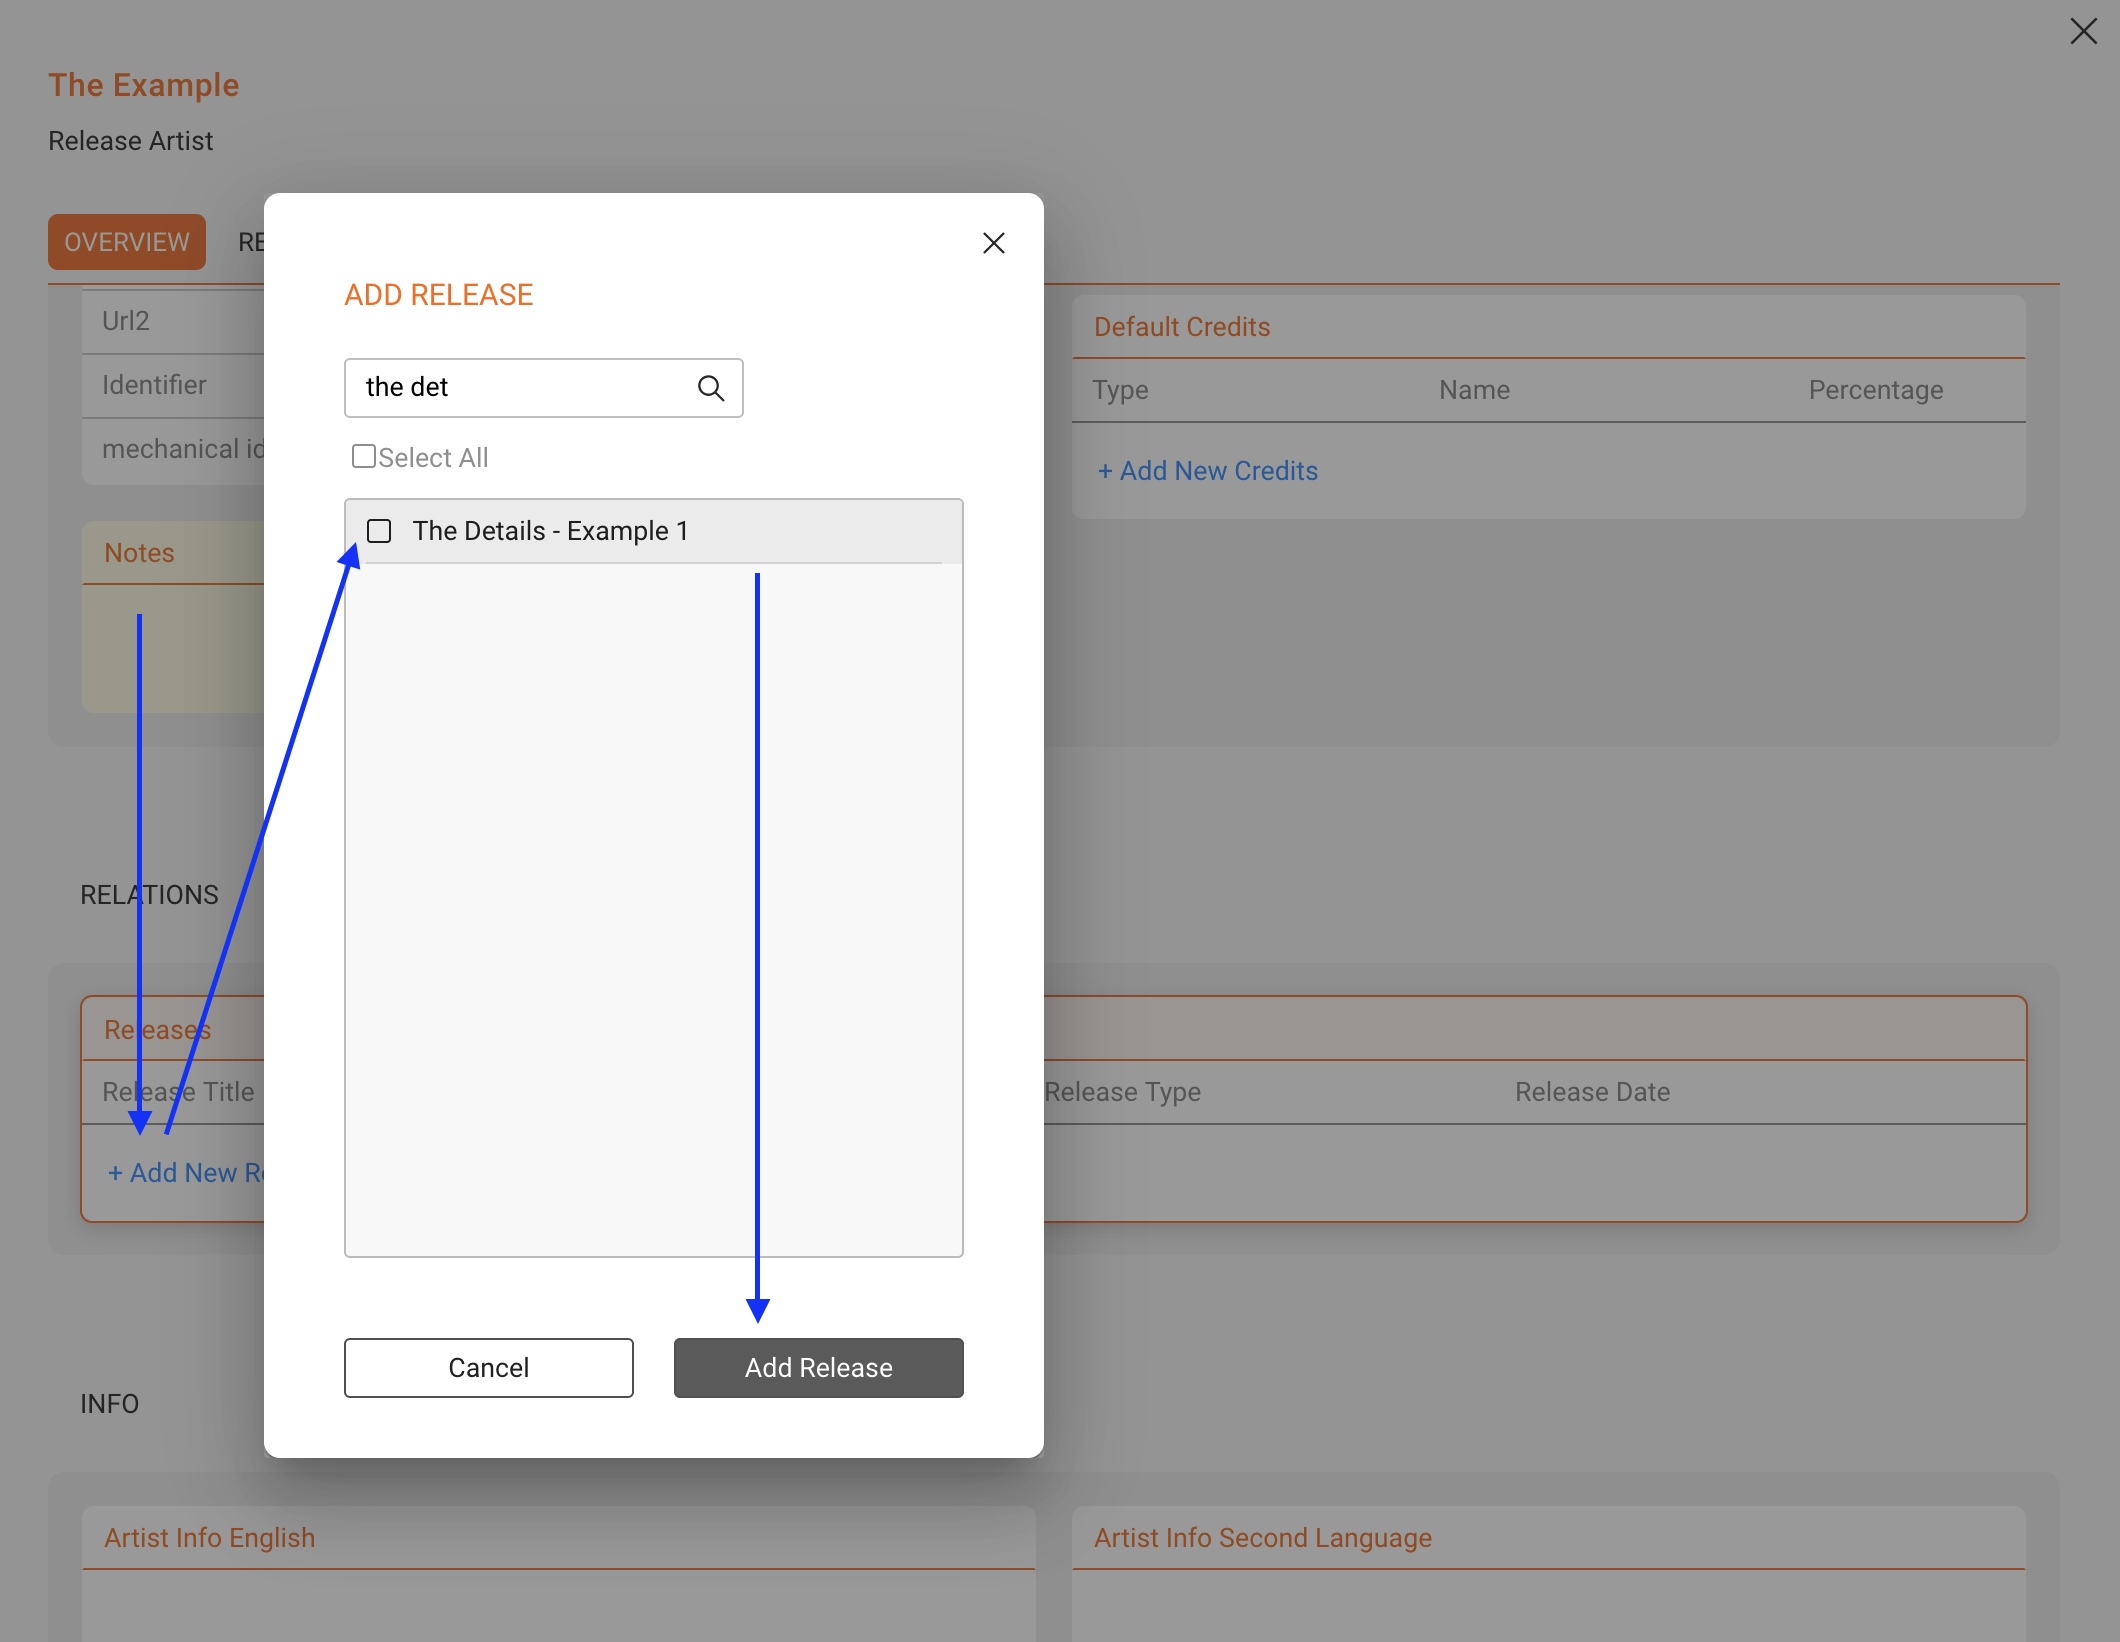
To create a discography view for better navigation you can link existing releases to the artists by clicking [+ Add New Release].


Note: Artists listed in CATALOG / ARTISTS represent your managed roster. They are not automatically matched with credits on RELEASES, PRODUCTS or TRACKS.

This section covers the basic actions you can perform in the CATALOG / ARTISTS list view in details.

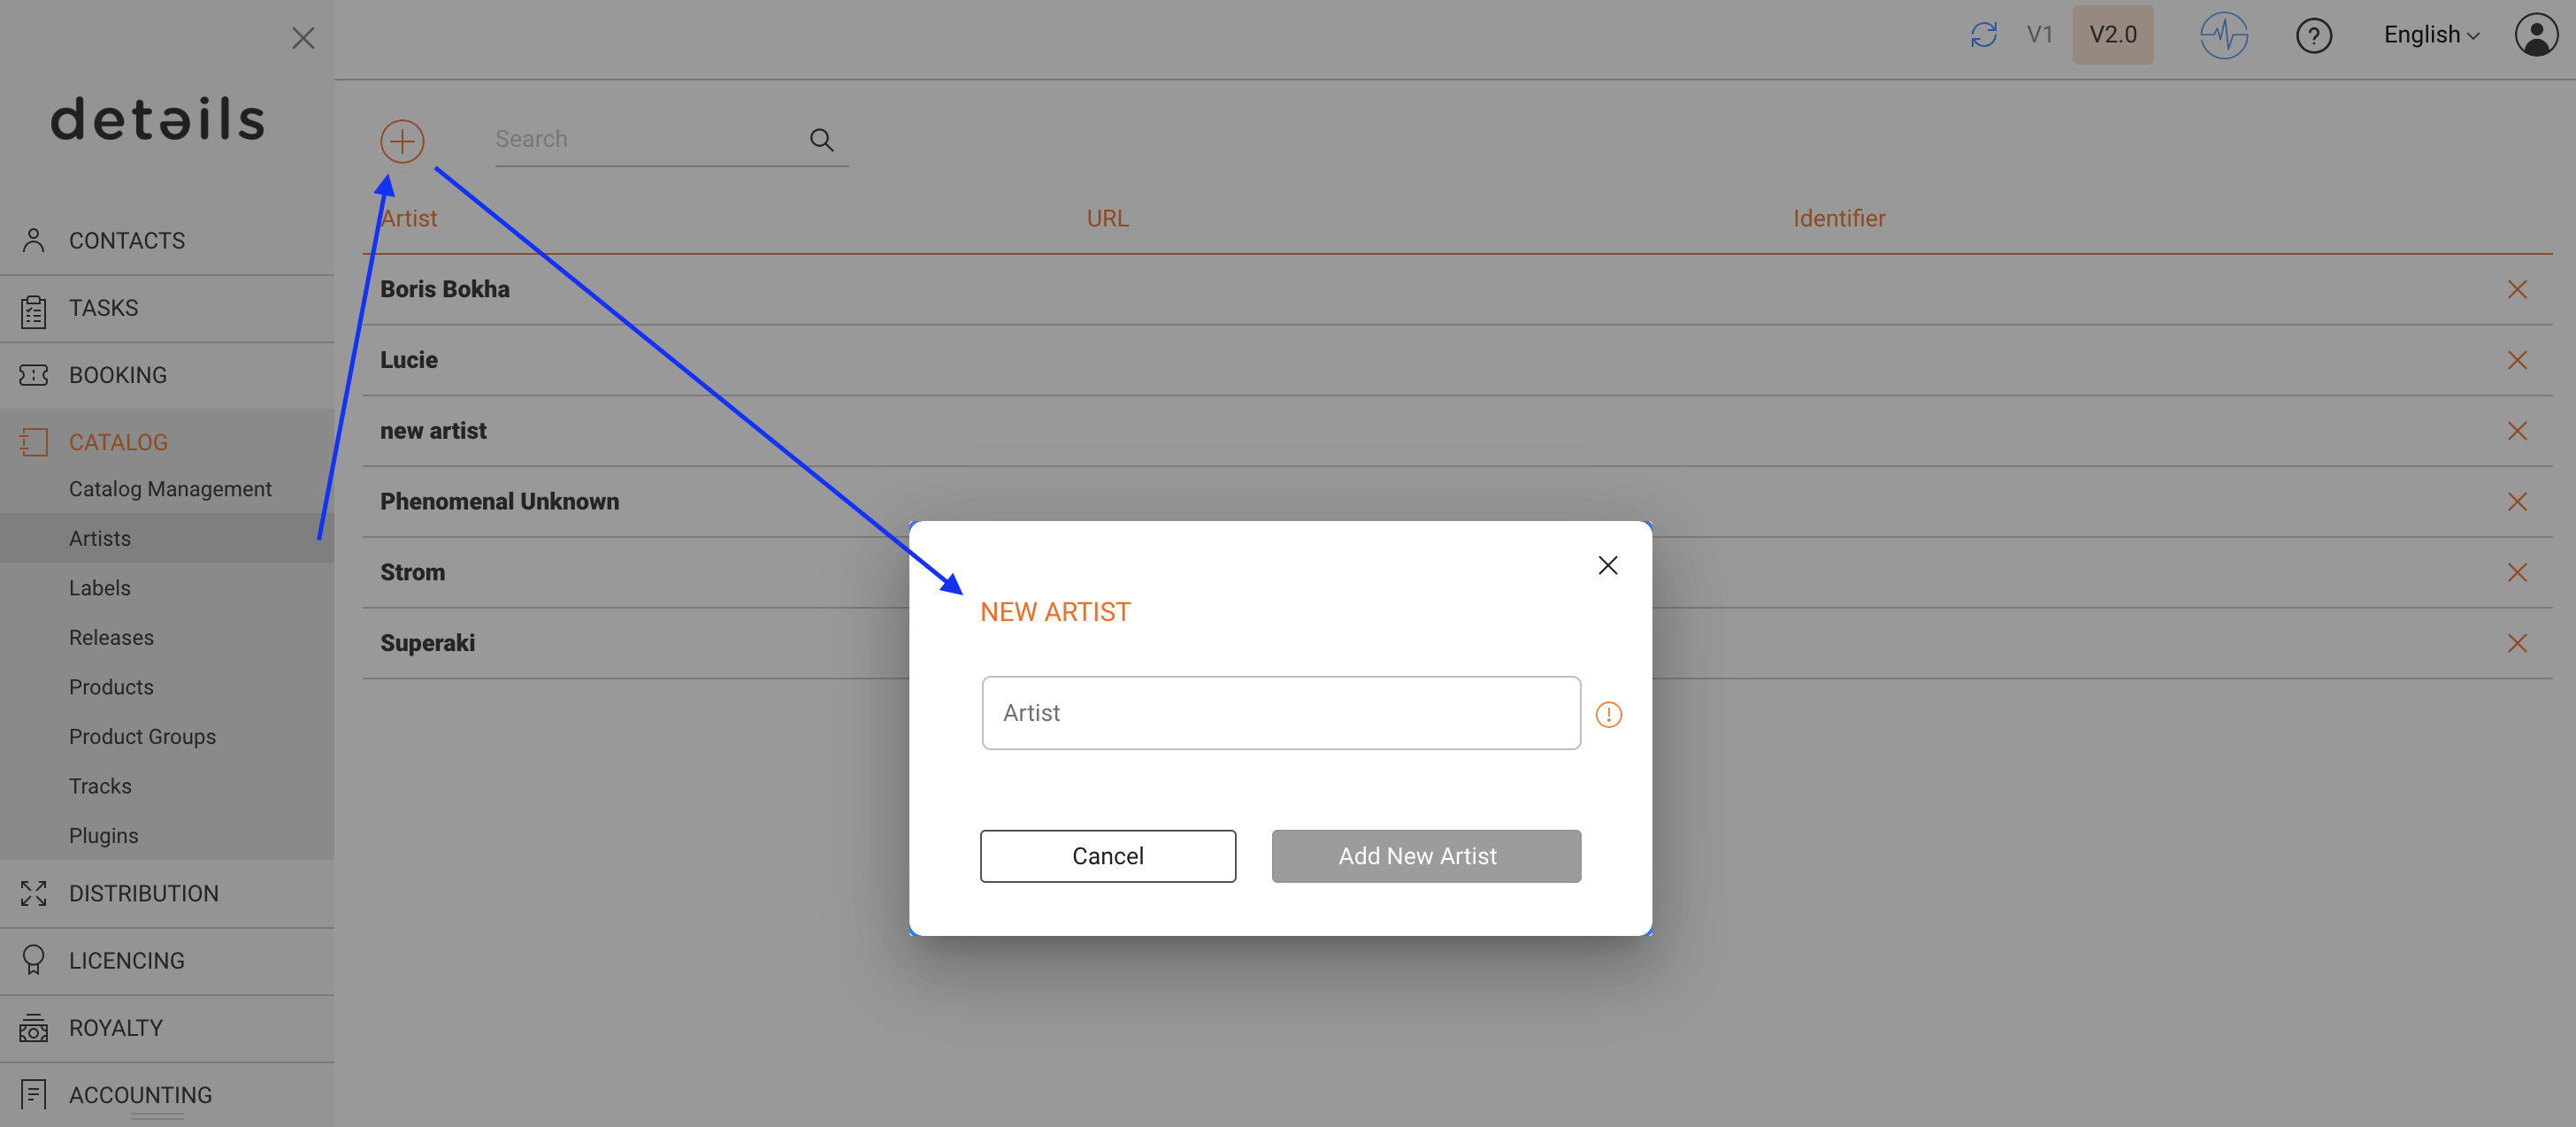
ADD NEW ARTIST

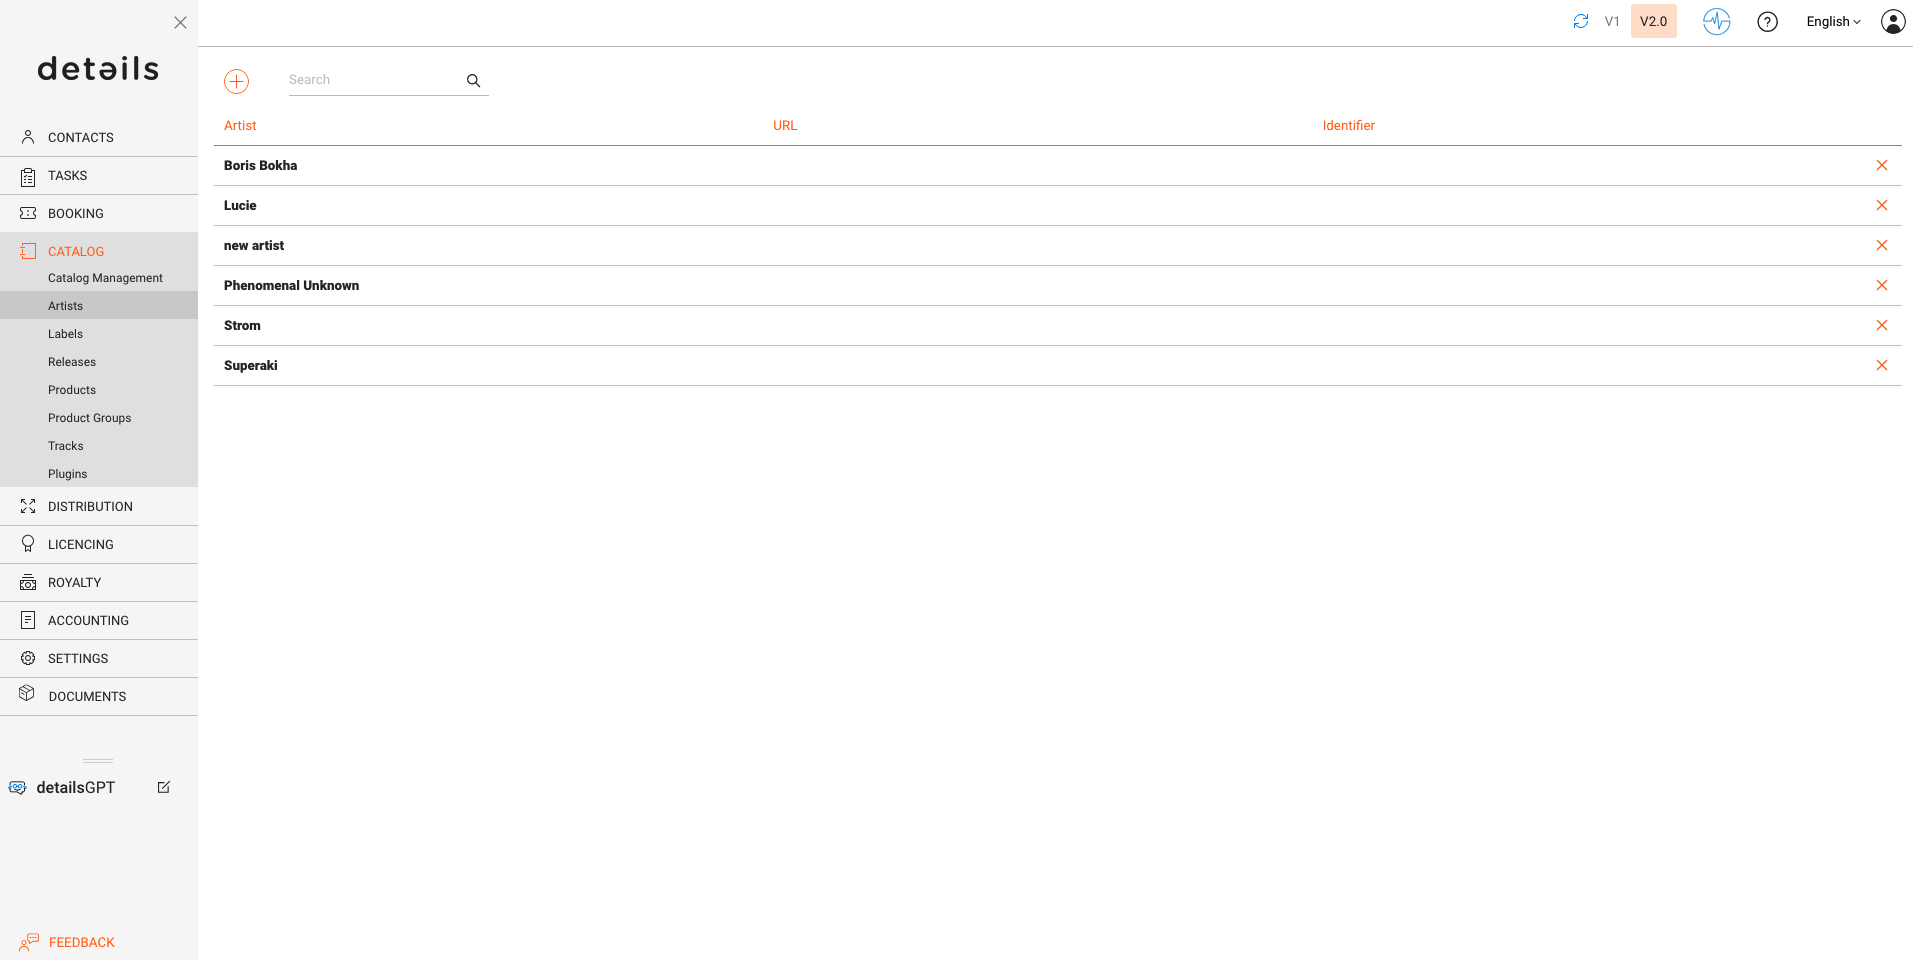
Click the [+] at the top left of the artist list and enter the required information.

 EDIT ARTIST

Click the artist s bold name to open the full artist interface and update any tab.

DELETE ARTIST

Click the [x] next to the artist s name in the list to remove the entry.

 LINK CONTACTS (MANAGERS & MORE)

Open the artist, then link relevant contacts (e.g., managers) so your team can quickly find key people when working on releases or tasks.

 ADD RELEASE

To create a discography view for better navigation you can link existing releases to the artists by clicking [+ Add New Release].


Note: Artists listed in CATALOG / ARTISTS represent your managed roster. They are not automatically matched with credits on RELEASES, PRODUCTS or TRACKS.

Artist Interface

In the CATALOG / ARTISTS section, you manage the artist roster of your catalog in details. This view focuses on your own label artists (you don t need to add external compilation-only contributors).

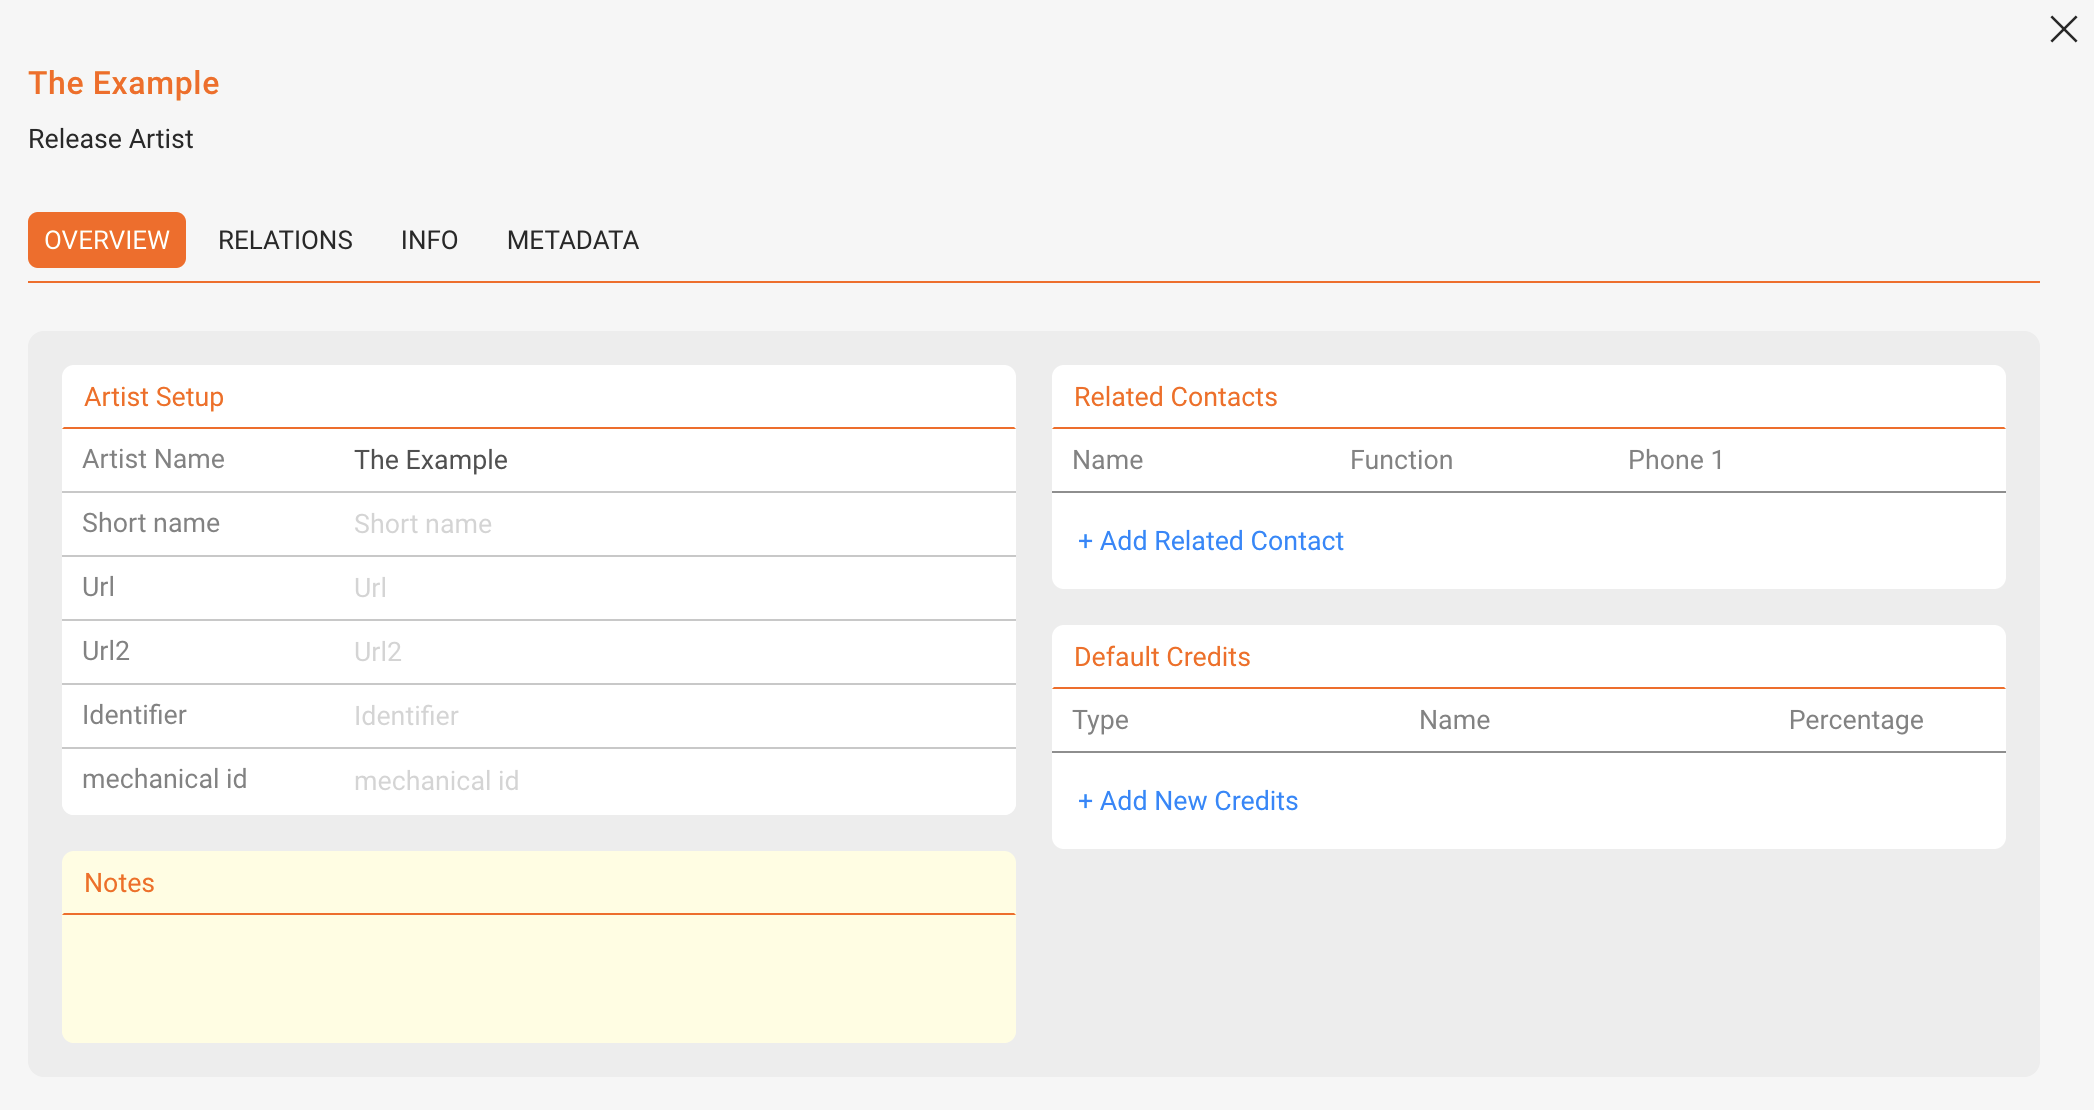
 OVERVIEW

Edit core artist data and manage helpful defaults and context for downstream work.

  • Artist Setup: Set Name and Short Name. Add Web URLs as needed.
    You have also the option to add an Identifier, e.g. the AMG ID.
    The Mechanical ID field allows you to store a registration ID.
  • Related Contacts: Link people like managers or other points of contact for quick reference and navigation.
  • Default Credits: Define typical roles (e.g., Composer, Writer, Publisher) you want to suggest when you later create tracks/releases for this artist.
  • Notes: Keep internal notes such as band members, live musicians, or role details you want your team to see.

Note: Default credits are conveniences for faster data entry; they don t change existing works automatically.


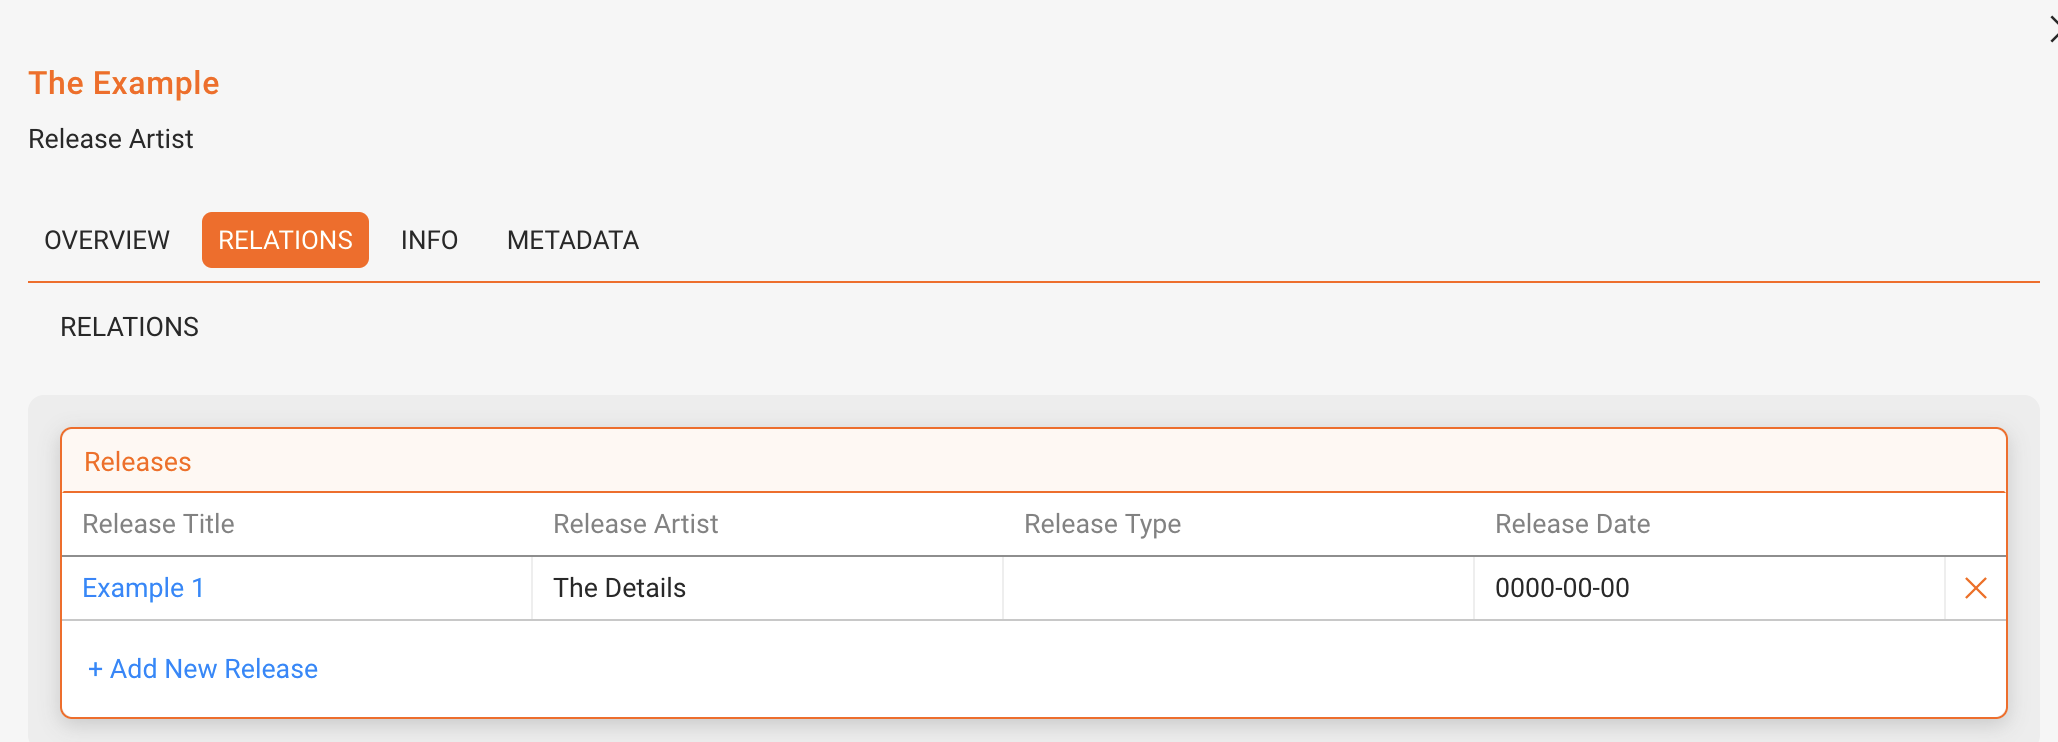
 RELATIONS

See and manage the releases linked to this artist. This creates a lightweight discography view and helps you navigate to related releases quickly.

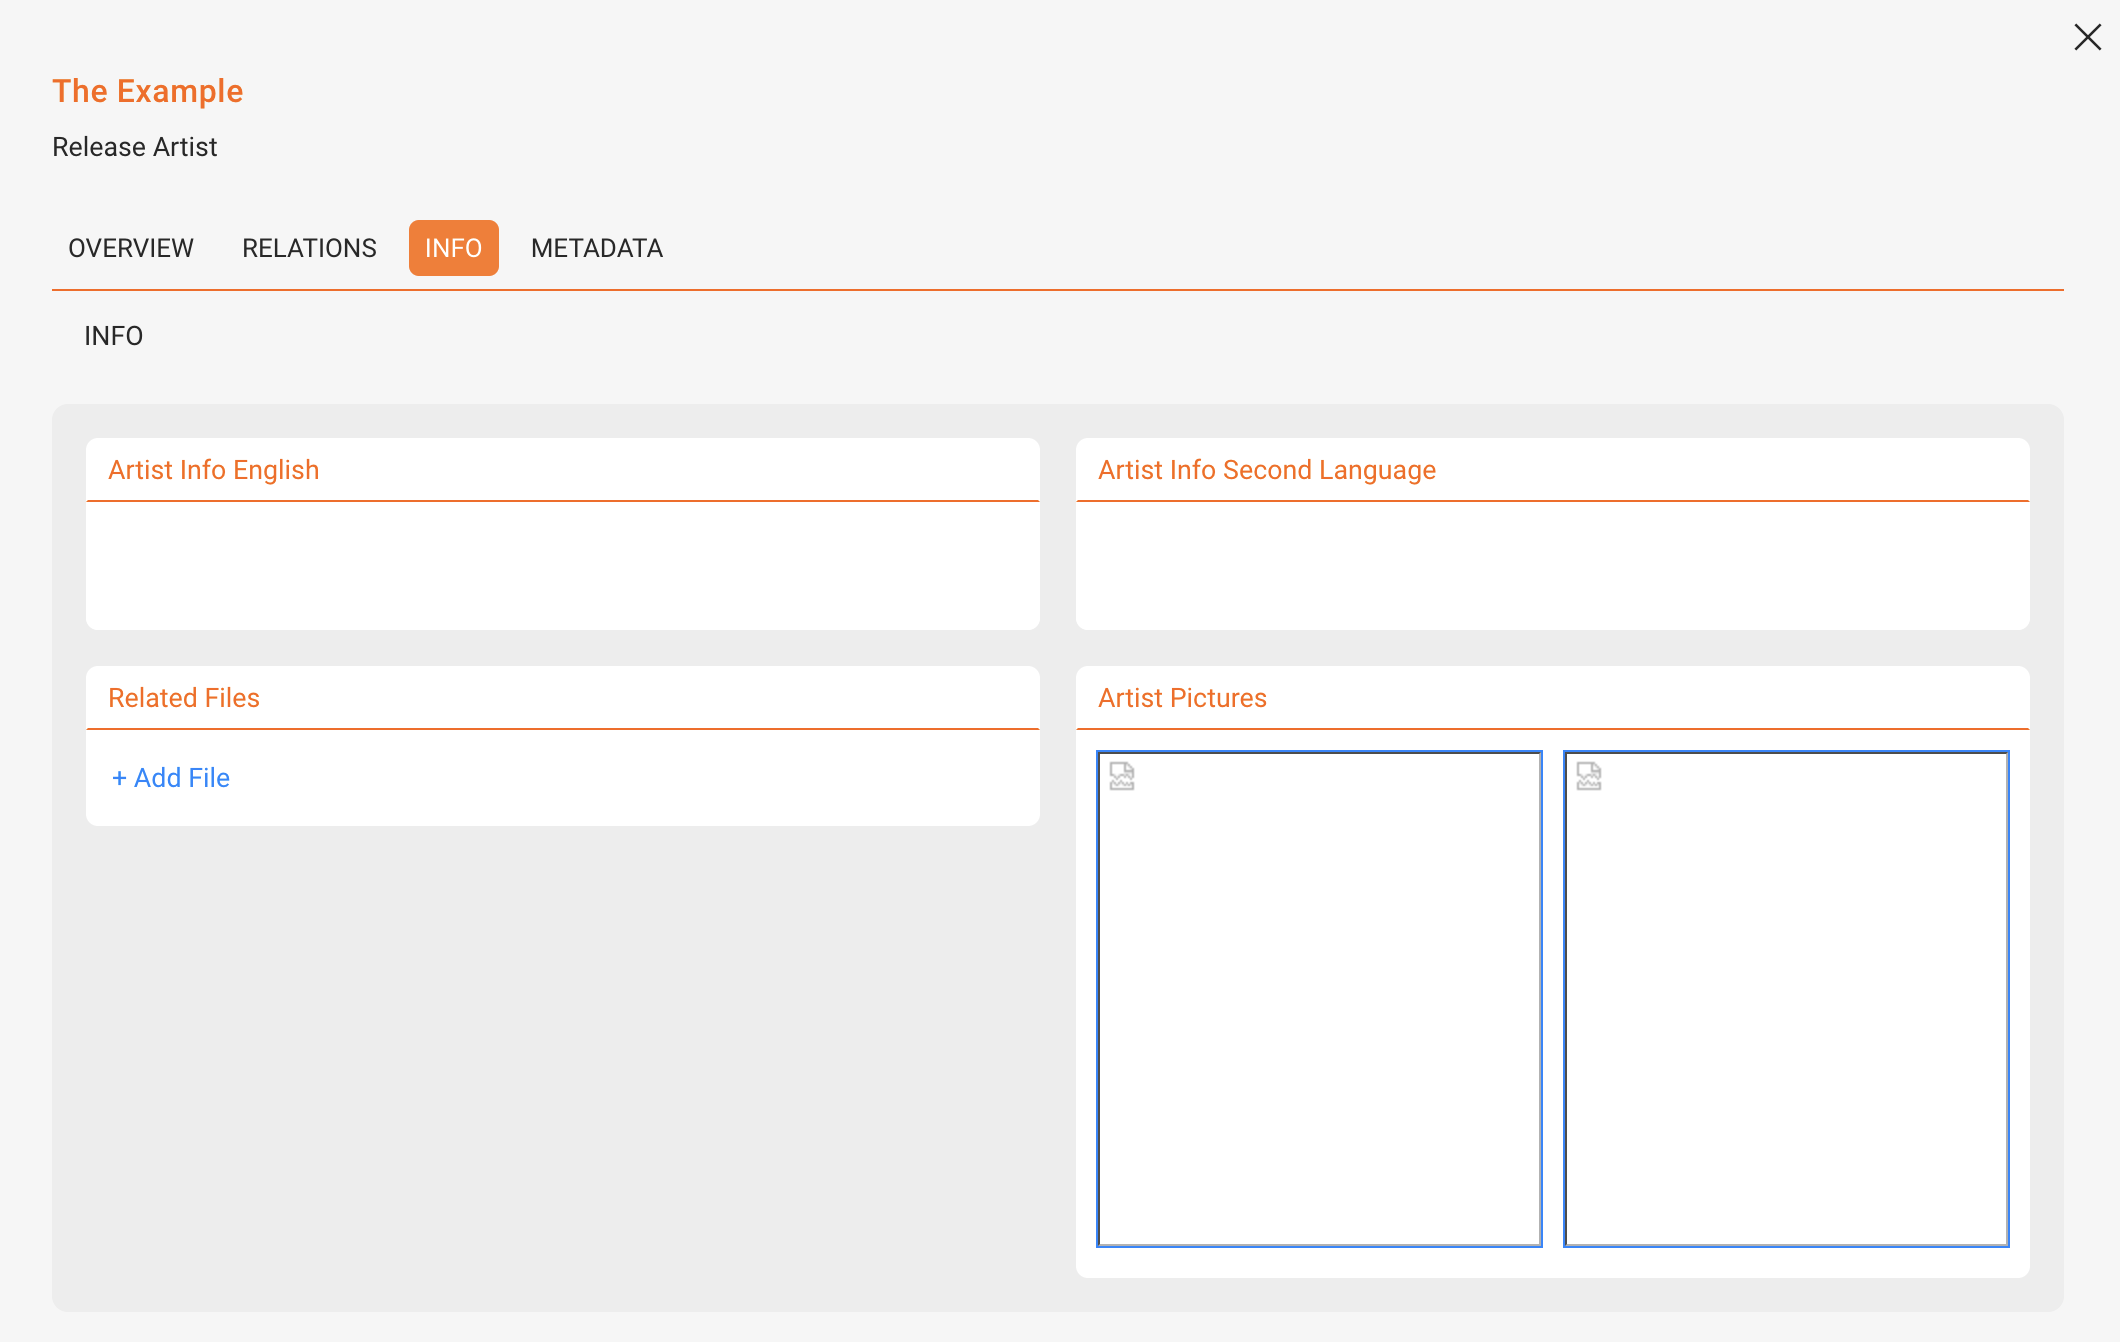
INFO

Store Biographies, upload Images, and attach Audio/Files that are relevant for your team s workflows.

 METADATA

Maintain distribution- and registration-relevant fields (e.g., Producing Country, SENA Country Number) required by certain collection societies or delivery contexts.

To activate metadata fields contact our team.

How the Catalog works in details

The Catalog is the foundation of repertoire management in details. It combines a music-specific track layer with a flexible product model that can represent physical items, digital goods, merchandise, tickets, and services.

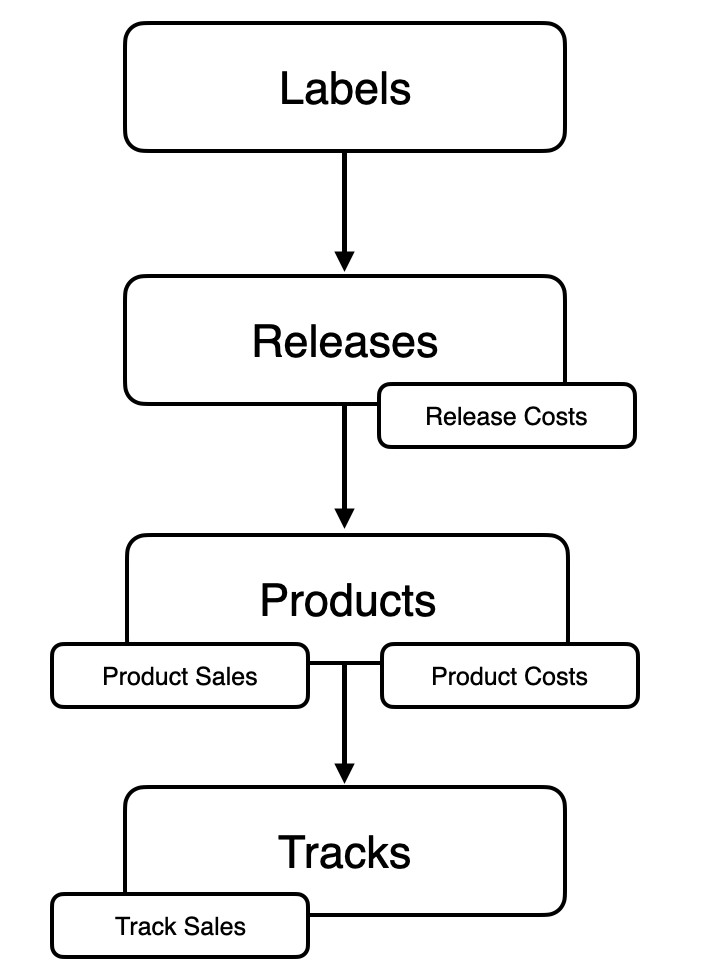
Key idea: Sales happen on Products and Tracks. Releases compile results with costs.

Four levels

  1. Labels – Top-level containers grouping releases.
  2. Releases – Organize products and tracks (albums, EPs, etc.).
  3. Products – Sellable items (physical, digital, merch, services).
  4. Tracks – Individual recordings for granular accounting.

Because details is product-agnostic, you can model anything you can sell.

Where sales happen

  • Product sales – money exchanged for products
  • Track sales – money exchanged for tracks

Releases are not sold; they aggregate results.

Where costs live

  • Release costs – artwork, promo, video
  • Product costs – manufacturing, packaging, etc.

Entry modes

  • Manual entry
  • Spreadsheet import
  • Auto-Ingestion

Auto-Ingestion channels

  • Webshops, Bandcamp, iTunes, Amazon
  • details-to-details automated transfers

Booking Dashboard

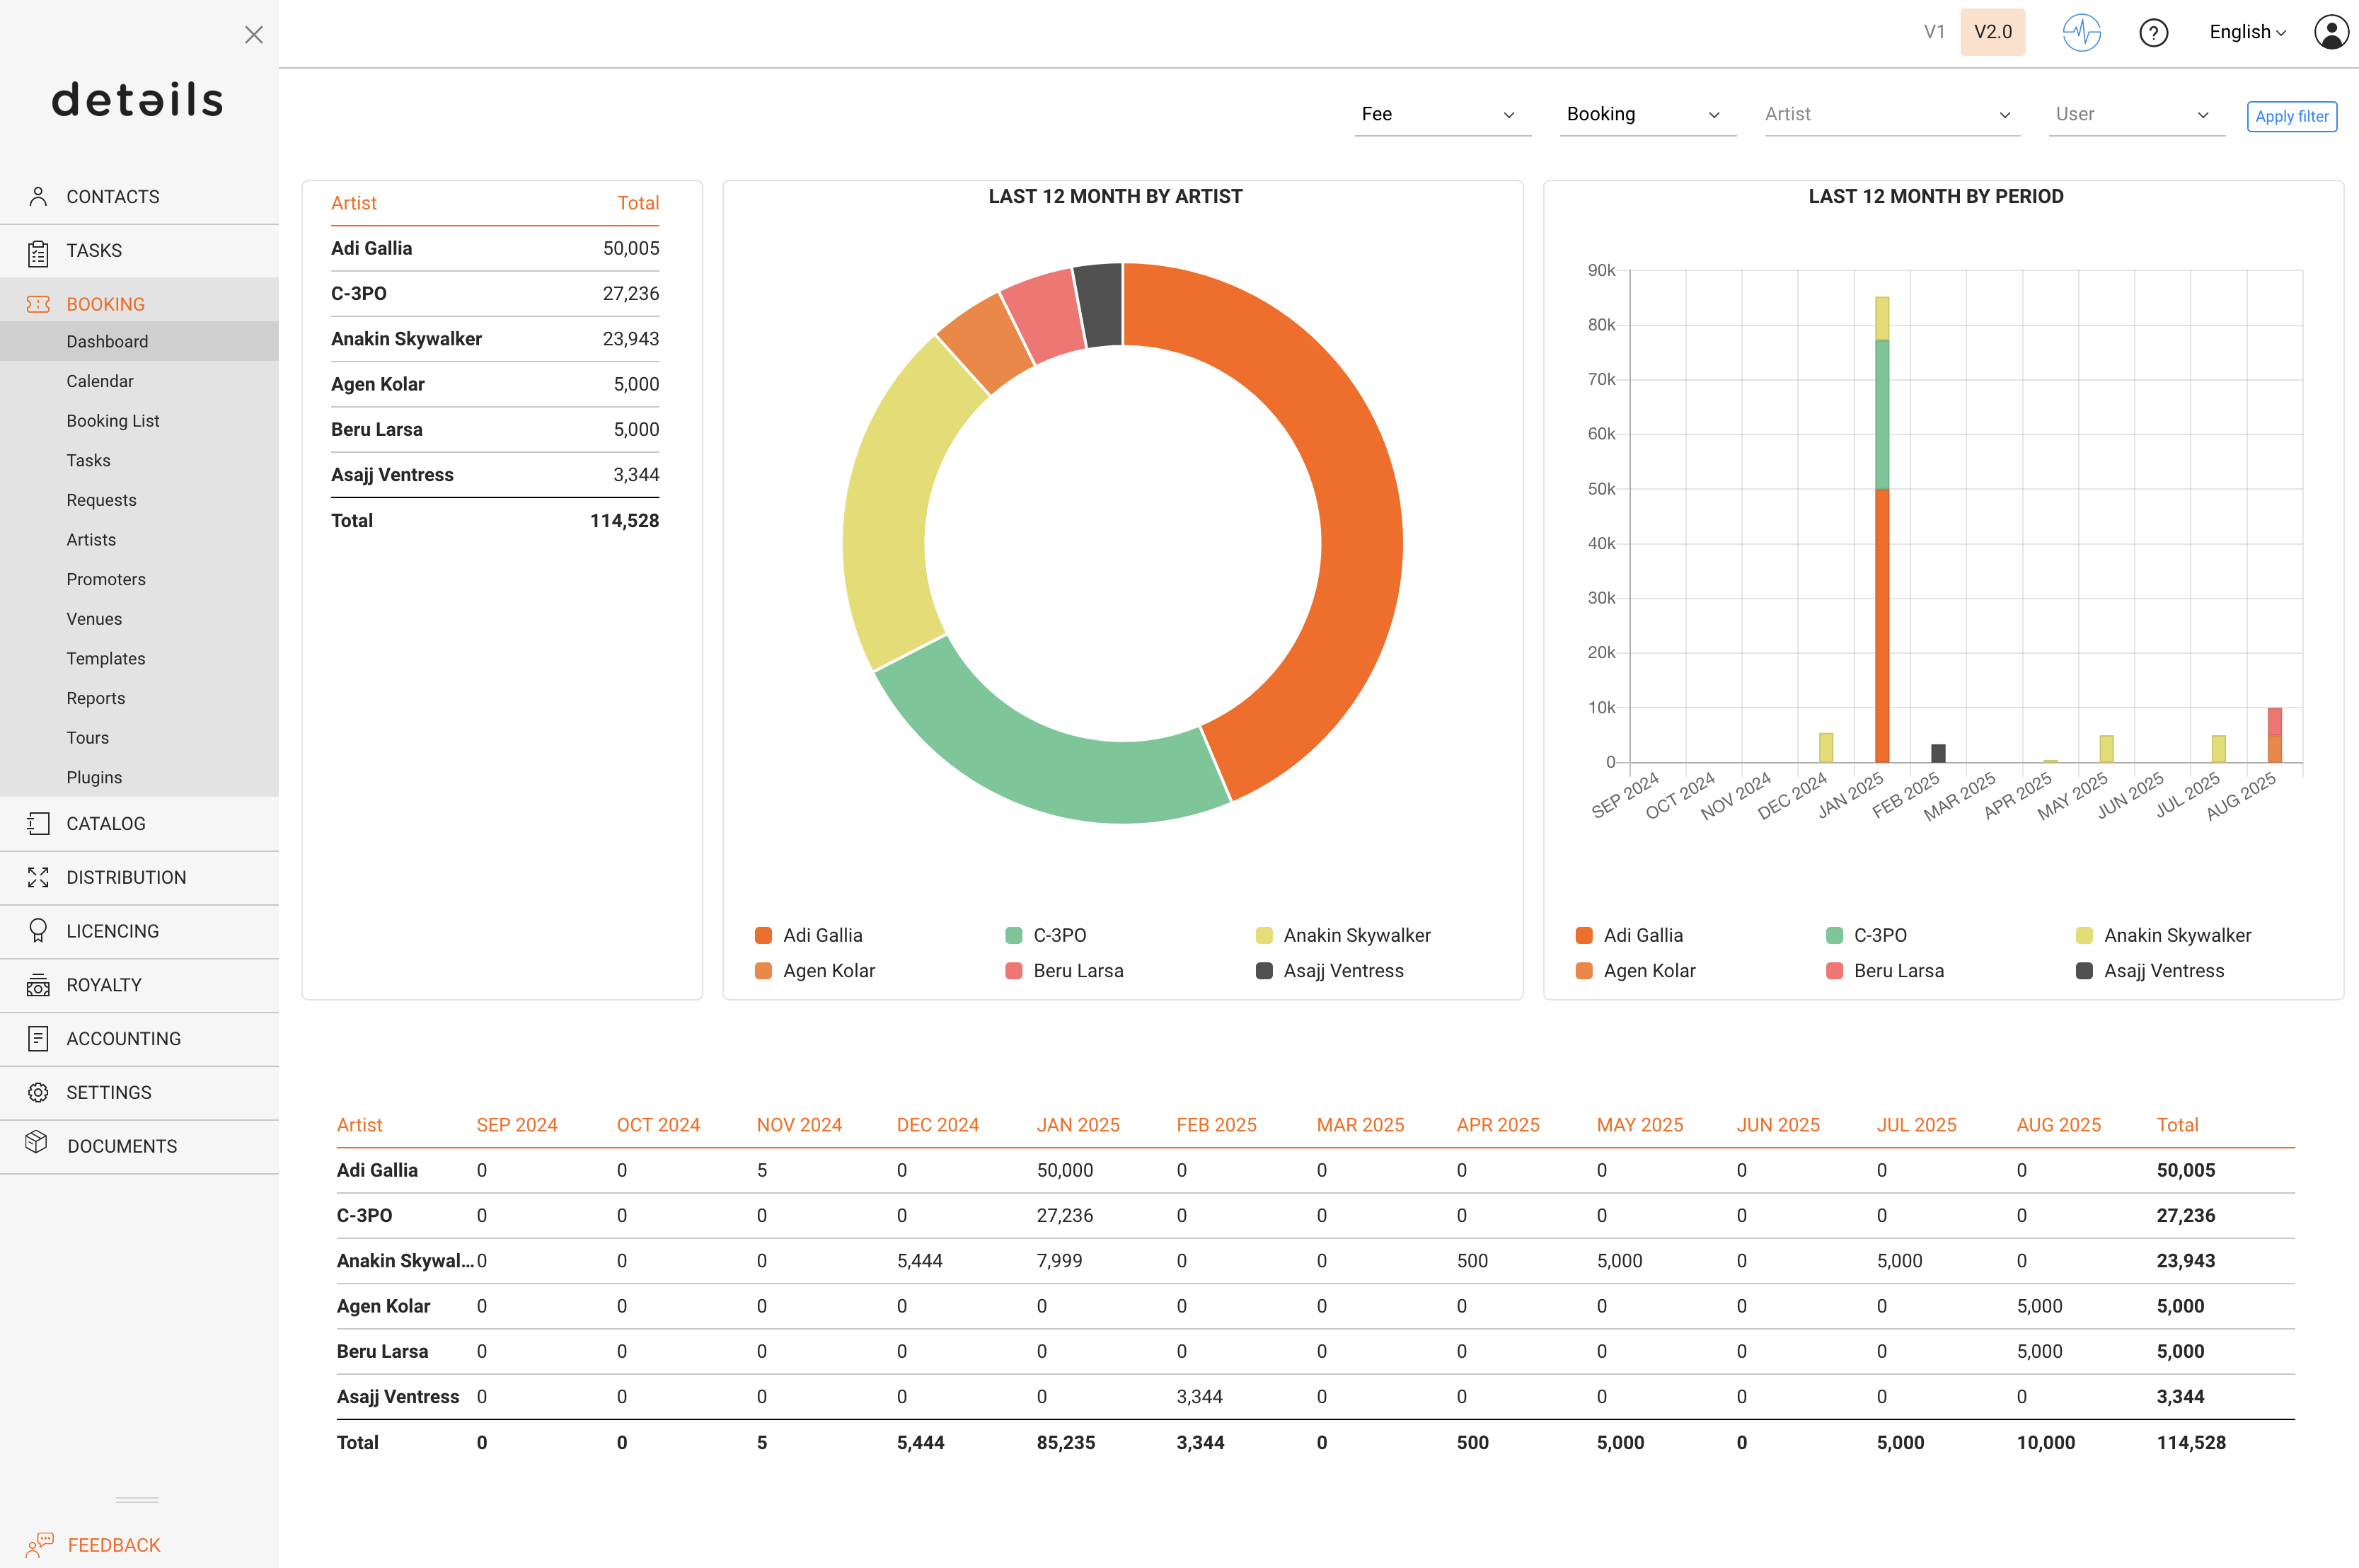
We re excited to introduce our new Dashboard, giving you instant access to key financial data for selected artists and a clear overview of both artist and agent performance at a glance.

You will find the dashboard under the Booking Tab in the main menu.


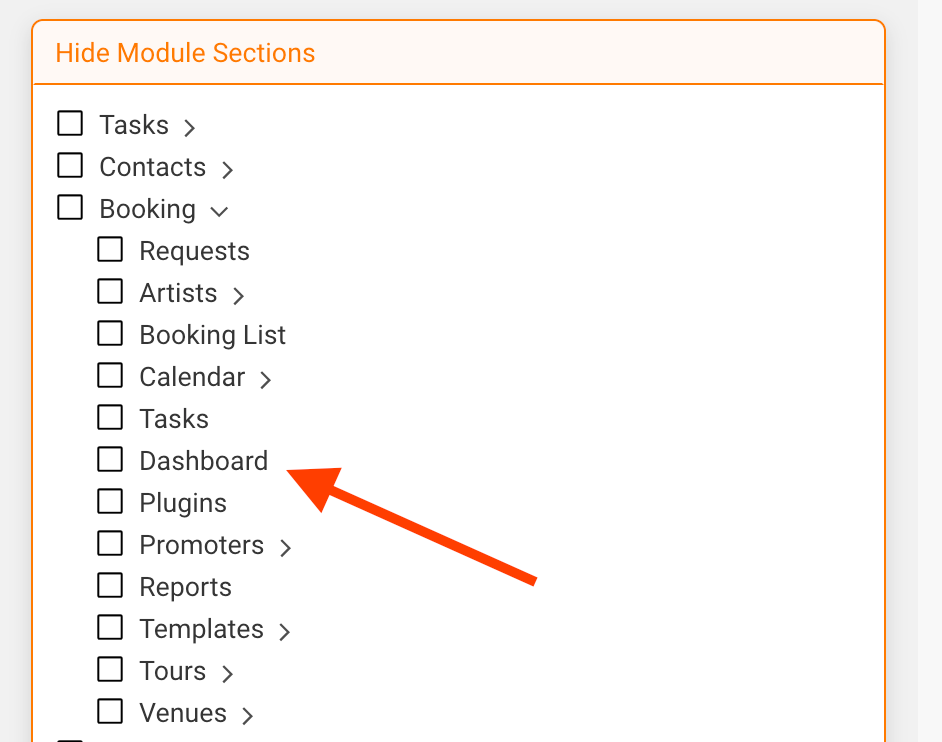
If it is disabled, you can enable the dashboard in the Settings -> User Settings and uncheck the DASHBOARD box. Note: This can only be done by users who are an admin.

You can set the following filters in the top right of the dashboard. Make sure to click the Apply Filter button once the filters are set.

Type

  • Fee
  • Booking Fee

Kind

  • Invoice
  • Payment
  • Booking

Artist

  • Which artist

User

  • Agent

Distribution Accounts Interface

The DISTRIBUTION / ACCOUNTS module contains all partners you work with for physical and/or digital distribution: aggregators, logistics partners, individual shops, your own warehouse, and optionally artist accounts for tour stock. This article explains the interface and the purpose of each tab.

Distribution Account List

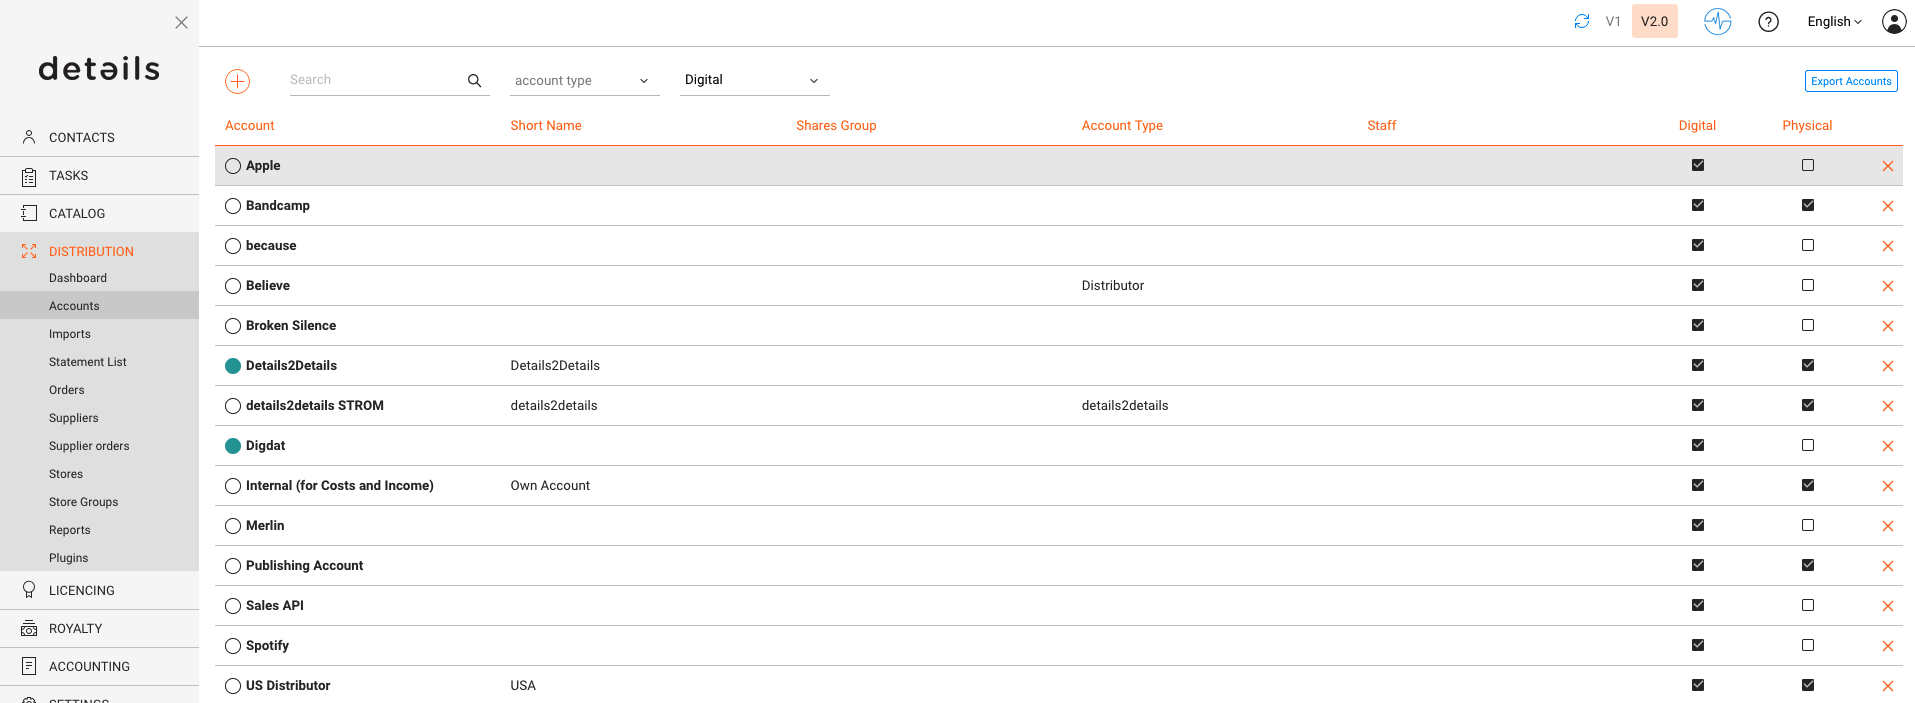
The ACCOUNTS OVERVIEW is the entry point to all distribution partners managed in details. It displays a list of all existing accounts, their status, and essential information at a glance.

  • Navigation: Open via DISTRIBUTION / ACCOUNTS. Use the search bar or filters (by name, account type, or digital/physical channel) to locate specific partners.
  • Clickable Columns: The account name opens its detailed window. The Status color, Currency, or Staff column may also include quick filters or dropdowns.
  • [+]: Creates a new account. Choose between shop, warehouse, distributor, artist, or promo partner during setup.
  • [EXPORT]: Exports the current list view with all visible filters and settings applied.
  • Icons and Links: Each entry includes clickable icons for editing, deleting (depending on permissions), and opening related documents or statements.
  • Account Colors: Color labels help distinguish key partner types (e.g., physical vs. digital). These can be customized in SETTINGS ► ACCOUNTS.

Each account entry serves as a gateway to deeper detail. Clicking the account name opens its dedicated account window with multiple tabs explained below.

Account Window Tabs

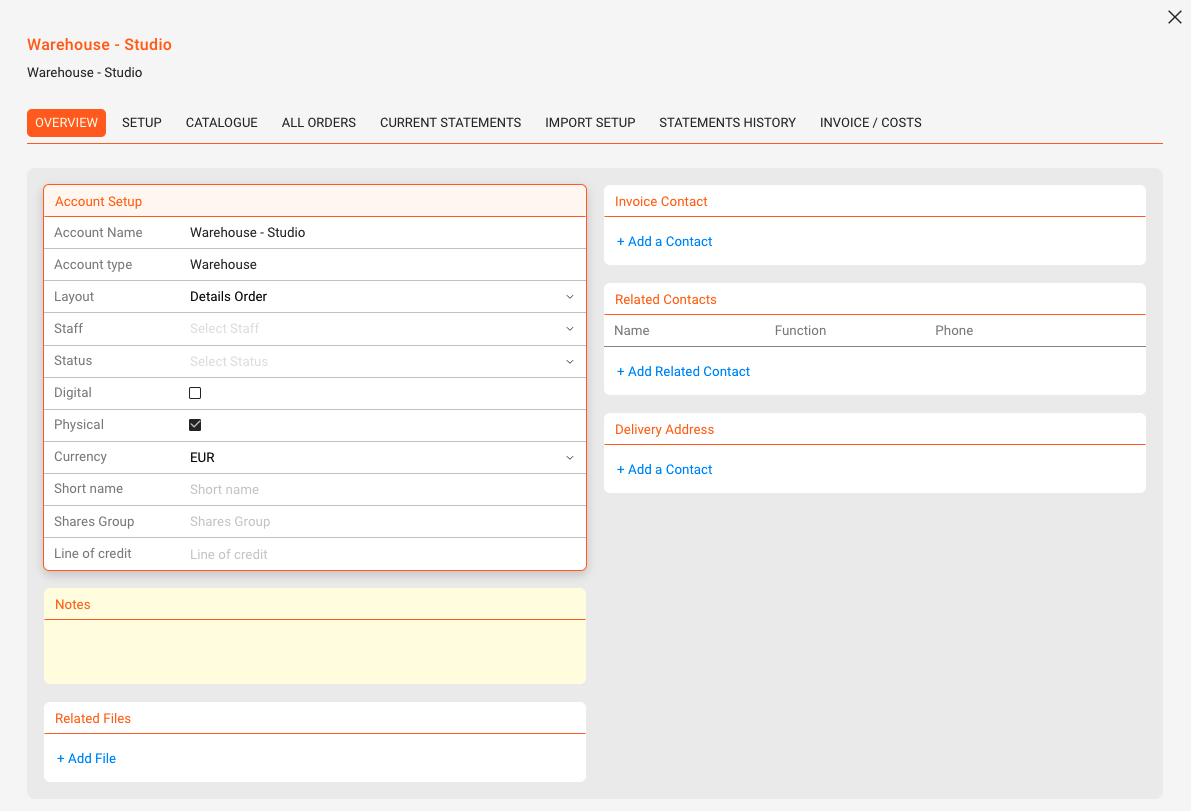
Each tab within the account window focuses on a specific area, from general setup and catalogue management to financial data, imports, and statements. Together they provide a complete overview of how each partner interacts with your distribution workflows.

OVERVIEW

The OVERVIEW tab contains general data for each account.

  • Identity & Billing: Set Account Type, Layout (invoice issuer), Status/Color, assigned Staff, and default Currency.
  • Shortname: Optional short label used in selected UIs and exports.
  • Invoice Contact vs Delivery Address: Choose who receives invoices and where goods are delivered. Delivery addresses appear on shipping and customs documents; both can differ from the office address.
  • Related Contacts: Add additional roles (e.g., Accounting, Logistics, Promo) with phone/email for quick access.
  • Related Files: Upload agreements, logos, price lists, or logistics notes.
  • Line of Credit: Optional credit limit concept for outstanding order value before accepting new orders (rarely used).
  • Shares Group: Groups this account for aggregated views in .shares. Use it to cluster revenue sources (e.g., B2C Webshops, Vinyl Stores, Retail Chains). In .shares, these groups appear in pie charts and summaries, letting artists and managers see which account clusters contribute what share of revenue over time.

SETUP

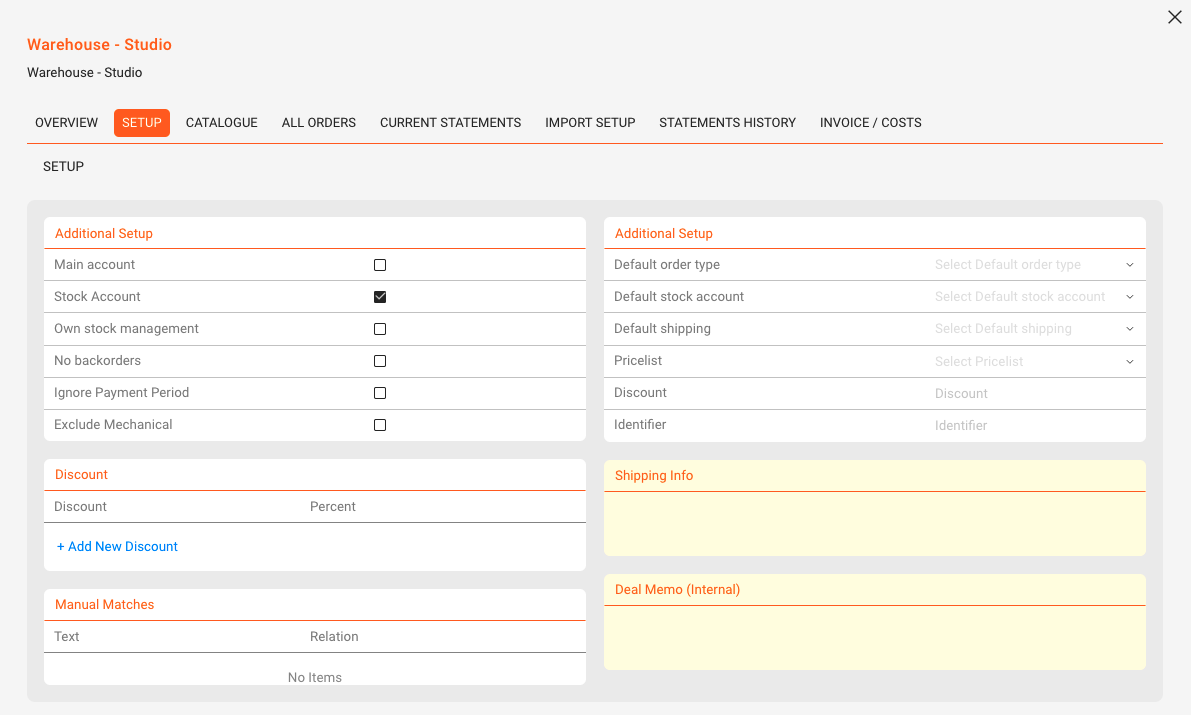
The SETUP tab defines how the account behaves in operations and accounting.

Core switches

  • Main Account: Highlights this account in product stock and sales views to keep it top of mind in daily operations.
  • Stock Account: Tracks stock movements (in/out) for this location. Required for consignment locations and warehouses.
  • Own Stock: Marks accessible locations you can ship from (included in total available stock). Use together with Stock Account for your own warehouses.
  • No Backorders: Prevents automatic carry-over of undelivered quantities into the next order.

Advanced options

  • Ignore Payment Period (advanced): For royalty calculations, uses the sales date instead of the payment date, even if the artist’s contract is configured to pay on receipt. Typical for large retail chains where payment reliability is assumed; enables reporting and settlements by sales period regardless of when invoices are paid.
  • Exclude Mechanical (advanced): Excludes this account’s sales from mechanical rights reporting (e.g., GEMA, Harry Fox). Useful for accounts like promo agencies or artist consignment where mechanical reporting would be inappropriate.

Defaults & pricing

  • Default Order Type: Preselects how orders are booked (e.g., Invoice, Consignment, Return/Credit, Promo). Affects stock and/or value movements.
  • Default Stock Account: Preselects the source warehouse for orders to avoid repetitive selection on every order.
  • Default Shipping: Preselects the usual carrier/service for this account (e.g., UPS, postal service, freight forwarder).
  • Price List (Price Code System): Assign the customer’s price list so prices are set automatically on order lines. Without a price list, automatic pricing will not apply.
  • Discounts: Define account-specific discounts globally and/or per price code (these stack; e.g., 10% global + 5% on T-shirts).
  • Identifier: Optional external shop code (often required by large chains) printed on documents and used in electronic transfers.
  • Manual Matches (read only): Displays learned mapping rules from statement imports, showing how external references map to your product catalog.

CATALOGUE

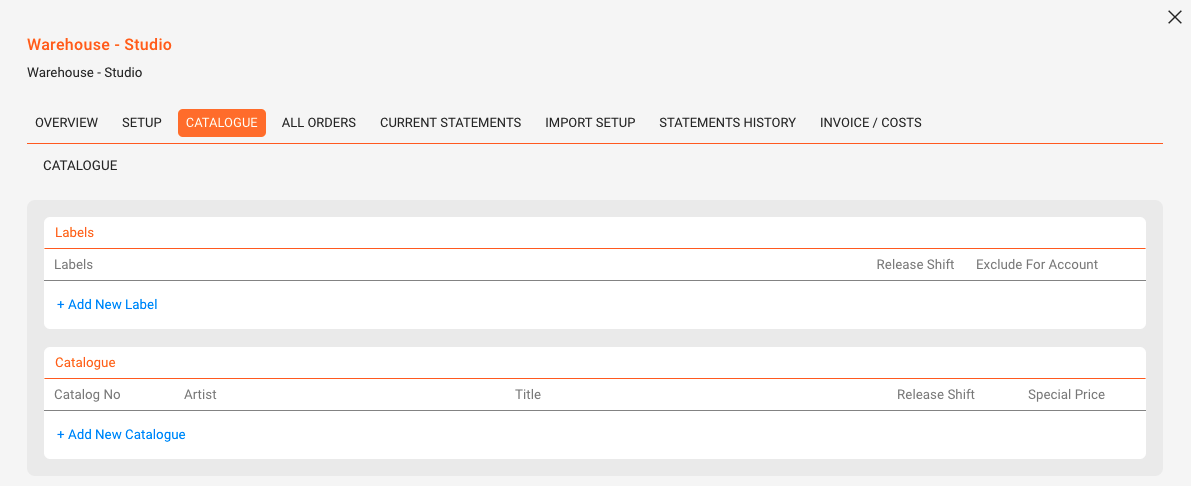
The CATALOGUE tab defines which labels and products are supplied through the account.

  • Add or exclude Labels and assign Release Shifts per label (negative values for early delivery, positive for delayed availability).
  • Add Products and define Special Prices or product-specific Release Shifts for this account.

ALL ORDERS

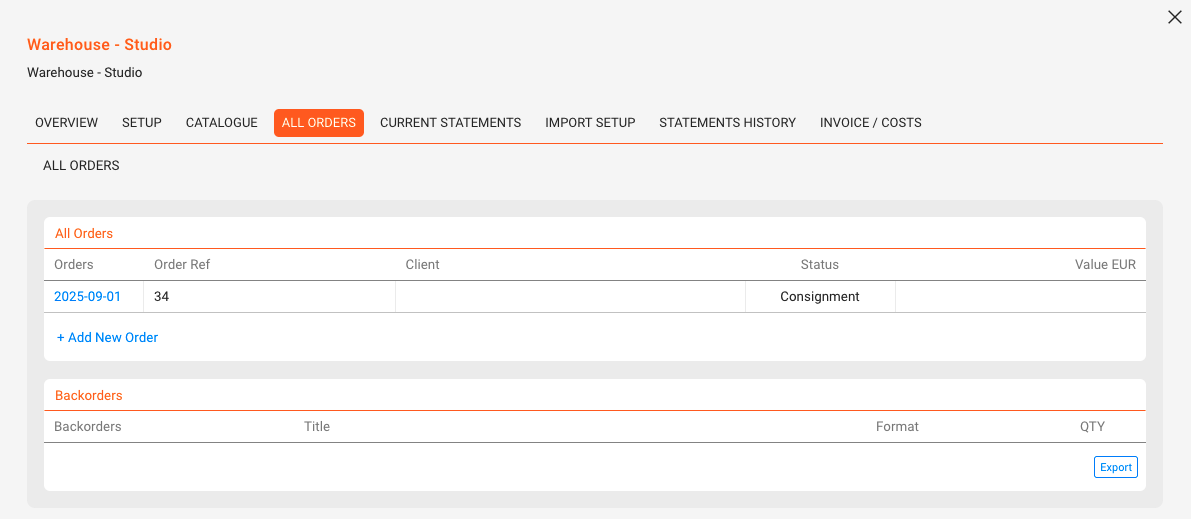
The ALL ORDERS tab lists every order linked to the account.

  • Review current and completed orders; create a new one via [ADD NEW ORDER] (the account and default warehouse are preselected).
  • Track and manage Backorders, items previously undeliverable that can now be fulfilled.
  • Export the order list as an Excel file using [EXPORT].

CURRENT STATEMENTS

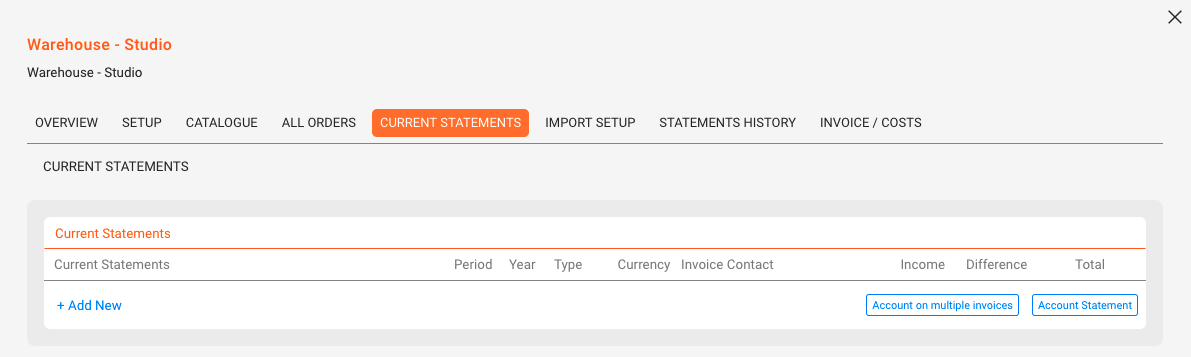
The CURRENT STATEMENTS tab displays recently imported statement files for quick verification prior to reconciliation.

  • Review latest imports for accuracy and completeness of expected fields.
  • Use this view for a fast sanity check after each upload.

IMPORT SETUP

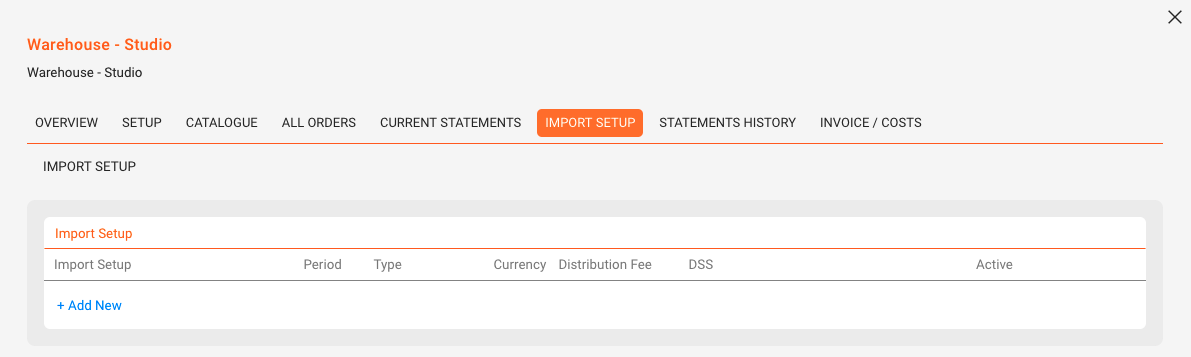
The IMPORT SETUP tab allows configuration of importers for different data types. Each importer appears in DISTRIBUTION / IMPORTS and defines the source, format, and currency for incoming data.

  • Create importers for Digital Sales, Physical Sales, Costs, Performance Income, and Other Income.
  • Use this area to assign formats, currencies, and import sources. Over time, manual product mappings become Manual Matches and will auto-apply in future imports.

STATEMENTS HISTORY

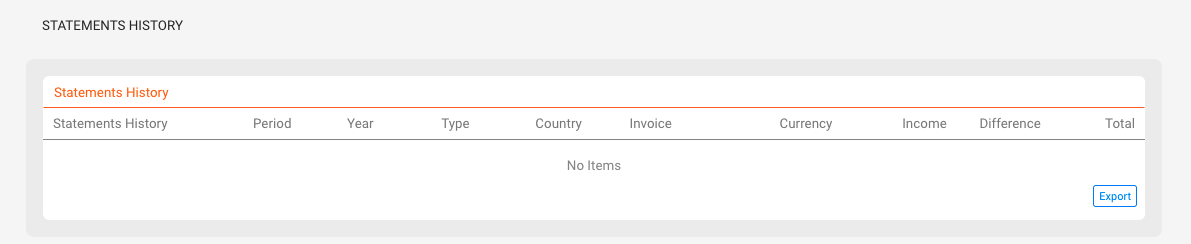
The STATEMENTS HISTORY tab lists all previously imported statement records for long-term reference and audits.

  • View older statement versions and cross-check invoice numbers and related uploads.

INVOICE / COSTS

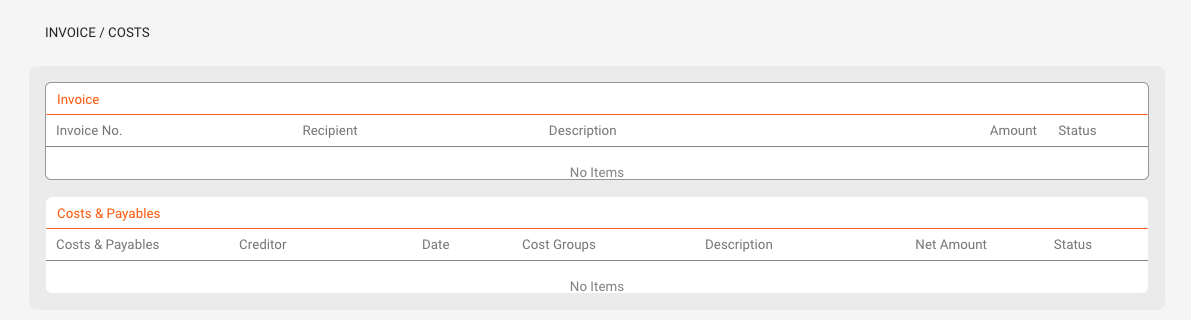
The INVOICE / COSTS tab provides an overview of financial documents linked to the account.

  • Review all invoices and cost entries connected to this partner.
  • Use this section for reconciliation and cross-checking against imported financial data and credit notes.

Sales Imports – Interface


The Sales Imports section in details is the central workspace for importing, monitoring, and managing all incoming sales statements. It connects your distribution accounts with imported statements and provides a clear overview of your digital and physical revenue streams.

Tip: Each tile in this interface represents one Import Setup. You can create, track, and confirm sales statements directly from here.

OVERVIEW

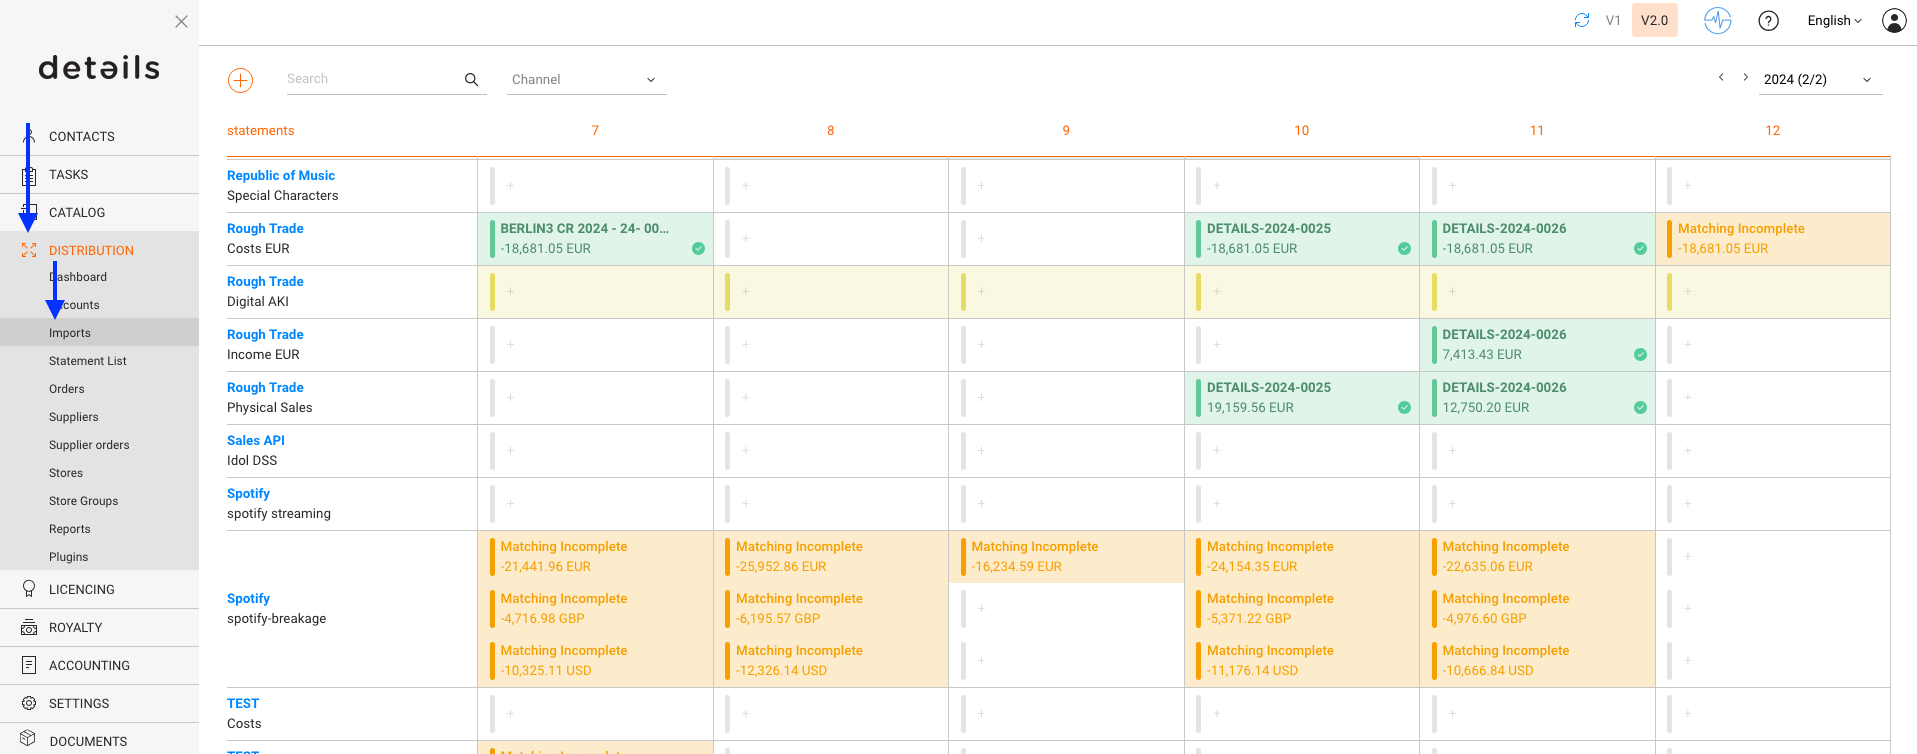
Go to DISTRIBUTION / IMPORTS in the main navigation. The page displays a grid of tiles that represent your import setups per distributor, period, and currency.

Each tile corresponds to one importer and sales period. From here, you can upload files, view automated ingestions, or check already confirmed statements.

COLOR & STATUS INDICATIONS

The color of each tile indicates the import s current status:

Color Status Meaning
Yellow Expected An import setup exists, but no statement has been uploaded or received yet.
Orange Matching Incomplete A file has been uploaded, but the line matching is incomplete and has to be finished manually before the next steps can be taken.
  Matching Complete A file has been uploaded, and line matching is complete, but the import is not yet confirmed.
Green Confirmed The import has been verified and accounted. The statement is now linked to an invoice.
Blue Auto-Import Available An Import is available via auto-ingestion, if configured.
Red Double-accounted Imported statement was accounted twice. Delete both related invoices and re-account.
Grey Not expected No statement expected for this period.

ACCESSING IMPORT DETAILS

Click on any tile to open the corresponding side panel. From there, you can:

  • See the import summary and statement period
  • Open the related invoice or delete the import if needed
  • Trigger automated ingestion processes (if configured)

NAVIGATION STRUCTURE

Inside each Distribution Account you ll find tabs that help manage related import settings:

  • Current Statements All active sales imports
  • Import Setup Configuration for automated or manual imports
  • Archived Statements Confirmed and accounted historical imports

Explained: Distribution Dashboard

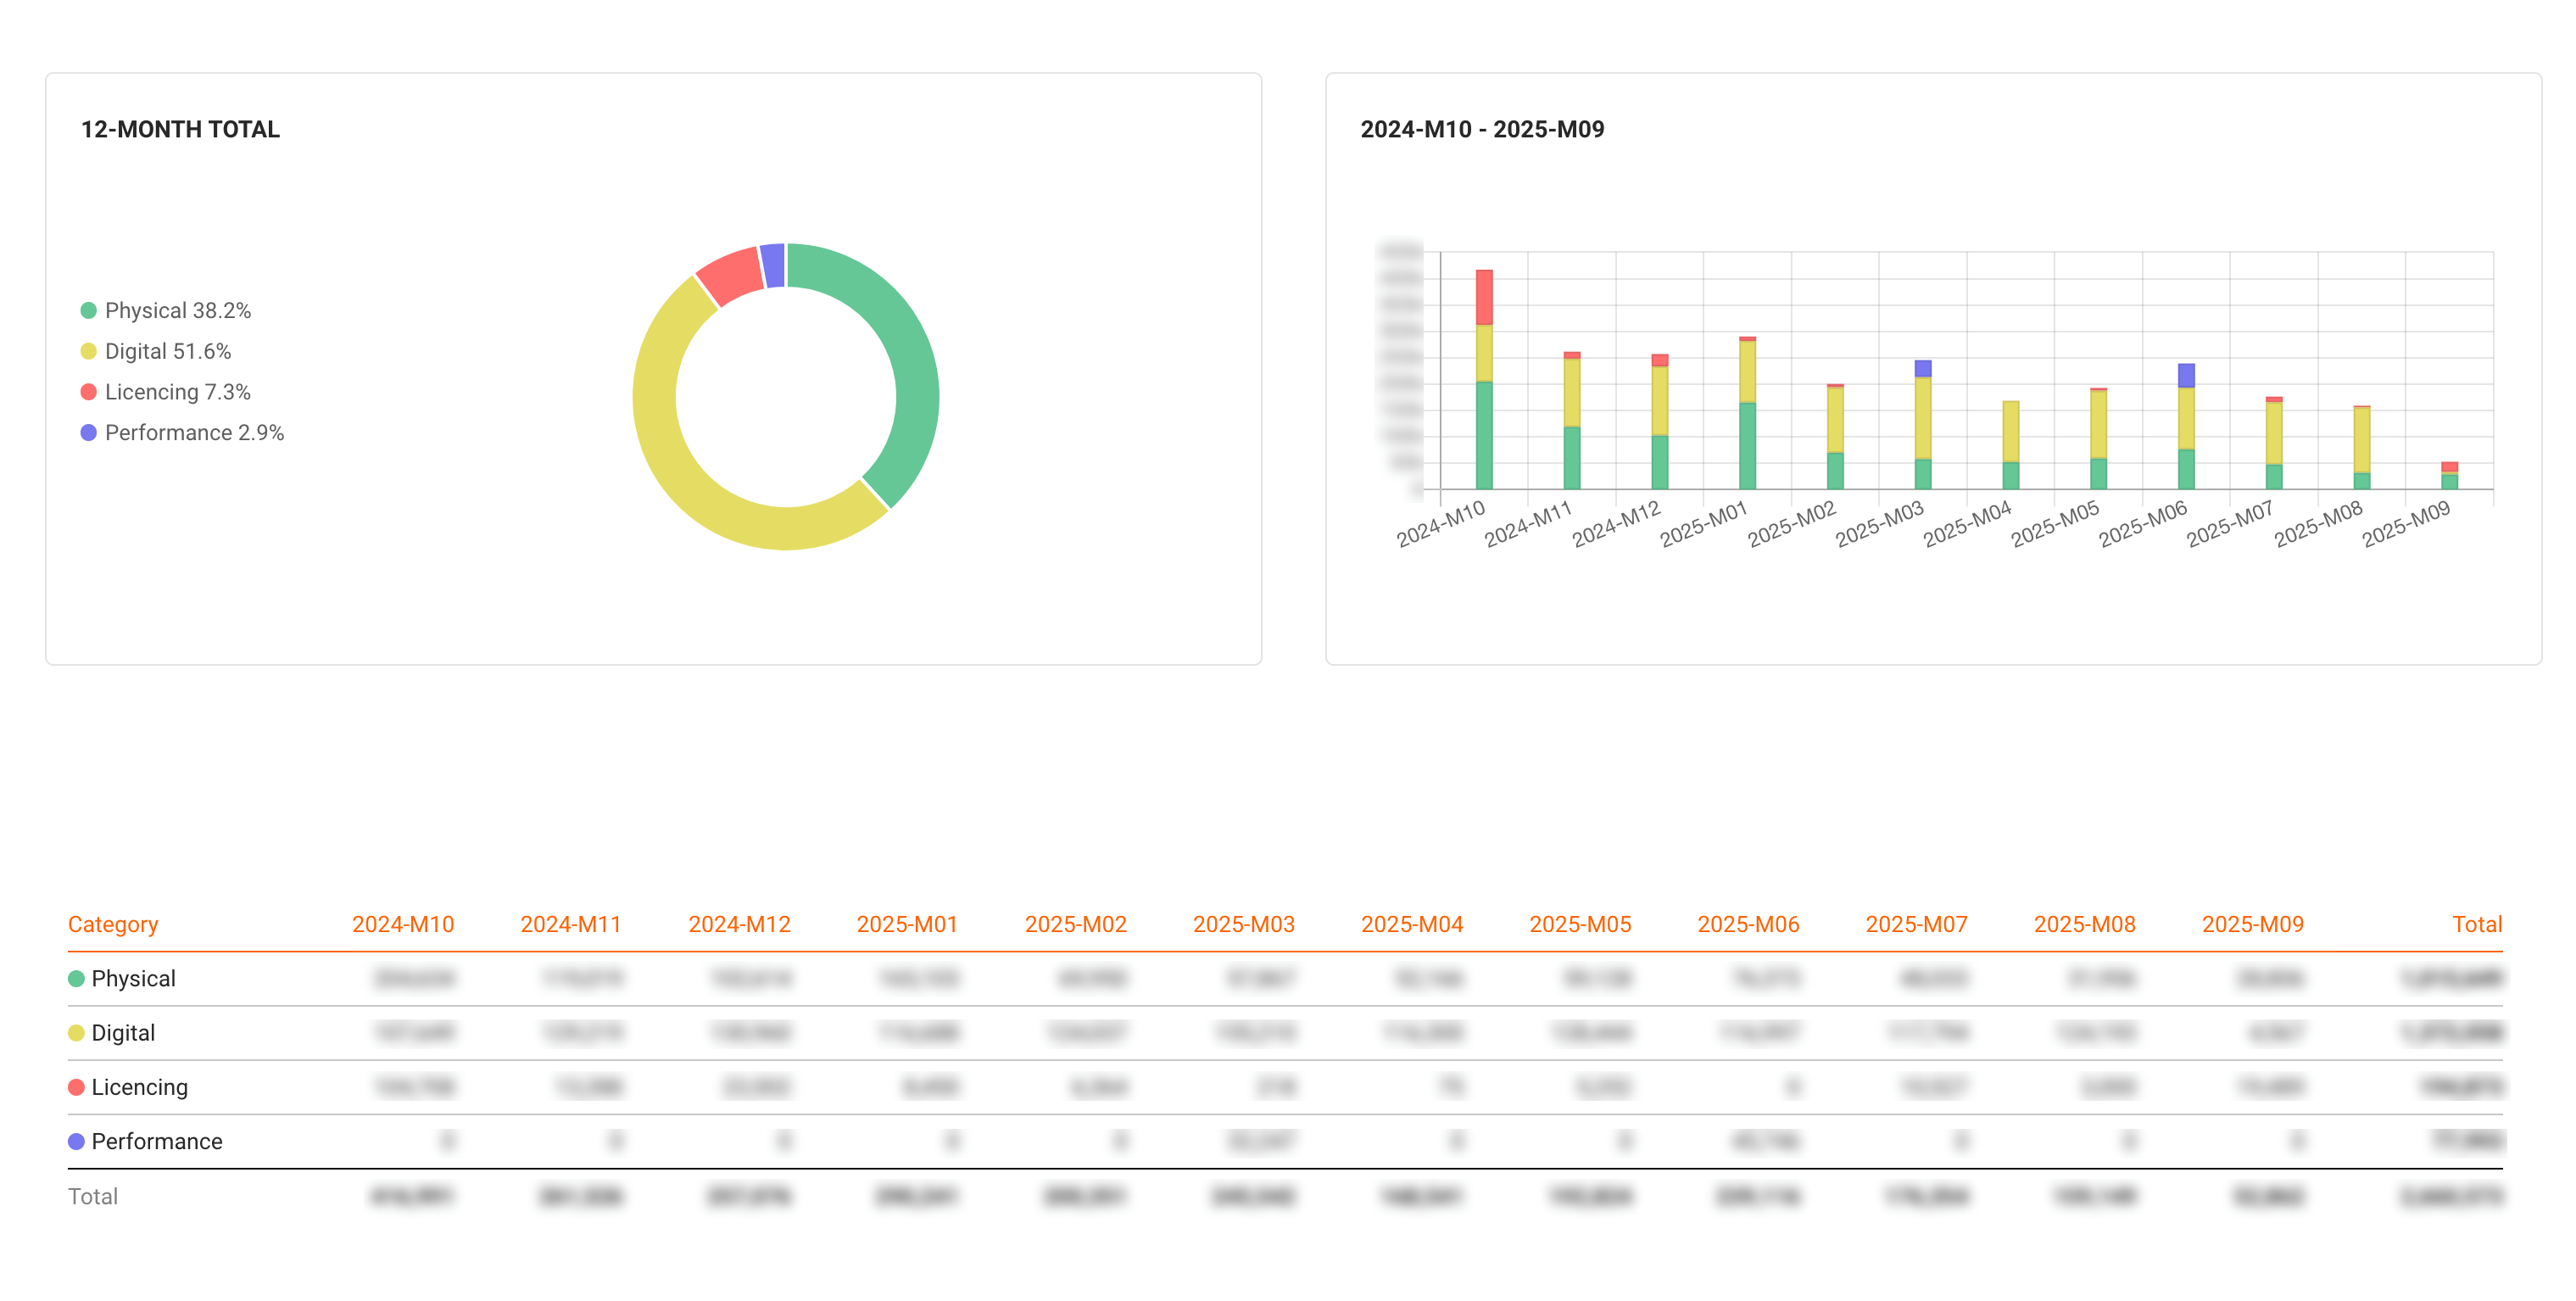
The Distribution Dashboard in details gives you a quick, visual overview of your distribution revenue performance across the last twelve months. It is designed as a high-level report that helps you identify trends and evaluate total sales without diving into individual transactions.

Note: The Distribution Dashboard shows net revenue — that means sales after returns and before taxes. It focuses on physical and digital sales channels, and may also include Licensing or Performance data when available.

Data Source

The dashboard is automatically populated from your imported data in DISTRIBUTION / IMPORTS and DISTRIBUTION / ORDERS. There is no manual input required. The values reflect all confirmed and imported sales from your connected distribution accounts.

Visualization

The Distribution Dashboard presents your net revenue in three visual formats:

  • Pie chart: shows the overall revenue distribution across channels (digital, physical, etc.).
  • Monthly table: displays exact values for each of the twelve months.
  • Bar chart: provides a color-based monthly comparison for easier trend recognition.

These elements together offer both numeric and visual perspectives of your revenue trends.

Interaction

The dashboard is a fixed report — it cannot be edited or customized. There are no filters, sliders, or settings. Categories only appear if data exists for them; empty categories remain hidden.

Use Cases

The Distribution Dashboard helps you quickly understand sales performance across your physical and digital channels. It is ideal for label managers or teams who want to monitor growth, detect drops, and track consistency month by month. For in-depth analyses or transaction details, refer to DISTRIBUTION / IMPORTS or DISTRIBUTION / REPORTS.

Note: The dashboard updates automatically as new imports are processed. If a recent month shows lower numbers, it may simply mean that not all sales have been imported yet.

Overview on 01 2026 Update


01 / 2026 Product Update

The first Update in 2026 update brings a set of important improvements across details, focusing on automation, clarity, and easier everyday workflows.

Below is an overview of what s new with links to detailed guides where available.


E-Invoicing

details now supports the creation of electronic invoices.

You can generate:

  • Structured XML invoices (EN 16931 / PEPPOL-compatible)
  • PDF/A invoices with embedded XML (Factur-X / ZUGFeRD)

This allows you to stay compliant with current and upcoming e-invoicing requirements while continuing to work with familiar invoice layouts. For more information, see E-Invoicing in details.


Spotify Catalog Import

Several new tools have been added to CATALOG MANAGEMENT, focusing on faster setup and easier cleanup of existing catalogs.

You can now import catalog data directly from Spotify:

  • Digital releases, products, and tracks
  • Full metadata and artwork

This is ideal for onboarding new catalogs or filling gaps in existing data. For more information, see How to Import Your Catalog from Spotify and the Spotify Import Interface Overview .


Move Products Between Releases

You can now move a product from one release to another using a controlled and validated workflow.

This helps fix catalog structure issues safely for example when a product was assigned to the wrong release. For more information, see How to Move Products Between Releases.


New MERLIN Sales Importers

Four new automated MERLIN DSS formats have been added:

  • MERLIN Tencent (TME)
  • MERLIN Twitch (TWI)
  • MERLIN Lickd (LIC)
  • MERLIN Rythm (RHM)

With these additions, details now supports a total of 33 automated MERLIN sales ingestions.

This completes coverage of the standard MERLIN delivery formats and further reduces the need for manual sales handling.


Video Catalog Imports from IDOL

To close a previous gap, details now allows the import of video metadata from IDOL.

Video products delivered via Labelcamp can now be imported and managed consistently alongside audio releases, improving catalog completeness.


Improved Confirmation Workflow for Multiple Sales Statements

The Current Statements box now includes additional filter controls, making it easier to:

  • Narrow down visible statements
  • Focus on specific periods, currencies or accounts

This is a small UI change with a big impact on day-to-day navigation.


Contract Item Exports

New export options make it easier to extract contract item data for internal reviews. You can export Excel sheets per contract or per royalty account, including all related items such as releases, products, and tracks.


If you have questions or would like a walkthrough of any new feature, feel free to reach out to us at label_team@details.eu or booking_team@details.eu.

detailsGPT: our in-app assistant for everyday questions

Table of contents

This article explains what detailsGPT is, how it was trained, and how it helps you get reliable answers to everyday questions across the details application and all its modules.

Internally, we sometimes refer to it as A.k.I a small nod to both AI and our co-founder and long-time system architect Aki Hetkamp. Now you know.

► What detailsGPT is

detailsGPT is an in-app assistant trained on the details application as a whole.

It is designed to help with everyday questions such as workflows, permissions, navigation, and common tasks across all modules quickly and consistently.

detailsGPT is not a replacement for human judgment. It does not invent rules, make autonomous business decisions, or override application logic.

► How detailsGPT was trained

detailsGPT was trained using domain-specific material covering the full details platform.

  • Help Center articles across all modules
  • Internal workflows and documentation
  • Recurring support questions
  • Explanations written for real client cases
  • UI labels, screens, fields, permissions, and role logic

This ensures answers are based on documented behavior and established workflows not on generic internet content.

► How we check answer quality

We do not blindly trust AI output.

  • Testing against known, recurring support questions
  • Comparing answers with real replies from our support team
  • Checking responses against actual interface behavior
  • Reviewing unclear or incomplete answers

When an answer is not good enough, we improve the documentation or explicitly route the topic to human support.

► When human support steps in

detailsGPT is designed to hand over to humans when context or judgment is required.

  • Client-specific situations
  • Business or contractual decisions
  • Undocumented or ambiguous workflows
  • Cases where the answer is unclear

detailsGPT is making first steps, but will evolve.

► Where to find detailsGPT in the app

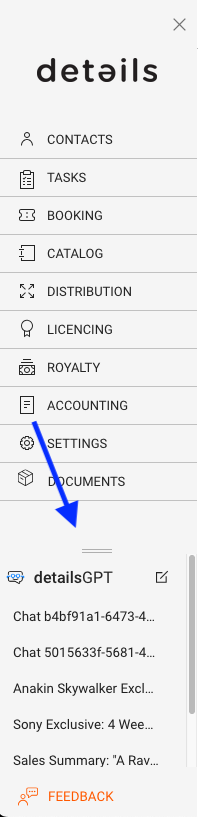
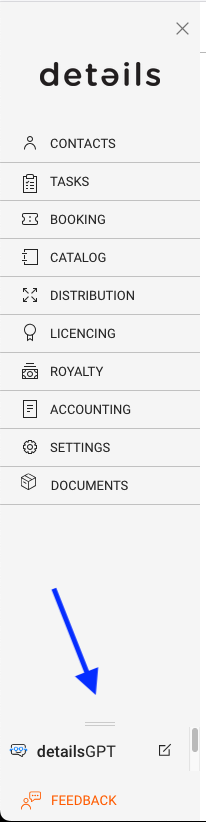
You can access detailsGPT directly from the main menu side panel.

  • The detailsGPT entry is located at the bottom of the side panel, just above [FEEDBACK].
  • Clicking it opens the GPT panel inside the app.
  • The [EDIT] icon lets you start a new prompt at any time.
  • The resize handle above the label allows you to adjust the panel height and view previous conversations.

► How to interact with detailsGPT

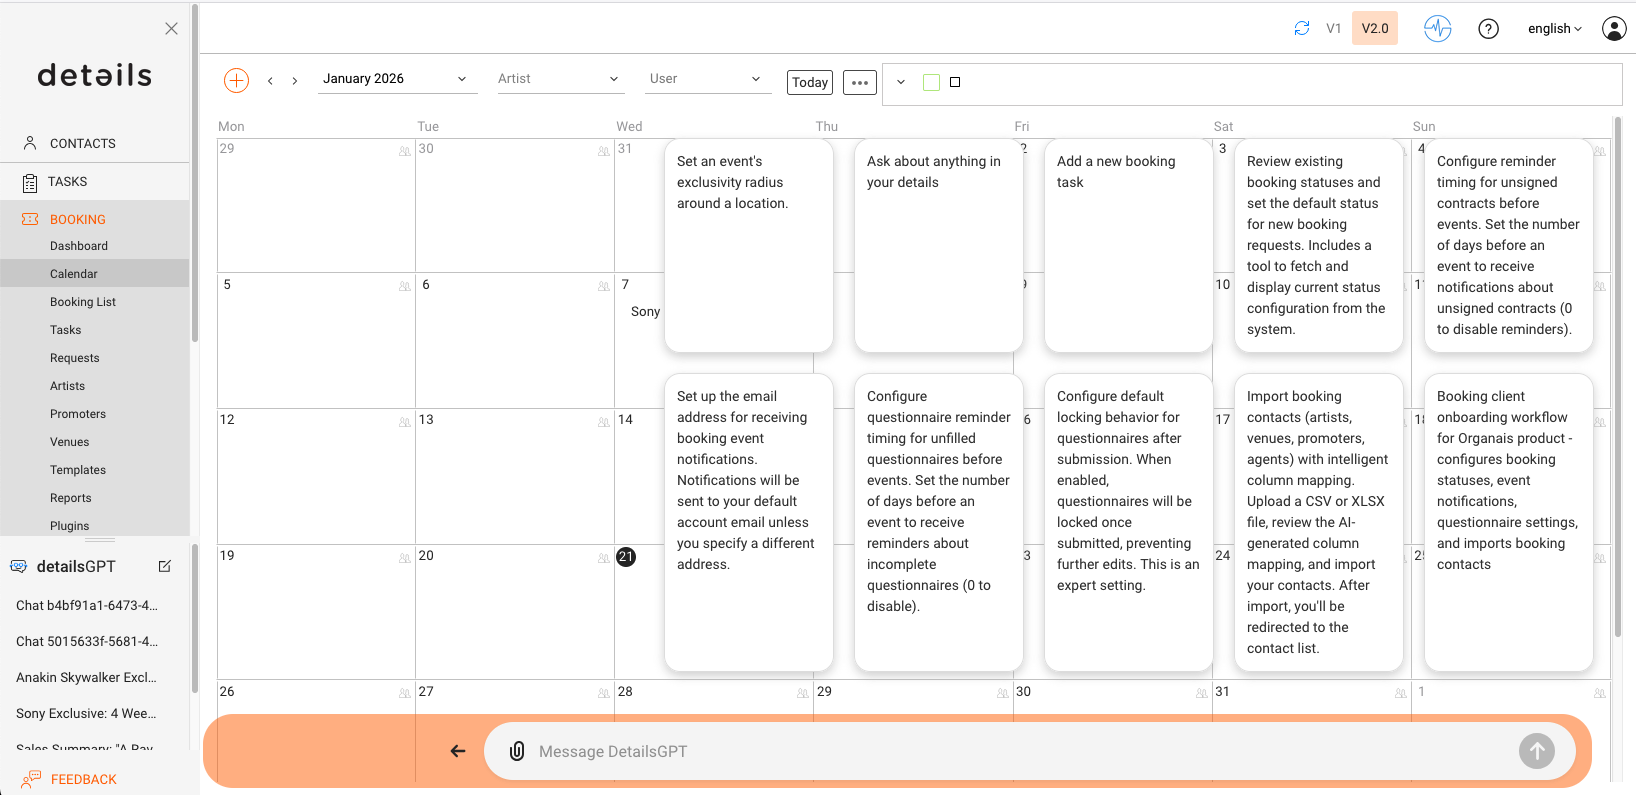
When opened, the primary way to interact with detailsGPT is the prompt bar at the bottom of the screen.

You can ask questions in plain language, such as how to perform a task, where to find a setting, or why something behaves in a certain way.

Suggestion tiles above the prompt represent predefined AI functions for common tasks in the current section. These are curated shortcuts and will be refined over time based on real usage.
 

► How detailsGPT handles data-related questions

For questions involving data, lists, filters, or actions, detailsGPT relies on the same application logic and APIs used by the v2 interface.

It does not access databases directly and does not bypass permissions. All actions follow the same rules and safeguards as the regular interface.

In short

  • detailsGPT helps with everyday questions across all modules
  • It uses the same knowledge base and logic as the details app
  • Answers are continuously reviewed and improved
  • Human support remains available whenever needed

If you ever need to reach our team directly, you can contact us at:
Billing in details: Where to find invoices and manage your billing details

This article explains how billing works in details, where you can find your invoices, and how to update your billing and payment information.

Who is this for?
This article is written for clients of details who want to access their invoices or manage their billing information.

► WHERE TO FIND YOUR DETAILS INVOICES

Whenever details charges you for subscriptions, support, or additional services, the invoice is always available directly inside the application.

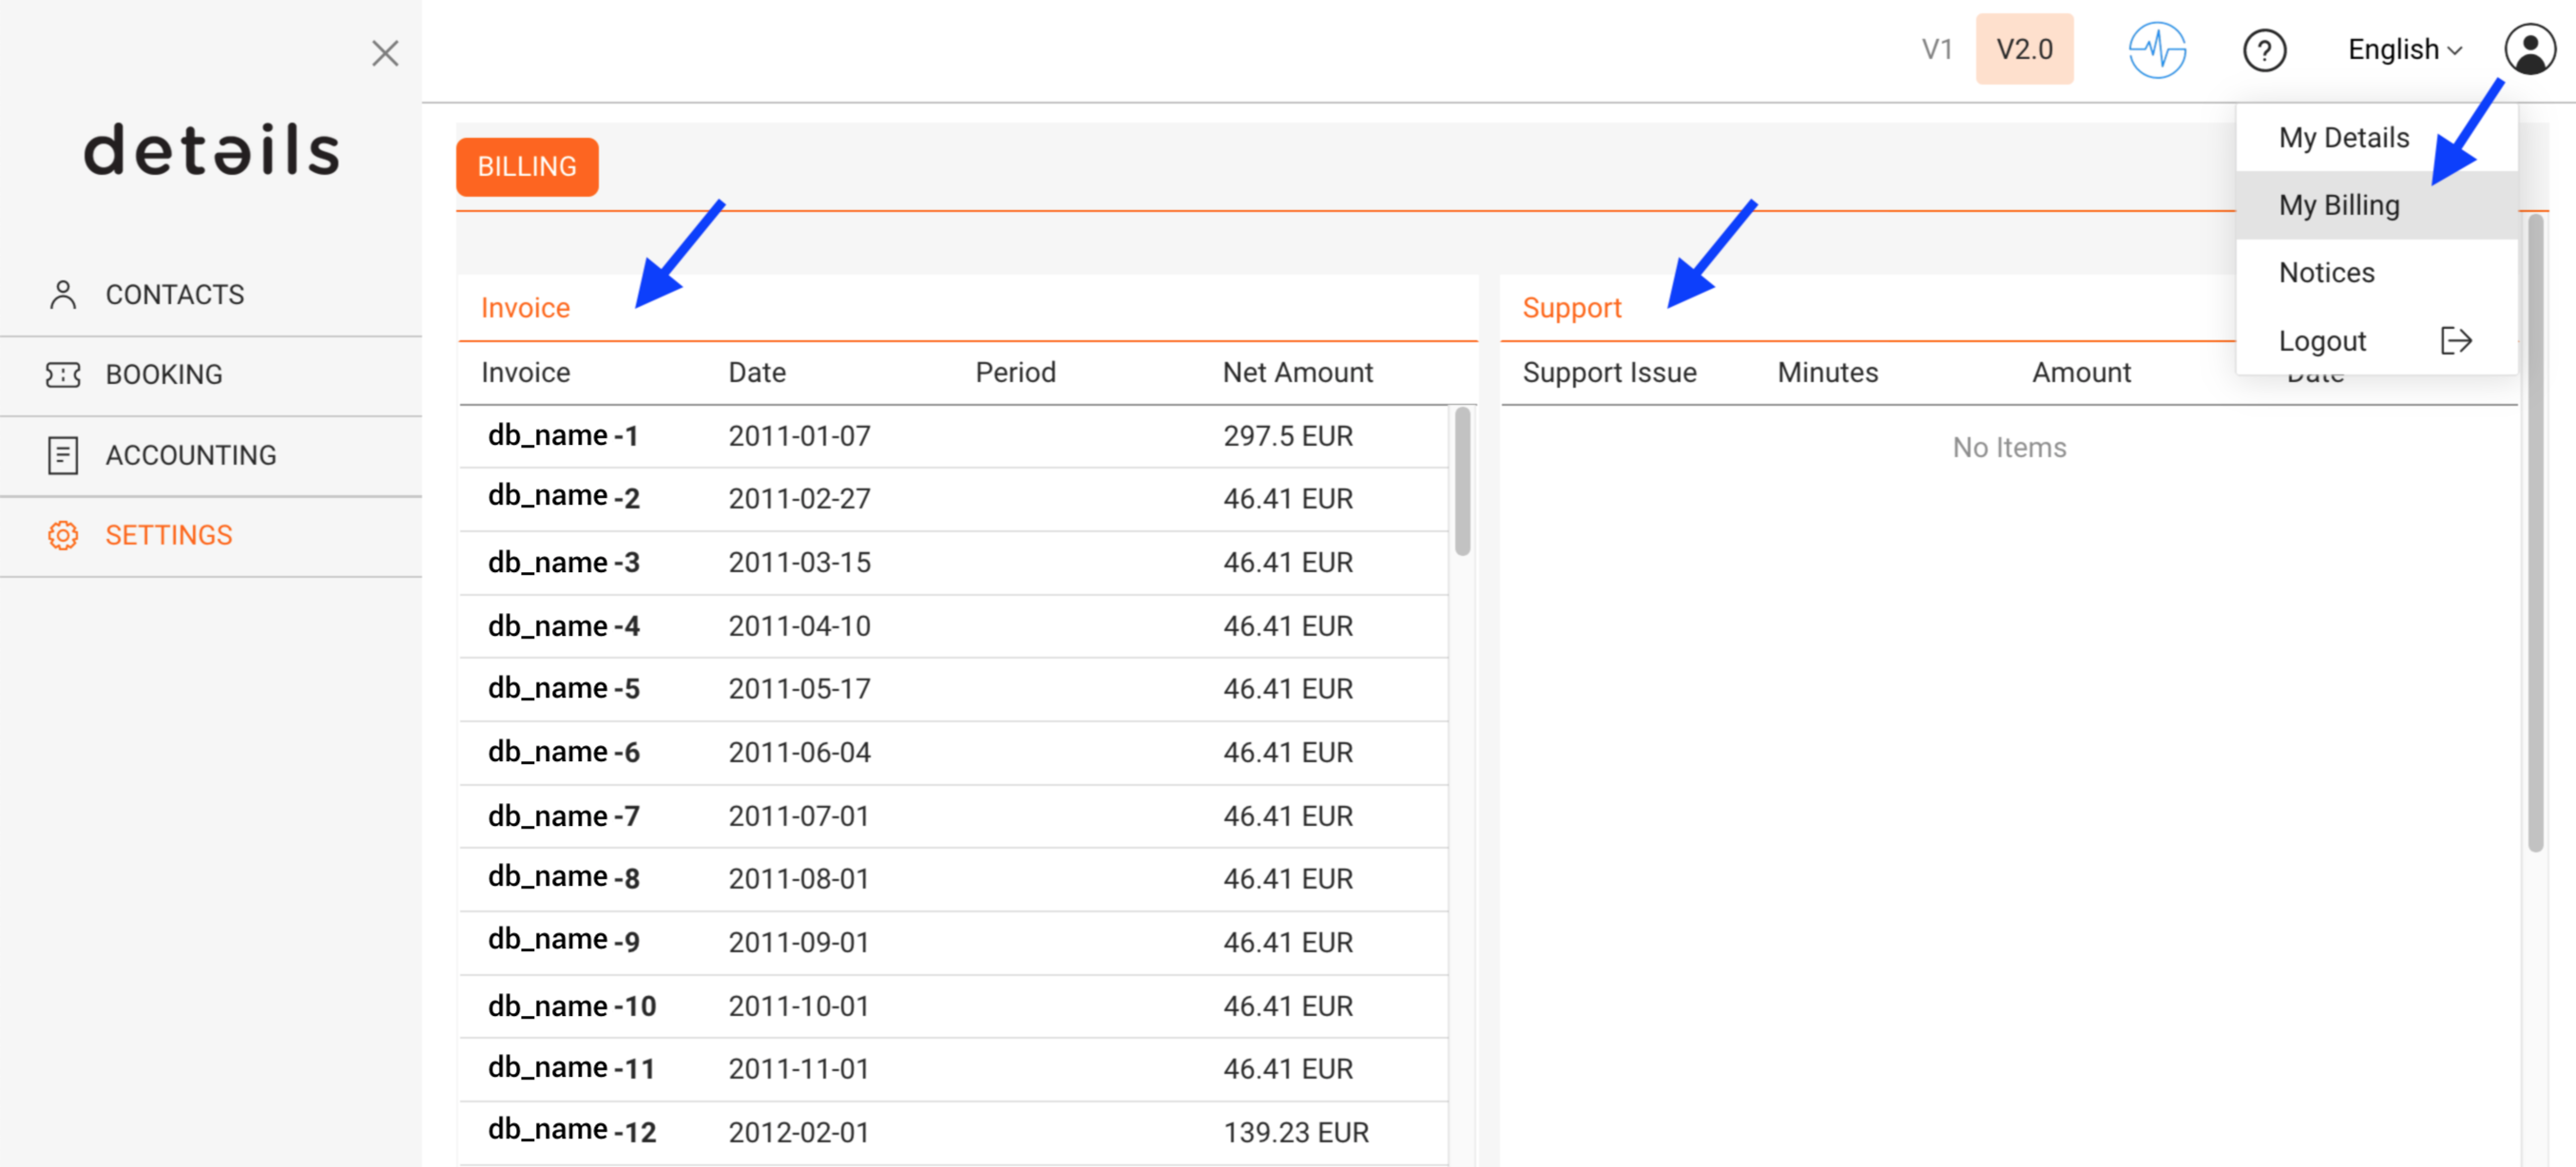
In Version 2, you can find all billing invoices under:

  • DOCUMENTS / BILLING
  • or via the profile icon (top right) ► My Invoices

The billing overview lists all invoices with their invoice date, billing period, and net amount.

To retrieve invoices:

  • Click an individual invoice number to view it
  • Or select one or multiple invoices and use [Download PDFs] to download them directly as PDF files

This allows you to download several invoices at once without using your browser s print function.

► WHAT DETAILS BILLS FOR

details provides several types of services that may appear on your invoices.

  • Platform usage
    Ongoing access to the platform and its modules, billed monthly or annually depending on your subscription.
  • Support & onboarding services
    Assistance with data migration, setup, training, or ongoing support.
  • Custom development & plugins
    Additional features or integrations developed specifically for your needs.

Pricing, billing cycles, and available plans may vary. For the current and authoritative pricing information, please refer to:

www.details.eu

► UPDATE PAYMENT INFORMATION

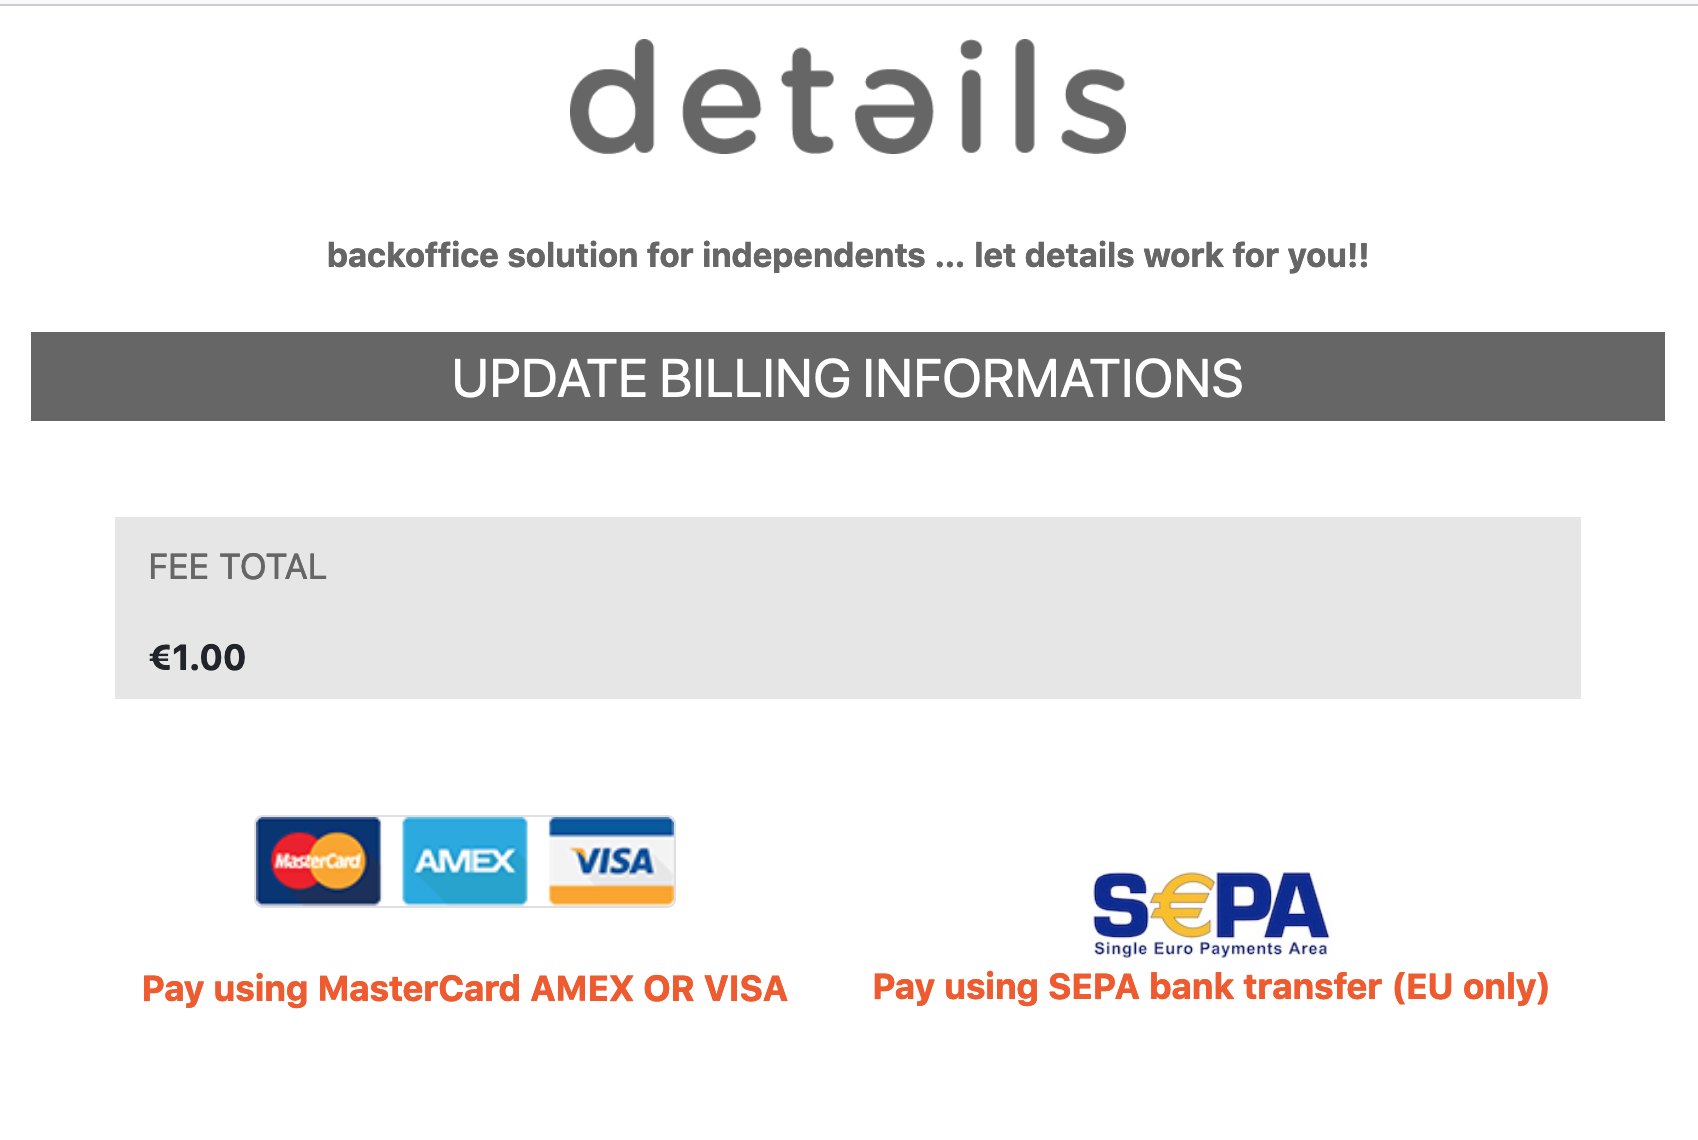
details uses a certified external payment provider to process automatic billing securely.

For security reasons:

  • Your payment details are not stored inside details
  • The details team has no access to your credit card or bank account information
  • Please never send payment details by email

To update your payment information:

  1. Go to DOCUMENTS / BILLING
  2. Click [Edit Payment Info]
  3. You will be redirected to the secure payment interface where you can update your card or SEPA mandate

Changes apply immediately and will be used for the next billing run.

► UPDATE YOUR INVOICE ADDRESS

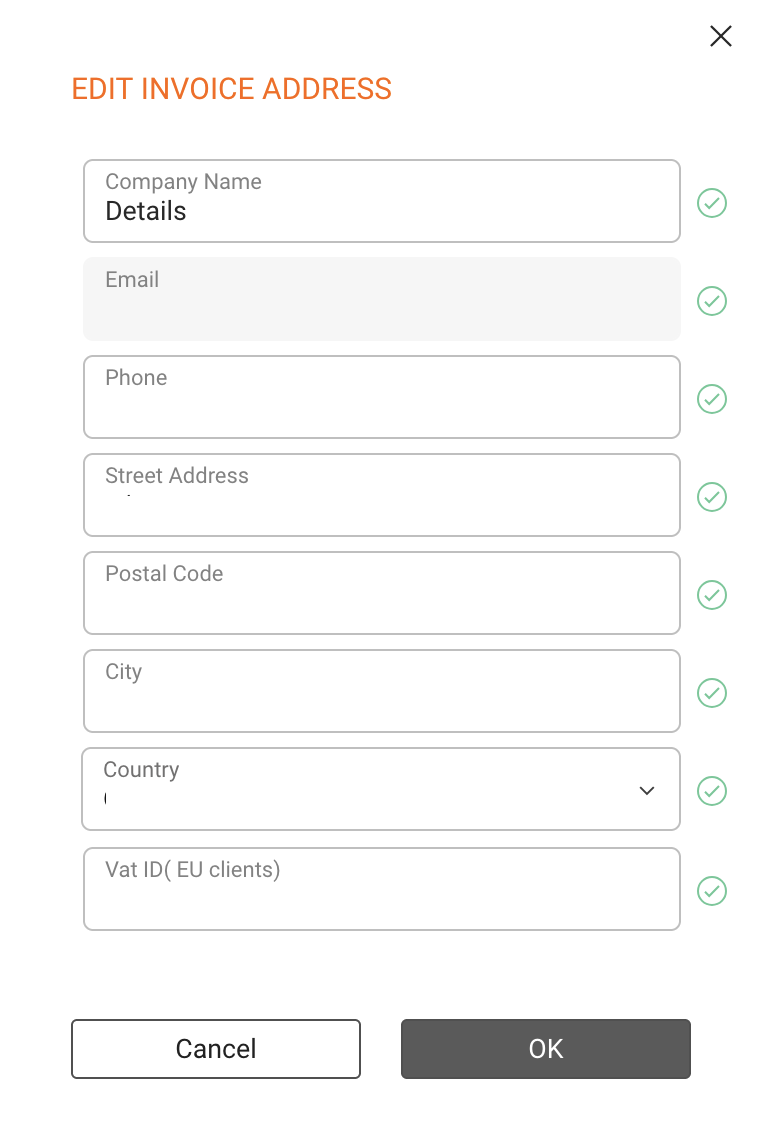
In Version 2 of details, you can update your invoice address directly in the app. This allows you to keep your legal and billing information up to date without contacting support.

To update your invoice address:

  1. Go to DOCUMENTS / BILLING
  2. Click [Edit Invoice Address]

You can update:

  • Company or legal entity name
  • Street, postal code, city, and country
  • VAT number (if applicable)

Important:
Changes to the invoice address only apply to future invoices. Already issued invoices cannot be changed for legal and accounting reasons.

► BILLING CYCLES & PAYMENTS

Billing is handled automatically based on your subscription and usage.

  • Monthly billing is charged after the end of the respective usage month
  • Annual subscriptions are billed upfront and may include discounted terms
  • Support and custom services are billed after the service has been delivered

If you have questions about a specific invoice or billing position, please contact the details support team with the invoice number for reference.