Label Interface


In CATALOG / LABEL, you manage label entities in details. This page first shows a list of all labels. From there, you can open any label to access its tabs.

►1. Labels List
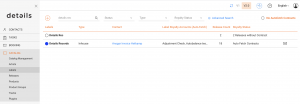
In the List of Labels you see

  • Type the label s predefined type (In-House, Distributed, External).
  • Contact the primary linked contact (if any).
  • Label Royalty Account the account used for royalty processing.
  • Release Count how many releases are under this label
  • Royalty Status number of releases not linked to a contract or connected via Auto Fetch

2. Label Page

► OVERVIEW
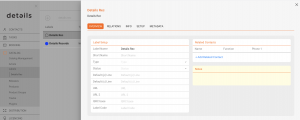
  • Type one of the predefined options (In-House, Distributed, External).
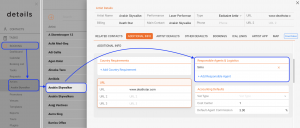
  • Status customizable color tags you define under LABEL / SETTINGSADDITIONAL INFO.
  • Default P-Line / C-Line legal lines used in exports and documents (use the officially registered names).
  • URLs two link fields (e.g., website and Wikipedia/Bandcamp).
  • ISRC Base the code root used to generate track codes downstream.
  • Label Code a legacy code still used by some collecting-society distributions.

  • Related Contacts link roles like Label Manager, Accounting, or Promotion via [+].
  • Notes keep internal notes for the label.

► INFO
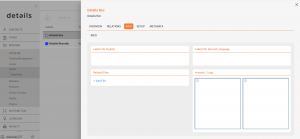
  • Logo select a logo that has been uploaded beforehand.
  • Biographies maintain label bios in multiple languages.

► RELATIONS

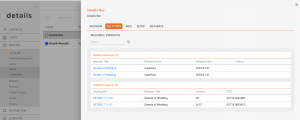
Shows all releases and products connected to the label, including counters. Click a bold entry to open its RELEASE or PRODUCT page.
► SETUP
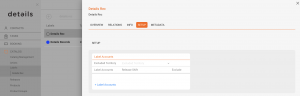
  • Distribution Restrictions exclude territories from delivery if needed.
  • Release Shifts per Account shift availability earlier or later for specific accounts.

► METADATA
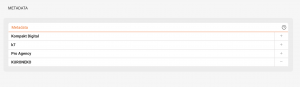
Attach predefined metadata sets (e.g., ISO codes, partner-specific fields) required for integrations and deliveries.
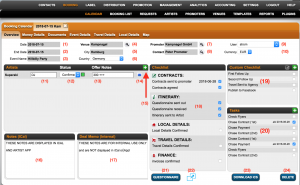
Booking – Overview

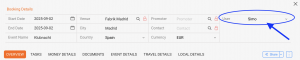
The ”Overview” tab of a booking offers a lot of valuable information for both agents and logistic people:


(1) DATE
: the start date of the selected event

(2) END DATE
: the end date of the selected event

This is set to start date per default, but available for change if you have an event that spans over multiple days. Multiple day events will be displayed with coloured bars in the calendar.
NOTE: Make sure the end date is not before the start date!

(3) EVENT NAME
: any given party or festival name or other description

NOTE: Venue names and artist names don’t need to be repeated in the event name as it might cause redundant text in contracts, itineraries and invoices.

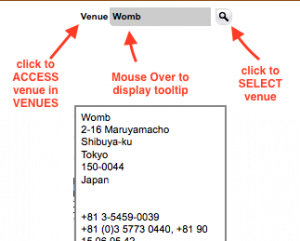
(4) VENUE
: the location, club, venue or festival this booking is taking place at.

Select a venue from your venue list by clicking the magnifier icon on the right.
To access and modify the selected venue, click on the word “venue“.
To quickly display venue information in a tooltip, hold your mouse over the selected venue name.


(5) CITY and (6) COUNTRY
: of the booking locarion are filled automatically from the venue selection

(7) PROMOTER
: the contract partner for the event.

The promoter will probably be included in contracts, itineraries and invoices, therefore it would be best to have full postal address and VAT ID available in your database. If you are missing those infos, send them a questionaire => see (19).
Promoters can be companies or persons.

Select a promoter from your promoter list by clicking the magnifier icon on the right.
To access and modify the selected promoter, click on the word “promoter“.
To quickly display promoter information in a tooltip, hold your mouse over the selected promoter name.

(8) CONTACT
: the person you talk to about this event.

This is not necessarily the same person as your promoter (7)

Select a contact person from your contacts by clicking the magnifier icon on the right.
To access and modify the selected contact, click on the word “contact“.
To quickly display contact information in a tooltip, hold your mouse over the selected contact name.

(9) AGENT
: the user responsible for this booking.

Most probably an agent. The available values for this selection are your user logins.
NOTE: To make sure automated email notifications will reach the selected user, make sure the user’s email is propperly set in the user settings.

(10) CURRENCY
: the main deal currency of this booking.

You can manage available currencies in SETTINGS / GENERAL

(11) PERFORMANCE TYPE
: the type of performance played by your artist at this booking.

The description will be loaded from the default from the artist setup in ARTIST / OVERVIEW.
It can be edited manually in this specific booking without changing the default.

(12) BOOKING STATUS
: the booking status per artist

Changing the booking status from an optional or cancelled status to a “confirmed” status or vice versa will trigger a change of the automated RSS feed. Confirmed bookings will be automatically included and cancelled or optional bookings will be excluded from the RSS feed.

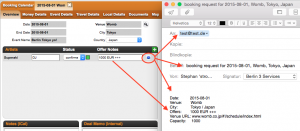
(13) FIRST OFFER NOTE
: a free text field which you could use to enter the promoter’s offer to the artist.

This text will be included in the first offer email (14) and also in the iCal subscription of the artist.

NOTE: the first offer note is pure optional text and will NOT be used anywhere in deal calculations (see MONEY DETAILS), in invoices or reports.

(14) FIRST OFFER EMAIL
: the email icon triggers an email with ome basic infos about the upcoming booking.

It could be used to send the artists or managements a first idea of an optional booking.


Read HERE how to customize the email SUBJECT and BODY for this email.

(15) ADD ARTISTS
: to add more artists to the selected booking click the green PLUS icon.

To remove artists from an event click the red X icon.

(16) NOTES (ICAL)
: a free notes field which WILL be displayed to the artist in the ARTIST APP and iCal feed.

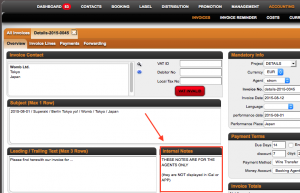
(17) DEAL MEMO (INTERNAL)
: a free text field which will NOT be displayed to the artist.

Instead it will appear in the “Internal Notes” field of related invoices.


(18) CHECKLIST
: a list of checkboxes to monitor the progress of this booking’s workprocess.

The checklist is highly related to the icons on the BOOKING LIST which will help you to stay organized throughout a multidude of bookings.
Checking the various checkboxes will change the status colour of the different sections from RED (not done) to YELLOW (in process) to GREEN (done).

NOTE:
– TRAVEL DETAILS will be displayed only if at least one travel has been added to the booking.
– FINANCE will only turn GREEN when ALL related invoices are confirmed as paid.

(19) CUSTOM CHECKLIST
: a customizable checklist open to your own checklist requirements.

NOTE: The custom checklist is currently not related to the filters in the booking list, but wil be eventually.

(20) CUSTOM TASKLIST
: a customizable tasklist that allows you to set standard tasks which may be assigned to yourself only or to somebody else in the team.

Fine more information on the custom task list HERE.


(21) and (22) QUESTIONAIRE
: access to your customizable webform questionaire used to fill all specific booking information for your contracts and itineraries.

There are two ways to use the Questionaire:
a) Send a link to the promoters and push them to fill out all necessary information for you: to get the link in an email click on the “Questionaire” button (21)

b) You may also use the questionaire to verify or complete relevant information yourself via the direct access icon (22)

(23) DOWNLOAD ICS
: a quicklink to download an iCalendar file for the selected booking.

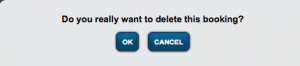
(24) DELETE
: button to click ONLY if you are sure you want to remove the selected booking from the database.

If you click this button you will be asked to confirm that you really want to delete this booking and all the data included. “OK” will remove the booking from the database.


NOTE: Deleting a booking is final. To retrieve deleted bookings from a previous backup is billable support.

Automated Email Notifications

Details will automatically send email notifications to our users in various steps of the workflow.

In the BOOKING Module the following email notifications are automatically send to the agents & logistics people:

1) Questionaires:
* Notification of submitted questionaires
* Reminders for NOT yet submitted questionaires

2) Contracts:
* Notification of submitted online agreements
* Reminders for contracts NOT yet agreed to

3) Invoices:
* Reminders for open, i.e. NOT yet fully paid invoices

4) Artist App:
* All Notifications to the Agent regarding
– New booking requests
– New gig feedback
– New guestlist requests


ALL NOTIFICATIONS are send to details users in the following sequence:

1st recipient: Responsible Agents


… if there is nothing set for these then

2nd recipient: Agent for the selected booking


… if there is nothing set for these then

3rd recipient: Client Administrator


Here is how to manage WHO will receive email notifications:

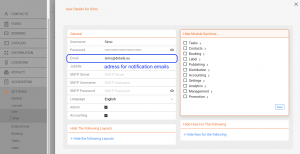
The email for notifications to responsible agents (1st recipient) and the agent for a booking (2nd recipient) is stored in the USER SETTINGS for the specified user.


If you wish to change the Administrator contact for your client, please contact our support

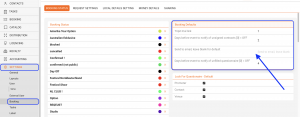
To set who should receive reminders for contracts not yet agreed to and WHEN those are send out, please go to SETTINGS / BOOKING and enter an email in the Booking Defaults box.


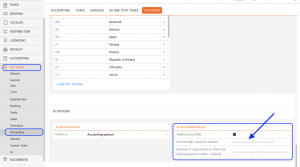
To set who should receive reminders for Invoices not yet paid, please go to SETTINGS / ACCOUNTING and fill the Invoice Notification box


Bookings

Details BOOKING module is all about managing your artist’s bookings and events easily.

There are two ways to create new bookings:
1) Accept and edit an incoming booking request in BOOKING / REQUESTS
2) Create yourself a new booking by clicking the green PLUS icon on any day in the CALENDAR

Our booking WIZARD will guide you through both processes and help to keep your database clean at the same time.

The following subtabs are available for every booking in the calendar:

* Overview
* Money Details
* Documents (Contracts & Itineraries)
* Event Details
* Travel Details
* Local Details

How to upload files in a booking and make them available in the artist ARTIST APP
* Map

Distribution Orders Interface


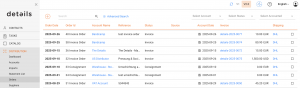
The DISTRIBUTION / ORDERS section is where you manage all physical orders created within details. This area serves as the central workspace for handling outgoing shipments, invoices, and account-based logistics.

You can use this section to sell physical products such as vinyl, CDs, or merchandise directly to shops, distributors, or individual customers. If your business only handles digital products or if you import sales exclusively through SALES IMPORTS, you won t need to use this tab.

The list view displays all existing orders along with essential information such as order date, client, type, value, and status. Orders that have already been accounted are marked accordingly.

Navigation and Search

To find a specific order, use the available dropdown filters or the free-text search bar at the top of the list. Clicking on the bold order date opens the selected order. Clicking on the bold invoice number opens the related invoice.

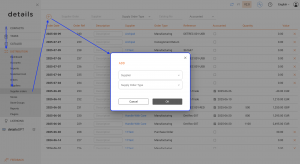
You can create new orders directly from this view by clicking the [+] icon in the top-right corner. This opens the order creation dialog, where you select the Distribution Account, Stock Account, and Order Type.

Accounts and Stock Accounts

Each order connects two sides: the Account (recipient) and the Stock Account (source). The Account represents the customer, shop, or partner receiving goods. The Stock Account defines the warehouse or inventory source that provides the stock.

Depending on your configuration, details may or may not track stock for an Account. For example, if the Account is not configured for own stock, only the Stock Account will show stock level changes.

Order Status and Actions

Orders progress through several stages depending on your workflow. After creation, you can edit order lines, adjust prices, or add shipping details before confirming and accounting the order. Once accounted, all stock movements and invoices are automatically processed.

Related Functions

In this area, you can also access connected actions such as:

  • Generating invoices from accounted orders
  • Reviewing stock movements in related PRODUCTS / STOCK
  • Accessing the Backorder list for incomplete shipments
Note: Once an order is created for a specific client, its account can t be changed later. The system loads client-specific data such as addresses, price lists, and shipping types at creation. If an order was assigned to the wrong client, cancel or credit it and create a new one with the correct account.

Supplier – Interface & Orders


In DISTRIBUTION / SUPPLIERS you manage supplier contacts, their catalogues, and all supplier orders (including manufacturing). This article unifies and updates the previous Distribution Supplier and How to create a manufacturing supplier order guides. It follows our standard workflow and UI wording in details.

Note: Button names and tabs are written as you see them in the UI. For example: [+], [OK], and the tabs Overview, Orderlines, Packaging & Shipping, Summary.

OVERVIEW

Suppliers are partners such as pressing plants and merchandise providers. Working with supplier orders gives you end to end control over stock, production quantities, direct deliveries, and costs. You will use the same order flow you know from distribution orders: create the order, add lines, pack/ship, then account/finish.

SUPPLIER INTERFACE

Go to DISTRIBUTION / SUPPLIERS. You will find the following:

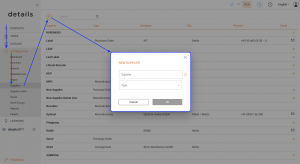
  • All Suppliers: View, add, and delete supplier contacts. Use [+] to create a new supplier.
  • Supplier Orders: Create new supplier orders and review/edit existing ones.

Each supplier record contains these subtabs:

  • Overview: Basic information and linked contacts/addresses (invoice and delivery).
  • Catalogue: Add PRODUCTS that you procure from this supplier using [+].
  • All Orders: Full list of past and open orders for this supplier; create a new order with [+].
  • Invoices / Costs: Review invoices and cost entries related to this supplier.

CREATE & MANAGE SUPPLIERS

  1. Open DISTRIBUTION / SUPPLIERS and click [+].
  2. Enter a Name and (optional) choose a default Order Type (e.g., manufacturing, purchase, consignment). You can still change the order type per order.
  3. Link the Invoice Address and (if needed) a Delivery Address via your Contacts (company and people). This ensures correct data on documents and emails.
  4. Save with [OK]. You can always return to the supplier to update defaults, add products to the Catalogue, or review All Orders and Invoices / Costs.

CREATE SUPPLIER ORDERS (INCL. MANUFACTURING)

You can start a supplier order in two ways:

  • From Supplier Orders: click [+], then select the Supplier and the Order Type.
  • From within a Supplier (subtab All Orders): click [+]. Here, the supplier is already set; choose the Order Type.

The order window uses the standard tabs:

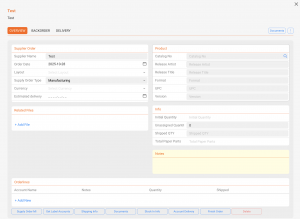
Overview

  • Confirm the Invoice Contact, Delivery Address, and key info like Shipping Date (the planned shipment date).
  • For manufacturing: select the PRODUCT to be manufactured, then enter Total Quantities and Costs.
  • Attach Related Files (e.g., print specs) in Related Files.
  • Optional: set Discount for this order (applies on top of any account/product pricing logic).

Orderlines

  • Add all items to be produced or purchased. Use search to add multiple lines, then [Add to Order].
  • For promos vs. free-of-charge (FOC): promos have price 0 and do not affect average price; FOC counts toward sold quantity at discounted value. Adjust per line if required.
  • Line-level discounts are possible in addition to an order-level discount.

Packaging & Shipping

  • Manage packing states (e.g., ReservedPacked) to control stock availability while preparing shipments.
  • Enter Weight (kg) directly or use the calculator (based on per-format weights set in label settings).
  • Add Shipping Type (carrier), Shipping Costs, and (if available) the carrier Shipping URL for tracking.

Summary

  • Review all order details, dates, addresses, shipping info, and totals.
  • Use Documents to generate paperwork (e.g., Proforma Invoice for customs).
  • When ready, click [ACCOUNT] to finalize. This accounts stock movements and (for invoice type orders) creates the supplier invoice. VAT handling follows your order settings.

DIRECT DELIVERIES & BACKORDERS

If products from this supplier order should be shipped directly to specific distribution accounts, add those accounts and quantities in the order (Overview/Accounts box). Use the Backorders tab to include open backorders where quantities could not be delivered previously and should be delivered now.

DOCUMENTS & COMMUNICATION

  • Proforma Invoice: Generate for customs declarations (values can be original or adjusted as needed).
  • Documents: Export order notifications or other documents as required.
  • Stock In Info: Summarize product and shipping totals for warehouse coordination.
  • Shipping Info: Add delivery notes (e.g., access instructions or contact details) that appear on delivery docs.

FINISHING, INVOICES & REOPENING

  • After [ACCOUNT], the order is completed. For invoice type orders, an invoice is created with number, dates, VAT, and discounts applied. Completed orders move to their final status and can no longer be edited.
  • To make changes after completion, first cancel/void the generated invoice (if any), then Reopen the order, adjust, and account again.

GOOD PRACTICES

  • Set per format weights in label settings to enable accurate shipping weight calculations.
  • Keep supplier Catalogue up to date to speed up order creation and pricing.
  • Use Backorders to handle partial deliveries cleanly and transparently.
  • Prefer Documents and Proforma generation inside the order for consistent paperwork.

For access and account management, use app.details.eu. All internal links from legacy articles have been removed or replaced by current navigation descriptions.

Using Distribution Plugins

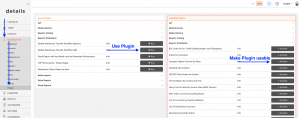
On DISTRIBUTION / PLUGINS, details provides a range of optional tools and reports to make your daily distribution work more efficient. Some plugins are free of charge, while others may be billable.

If additional costs apply, this will be indicated in the description.

To activate a plugin, click on [Activate] next to the plugin name. Once activated, you can access its functions via the corresponding icon. A module window will then open to proceed.

Note: For some plugins, activation may require a double confirmation.


Below you find examples of distribution-relevant plugins currently available in details.
For a complete list of available distribution plugins, check the PLUGINS section in your account.

► Check Statement Matching

Exports imported lines by identifier with matching information to help verify your distribution statements.
Access via DISTRIBUTION / PLUGINS / Sales Imports

► Order Discount

Enables you to add discounts to distribution orders directly within the system.
Access via DISTRIBUTION / PLUGINS / System.

► Order Import (XLS)

Allows you to import Excel files containing distribution orders, simplifying bulk order management.
Access via DISTRIBUTION / PLUGINS / System.

► Automatic Statement Importing

Provides automatic importing of statements from multiple shop or distributor formats, reducing manual work and ensuring consistency.
Access via DISTRIBUTION / PLUGINS / Sales Import.

General Settings

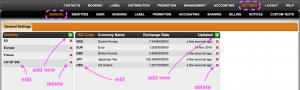
In SETTIINGS / GENERAL you can

  • manage territories
  • manage currencies

Manage Territories

Territories are mainly used in the LABEL & DISTRIBUTION modules to customize your own groups of countries, such as the EU, Scandinavia, GSA (Germany Austria Switzerland), North America, etc. You can then use those territories to apply specific ROYALTY calculation rules or distribution permissions for products in PRODUCTS / SPECIALS.

To add a new territory, click on the green PLUS icon, choose the countries from the list, enter a territory title and confirm with OK.

You can EDIT a territory by clicking on the BOLD territory title and select or de-select countries.
*2021 update: If you have created a territory for the EU, make sure to remove the UK.

To DELETE a territory you need to click a red x icon in the list.


Manage Currencies
At detYils we manage currencies on different levels and for different purpuses. A classic is that you may create invoices in different currencies and need to convert the paid amounts into your system currency (i.e. fiscal currency). THis may be important for financial reporting, royalty payouts etc.


You may manage your standard currencies and their exchange rates in SETTINGS.


We do offer a Plugin that will automaically update your default currency exchange rates every sunday night. The data source for our automatic updates is the European Central bank. Find out more about the exchage rates we use to update HERE.

Accounting Settings

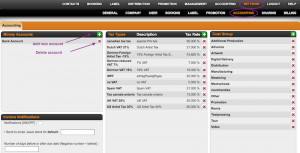
On Settings / Accounting you can add and customize settings related to ”details” / ACCOUNTING such as Money Accounts, Tax Types and Cost Groups.


Money Accounts can be normal bank accounts, paypal accounts or a cash box.

To add a new money account, click on the green PLUS icon on top right of the Money Account box and enter name and details.

You can EDIT an existing money account by clicking the BOLD account title. To DELETE a money account, you need to click a red x icon in the list.


Tax Types are customizable tax rates related to your products and services.

You can add a new tax type by clicking the green PLUS icon on top right of the Tax Type box. Enter name, description and rate and confirm with OK.
You can also choose to withhold a tax type by default, just tick WITHHOLDING TAX.
NOTE: Make sure the tax rate has a leading minus for tax deductions.

To EDIT an existing tax type, click on the BOLD tax type. To DELETE a tax type, you need to click a red X icon in the list.


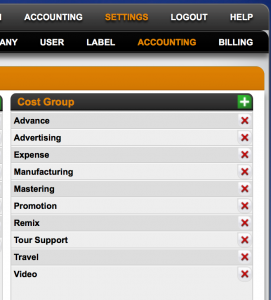
With Cost Groups you can categorize your expenses.


Please note also RECOUPABELES are accounted by cost groups. ”details” automatically identifies the costs by its cost group so that these will be accounted according to your royalty settings.

To add a new cost group, click the green PLUS icon on top right of the Cost Group box, enter the name and confirm with OK.

You can delete a cost group with the red X icon.