How to use Default Artist Credits

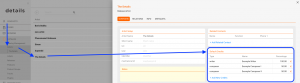
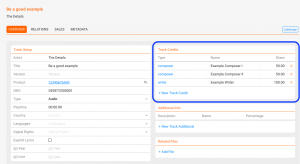
Sometimes it can save you time to store standard credits directly on an artist. In CATALOG / ARTISTS, you can define Default Artist Credits such as composers, writers, or publishers. Whenever you create new tracks for this artist, these credits will be inherited automatically and appear in the track creation modal.

Important: Default credits are only applied if the relation chain is set up before you create tracks.

ARTIST ► RELEASE ► PRODUCT ► TRACK

Quick setup

  1. Create or choose the artist and insert default credits.
  2. Create the release, if not already done.
  3. On the artist page, click [+ ADD NEW RELEASE] and thereby link the release to the artist.
  4. On the release, create a product (this product is now linked to the artist via the release). Already existing products are linked as well.
  5. On the product, add new tracks via [ADD NEW TRACKS] the default credits will be prefilled.

Default credits apply to newly created tracks only. Existing tracks are not updated.

MONEY DETAILS

The MONEY DETAILS subtab is the place to create deals, manage income and expenses and create invoices for your bookings. So this is the section where financial arrangements are added and edited for each booking individually.

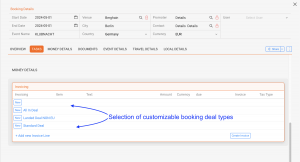
When you first come to the MONEY DETAILS tab on a new booking, in addition to the general booking infos on the top you will see a selection of your customizable deals or INVOICE LINE GROUPS listed.


Click on any INVOICE LINE GROUPS / Deal and the deal preset will create a set of Items for this specific booking which you can use to put down your agreement in details. You will be able to select which Invoice Items you want refer to in your contracts and invoices later.

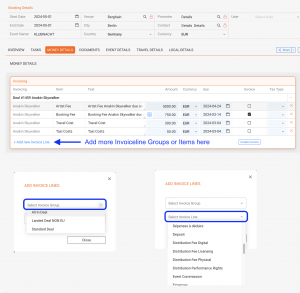
If you need any additional GROUPS or ITEMS you can ADD more using the PLUS icon on top right of the Money Section.


For each of your bookings you can now edit anything from Artist Fee and Flight Share to Booking Fee.
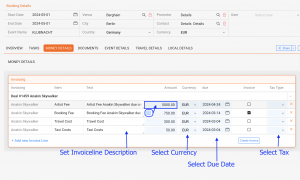
How to set automatic due dates for Money Details

If an INVOICE ITEM is based on a percentage of something then you can use the ”Calculate” button to calculate the percent amount.
To do this click on the ”Calculate” icon in the INVOICE ITEM row. The textboxes which have an amount already filled in will get highlighted. Now click on one of the highlighted textbox. The amount will be calculated and displayed in the textbox.


For each INVOICE ITEM you can also set ”Currency” as well as the ”Due Date” by selecting options from the currency dropdown and choosing a date from the date selection.

Also a Tax Type can be selected from a customizable dropdown which will transfer the selected option to contracts and invoices.
NOTE: Withholding taxes will have to be set manually in the INVOICES.

To create an INVOICE select the whatever you want to have on the invoice by checking the checkboxes in column ”Invoice”. Then use the CREATE INVOICE Button

Obviously you can create multiple invoices including different items by repeating this process.

Once an INVOICE is created, it’s number and payment status will be displayed in MONEY DETAILS.


Customize INVOICE ITEMS and INVOICE LINE GROUPS

Each Booking Agency has their own traditions, wording and invoicing workflows.

DETAILS offers you to create presets not only of what you invoice, but also how you want to bundle them in your own special deal arrangements.

Previously we had three fixed deal types to choose from:
”Standard Deals”, ”All-In Deal” and ”Door Deal” to choose from. With the 02 2015 Update you are now able to create your very own deal arrangements and modify them anyway you need.

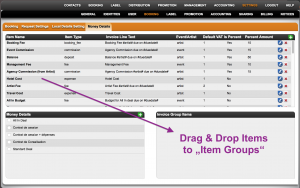
To do this go to SETTINGS > BOOKING > MONEY DETAILS


You will find three boxes for settings:

1. INVOICE ITEMS (i.e. any item you want to include in an invoice or deal, like Artist and Booking Fees, Travel Expenses, etc.)
Find out how to create or edit INVOICE ITEMS HERE

Here is how to set automatic due dates for Money Details

2. INVOICE LINE GROUPS (i.e. “deal types”)
Find out how to create or edit INVOICE LINE GROUPS HERE.

3. Invoice Group Items (i.e. selection of INVOICE ITEMS for a specified INVOICE LINE GROUP).
To populate INVOICE LINE GROUPS with INVOICE ITEMS, select a group first and then simply drag & drop items into the “Invoice Group Items” box.
NOTE: The Sequence in which you ”add” INVOICE ITEMS to the Group will be the sequence in which the INVOICE LINE GROUPS will appear whenever it’s selected in a booking!

INVOICE ITEMS

DETAILS allows you to customize your own presets for specific booking arrangements.

Configure Artist- and Booking Fees, Deposits or Travel Expenses and their usage any way you need in SETTINGS > BOOKING > MONEY DETAILS.

Whenever those INVOICE ITEMS are used in any specific booking, they may automatically be transferred to contracts, itineraries, invoices as well as to the ARTIST APP.

We have populated the SETTINGS with a default set of INVOICE ITEMS.

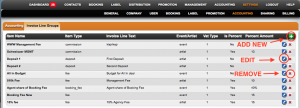
ADD NEW items by clicking on the green PLUS icon on the very right of the top box.

EDIT existing items by clicking on the blue EDIT icon in each existing line.

REMOVE existing items by clicking on the red X icon in each existing line.

NOTE: Be aware that removed items will not only be not available for future bookings, but also be deleted in past and present bookings! Existing Invoices however will not be modified.
Each INVOICE ITEM can be set in the following screen:
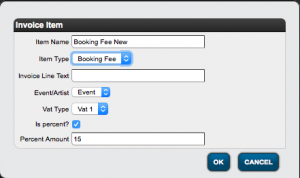
* First setting is the Item Name

* Select one of the available Item Types:
FEE”: use for any kind of artist income or landed fees
DEPOSIT”: use for artist fee deposits
”BOOKING FEE”: use for agency fees which go ON TOP of the artist fees
COMMISSION”: use for agency commissions which will be deducted from FEES
EXPENSE”: use for any kind of cost or expenses related with a booking
* The
Invoice Line Text allows you to adapt the wording of the description on the Invoices.
NOTE: You may include the following variables in the description texts:
”#artist#” will include the specified artist name in the invoice line
”#duedate#” will add the duedate selected in this invoice line
* Select whether the current item will be PER ARTIST or PER EVENT on the
Event/Artist dropdown.
* Select whether the current item will PER DEFAULT have a
VAT type 1 or 2 or NO VAT.
VAT 1: use if this item typically needs full VAT rate
VAT 2: use if this item typically needs half VAT rate
No VAT: use if this item typically doesn’t need any VAT
* If the item typically
is a percentage of other values within the deal, you can set a default percent rate and DETAILS will help you calculate those percentages in your booking deals.
* The default percent rate is set in
Percentage Amount__

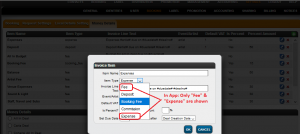
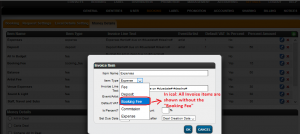
* There are two more options for being availability of invoice items in Artist app and ical.
That is:

** 1)In Artist App : Shown only “fee & expense” type invoicelines .
Screenshot:
** 2)In ical : Shown all types of invoicelines without “booking_fee”
Screenshot:
Artist App

Details offers a direct link to Bookings in a HTML5 webapp, which we call the Artist App.


Find out HERE how to create Artist Apps for your artists!

HERE is an article for your ARTISTS on how to add the App to their mobile phones!

Here is a hint for booking agents who want to see MULTIPLE ARTIST APPS on their mobile phone.

It offers many additional features. As the App is actually a HTML5 link (and not an App from any store) you should be able to use it on any device.

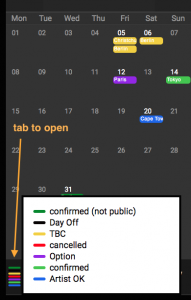
As soon as the App is loaded the user will end up in the current month of the calender. Click on any date to get details for this specific booking.
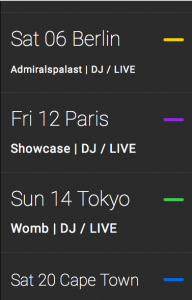
Or you could switch to the List View which let’s you scroll up and down a selected month.


At the bottom left of both calendar and list view you can also find a pop-up explanation of the colour code of the customized booking states.


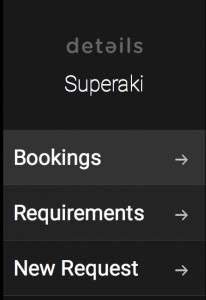
For other options click on the MENU icon on the top right, which gives you access to the BOOKINGS; REQUIREMENTS and NEW REQUEST tabs.


BOOKINGS will take you back to the calendar where you can select any booking.
See below for more details.

REQUIREMENTS will allow you to see what requirements the agency has currently stored as default.

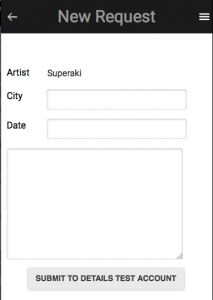
NEW REQUEST is a NEW feature and allows your artists to submit new booking requests or other request back to the agency.
The RESPONSIBLE AGENT will receive an email with whatever the artist entered here.


The main change however is the way we structure the various details about bookings:
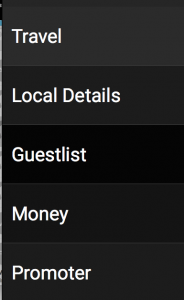
Each section from logistics has now its own subtab where selected infos are displayed in a way that allows you to read it in any condition …


TRAVEL will give you any travelsteps related with this booking for the selected artist

LOCAL DETAILS will display all entries from the details LOCAL DETAILS tab of this specific booking, i.e. Drivers, Hotels, Restaurants, Technicians, etc.

NOTE: You may now directly trigger valid PHONE NUMBERS and EMAILS.
This will only work if they are entered correctly in Details.
Valid: ”===+49 177 12345678===”
NOT valid: ===”+49 (0)177 12345678 / Alex: -79 / Michael: -80”===


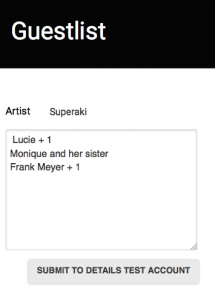
GUESTLIST is a NEW and OPTIONAL tab. If activated, artists will be able to submit guestlist names directly to the RESPONSIBLE AGENT. Agents will receive the names in an automated email notification.
NOTE: The agents will need time to process the guestlist names … plan ahead!


MONEY is where the deal infos will appear. This section is also OPTIONAL, so the agent may or may not allow access to what’s in the MONEY DETAILS for this artist.
For example the MONEY section might be activated for the artist manager, but not for the Tour manager. He might get a link without this option.

PROMOTER is another OPTIONAL tab. Some agencies need their artists to see the promoter details, others won’t allow it. If activated this tab will display the full address, email and phone number of the promoter.

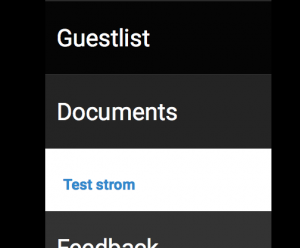
DOCUMENTS is OPTIONAL as well. Agencies may allow the artists to see and download public files related to the selected artist and booking.
Click HERE for more info on how to make documents available in the Artist App

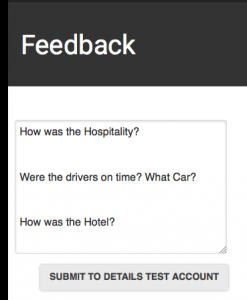
FEEDBACK is NEW and also OPTIONAL: Agencies may ask their artists and crew for feedback about their bookings in a customized form. The feedback will be transmitted via automated email notification to the RESPONSIBLE AGENT in an emnail as well.


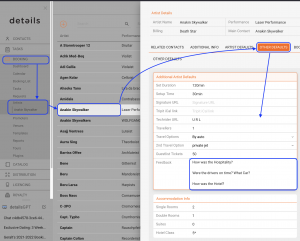
NOTE: The default questions which agencies want to ask to the artist need to be added in BOOKING/ ARTISTS / selected artist / OTHER DEFAULTS


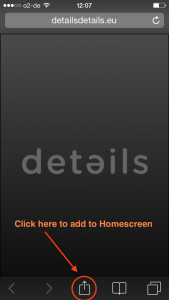
NOTE: Make sure Artists and Tour Managers are using current links. People using any OLD links might have to update their links and icons on their homescreens. To create a new icon please select the ”ADD TO HOMESCREEN” button on your mobile device. The same applies if you or your artists are stuck on the loading screen.


How to display documents in the Artist App

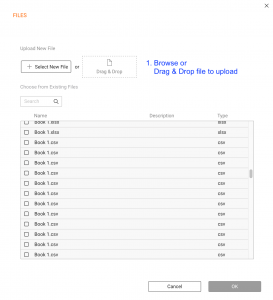
The details ARTIST APP allows your artists to see and download files or documents related to specific bookings, like train or flight tickets, itineraries, instructions or stage plans …

All documents need to be provided from within details with the following steps:

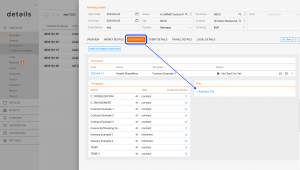
1) Go to the booking you want to provide a document for


2) Click on the “+ Add New File in the FILES box


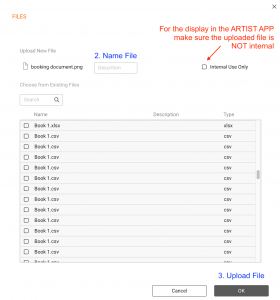
3) BROWSE the file you want to make available, give it a file NAME and click OK.

NOTE: Make sure the documents you want to share are NOT clicked as internal.
Internal files will never be shared with anyone outside of details.


Any NOT internal file made available in the booking will be available for display in the ARTIST APP.
NOTE: If you do NOT want to allow this option, make sure you don’t select it when you CREATE and send out the ARTIST APP LINK.


Responsible Agents for Artists

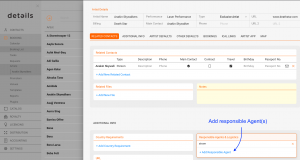
In details you can relate “responsible agents” to your booking artists.

In this context “agents” actually means “users logins”.
Each Artist can have one or multiple USERS related to it.

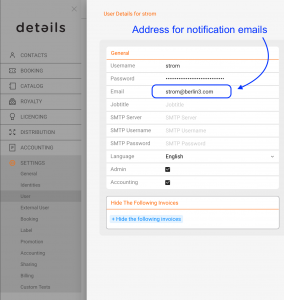
Each user / agent will receive notification emails from QUESTIONAIRES, REQUEST FORMS and also Guestlist-, Request- or Feedback- Messages from the ARTIST APP.

You could also use the related agents information in templates like contracts or itineraries.
To relate a “responsible agent” go to BOOKING / ARTISTS / select the artist / ADDITIONAL INFO.


NOTE: Email notifications to “responsible agents” will be sent to the email-address stored in the USER SETTINGS for the specified user.


Add custom fields to a Promoters

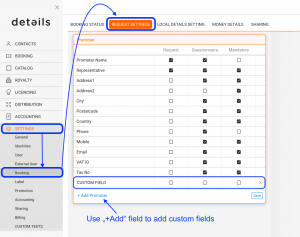
To add custom fields to a promoters page, go to SETTINGS / BOOKING and then click the second subtab REQUEST SETTINGS

On this tab, you will have the option to add custom fields for each of the different categories in details including the promoter. Click on the +Add …. to add custom fields


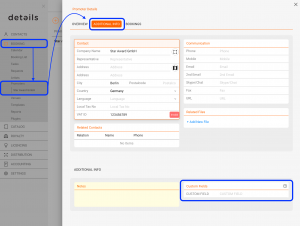
Once you’ve created your custom fields, go on to the PROMOTER section within BOOKING. Select your Promoter and go to tab ADDITIONAL INFO to find and populate the fields you’ve created.

Booking Settings

DETAILS allows you to customize your own presets for specific booking arrangements, including Booking STATUS, REMINDERS, REQUEST FORMS and QUESTIONAIRES, LOCAL DETAILS and MONEY DETAILS.


Booking Settings
* How to customize Booking Status


Request Settings
* How to create custom fields for promoters

Local Details Settings


Money Details Settings
* How to customize INVOICE ITEMS and INVOICE LINE GROUPS (Deal Types) for MONEY DETAILS

* How to customize INVOICE ITEMS