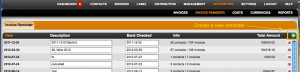
If you want to create an invoice reminder, please follow these steps:1. Go to section Accounting – Invoice reminder, and click on the green button to create one invoice reminder:
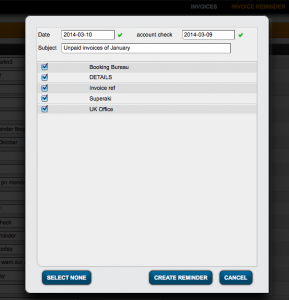
2. Add the date you checked your bank account, as well as the invoice projects you want to check and click create reminder. The system will find all unpaid invoices.
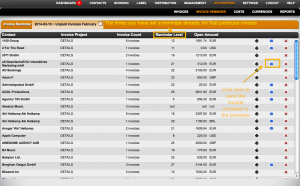
3. The invoice reminder is created. To send a particular reminder to a promoter, click on the blue envelope. This will open an e-mail to the assigned contact with all relevant info.
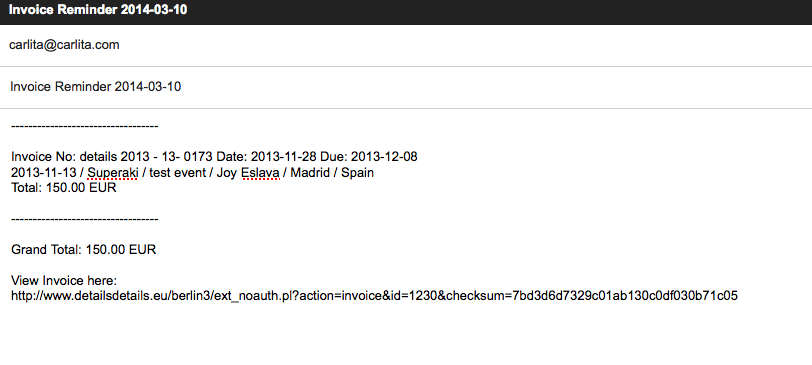
4. This is how the final invoice reminder looks like:
You can also send the reminders in a batch (to all contacts that have mail addresses assigned) by clicking the Notify All button at the bottom of the page.
Author: detailsadmin
Why Travels or Local Details don’t appear in the Itinerary or App
If your itinerary or local information isn’t showing up, follow these steps:
For travels and local details to appear in your Itineraries and the Artist App, the following connections must be in place:
- ARTIST connected to CONTACT connected to TRAVEL or LOCAL DETAIL
Here’s how it works:
1. ARTIST must be linked to a CONTACT with the “Travel” checkbox checked.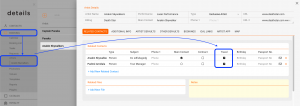
AND
2. CONTACT must be linked to a TRAVEL or LOCAL DETAIL.
Also, make sure the custom variables for travels or local details are available in your templates. The Artist App will automatically pull all travel and local details.
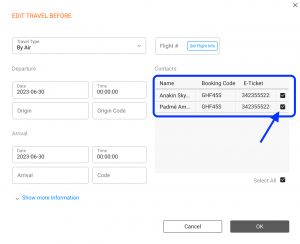
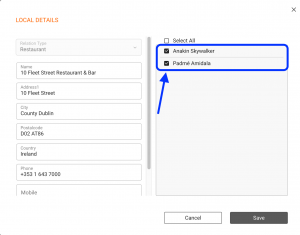
In addition to the relations between ARTIST, related CONTACT and TRAVEL or LOCAL DETAIL, you may need to check if the custom variables for travels or local details are available in your TEMPLATES.
NOTE: The Artist App will automatically pull all data travel and local details.
Following this logic here is a checklist of issues you want to investigate when a travel or local detail does not appear on your Itinerary or App:
1) Check the respective artist profiles and make sure each has related contacts and the “Travel” checkbox activated. Click here to read how to properly set up your artists. 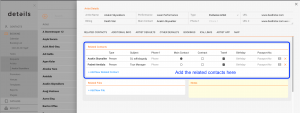
2) Regarding Travels then check the Travel Details section for your booking:
Make sure the travel contacts are included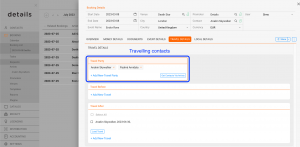
If the travelling contacts section is empty, click on the GET CONTACTS VIA ARTISTS button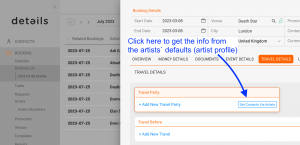
Then make sure the contacts are related to the travel steps.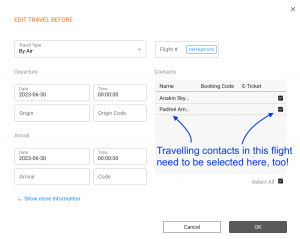
You can see if travel steps are missing from the Travel Details overview: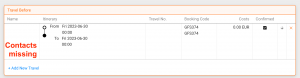
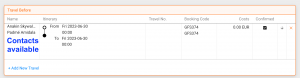
3) The same applies to LOCAL DETAILS: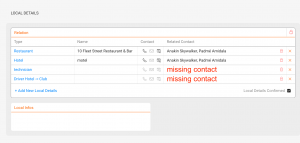
Booking requests notifications to your email
This is how the Email Notifications work for Booking Requests:1. The Email Notifications are related to the responsible agent of each one of the artists. That means: Each responsible agent will receive their own email notifications when a ===Booking request for his/her artist=== is submitted to Details.
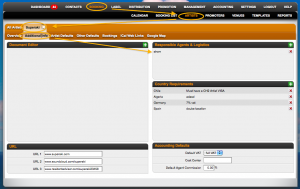
2. If the Responsible agent has no email (user with no email), or there is NO responsible agent (no user related to the artist), the email notifications will go to the default email in the client settings (the email given in the registration process).
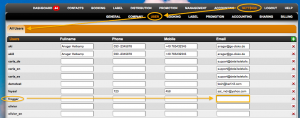
3. If you want to change the default contact email address, just contact us and we will change it in our database.
Also:
If an artist has 2 agents, both of them will receive the Notifications.
Invoices
Structure of invoices in details:
We display all relevant information about any invoice in details on 4 tabs:
1) overview
2) invoice lines
3) payments
4) forwarding re 1)
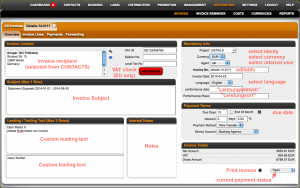 On the overview you can find the most important accounting facts about the selected invoice:
* the invoice recipient which is selected from the CONTACTS section via the eyeglass icon
* their VAT ID including a VAT number check for EU based companies
* the invoice subject * optional text fields for custom leading and trailing texts
* a field for internal notes
The “Mandatory Info” section allows you to doublecheck such important invoice facts as
* the invoice project (the selected invoice identity) * the selected currency
* the selected user
* the pre-filled, but editable invoice number
* the pre-filled, but editable invoice date
* the selected invoice language
* the performance date and place (required for German clients as “Leistungsdatum” and “Leistungsort”)
The “Payment Terms” section allows you to doublecheck
* the due date of the invoice
* optional discounts
* the selected payment method
* the selected money account
Note: Each invoice can only have ONE due date! This due date will be referred to in the Invoice Reminders. Different due dates by invoice line will be displayed in the invoice lines, but will not trigger our automatic reminders!
There is also a “Invoice Totals” section on the overview which shows you the total net, vat and gross balances. At the very bottom of this page you on the right you will find another print icon and a display of the current payment status.
Importing Multiple Contacts (Bulk Import)
To import multiple contacts including entire contact groups you can either use our Excel template or upload a vCard file. Both options are designed for bulk import.
If you want to add a single contact instead, simply use the [+] button in the CONTACTS view.
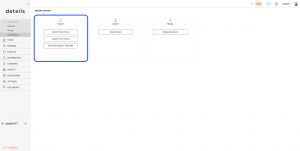
► Import from Excel (.xls / .xlsx)
To import contacts from an Excel file, follow these steps:
- Download the import template from CONTACTS / IMPORT or directly here.
- Enter or copy your contact data into the template. Make sure to use the correct columns.
At least one of the following must be included:- Company name
- First name and last name
- Add as much additional information as possible to make the contact entries more complete:
- Address
- City
- Country
- Phone number(s)
- Email address(es)
- To automatically create related accounts during import, enter x in the following columns:
- Column T: create royalty account
- Column U: create distribution account
- Column V: create supplier account
- Save the file as .xls or .xlsx.
- Go to CONTACTS / IMPORT in details and upload your file via the import section.
► Import from vCard (.vcf)
The vCard format (.vcf) is a standard for digital contact files and is supported by many address book applications. You can use it to import both individual contacts and entire contact groups into details.
If you’re using the Mac Contacts app, you can select a group and export it as a vCard file. Most other contact tools offer similar export options.
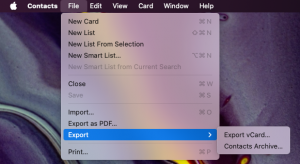
If your tool doesn t support vCard export directly, you can convert a CSV file to vCard using an online converter such as this one.
Once you have your vCard file ready:
- Go to CONTACTS / IMPORT in details.
- Click [IMPORT FROM VCARD] and select your file.
details will automatically assign imported contacts as Companies or Individuals, based on the content of the vCard.
If you need assistance at any point, feel free to contact us we re here to help.
Settings / Sharing Menu
On the SETTINGS / SHARING page you can currently find
1) the embed script for our online request form
You will find it here:
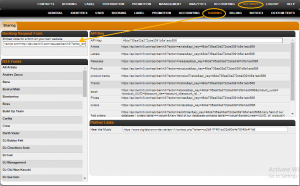
How to adapt the Booking Request form to your style
Here’s a list of programmers you could contact if you need help with this: Philippe Tiffon
2) our RSS feeds for ”a)” all your artists or ”b)” selected artists
You can use our RSS feeds to publish all confirmed bookings to websites or external services, such as Gigatools, etc..
To find the RSS feed links, go to SETTINGS / SHARING.
In the RSS section on the left side of the page, there’s one link for ALL Artists and below that are links for all single artists:
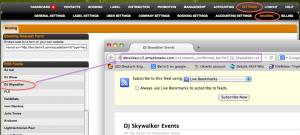
Just copy the RSS links you need and forward them to your web administrator. He or she should know how to include those into your website.
Here is how to push your confirmed bookings to Facebook, Twitter, etc.
3) Details platform provides various APIs that calls for easy communication for various services.
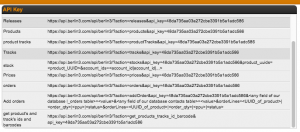 API URL Structure:
Each API URL has the following structure:
https://api.berlin3.com/api/berlin3/?action=get_products_tracks_id_barcode&api_key=12345
If we break down the URL, each url contains two essential parts:
*action: This specifies the sort of action we want to perform.
Example: get_products_tracks_id_barcode(this fetches the external id and external table)
*api_key: This is the Unique Key specified for you from Details.
This can be found at Settings>Sharing.

Why are past dates removed from the iCal subscription?
“`html id=”ical-subscription-redesign”
“`
An iCal subscription is basically a text file in an international standard format called ICS.
The more dates are included in that file, the larger it becomes. The larger the file becomes, the longer it takes to download and update on your device.
If an iCal file becomes too large, smartphones may not be able to load all data within the time limit defined by their settings. This can cause a timeout, meaning new dates may no longer be uploaded correctly.
Why Past Dates Are Removed
For this reason, the details Artist iCal Subscription Feed only displays bookings within a limited date range.
| Included in the iCal feed | Removed from the iCal feed |
|---|---|
| All bookings from the previous 1 month up to the next 1 year. | Booking dates older than 1 month and booking dates newer than 1 year. |
Where to Find All Booking Dates
If you need to view older bookings, bookings further in the future, or a complete booking history, you can use one of the following options:
- Use the Artist App. This web interface can be opened on a PC, Mac, or smartphone.
- In details, go to Booking > Artists > Booking Dates to see all bookings for the selected artist.
- In details, go to Booking > Booking List to see bookings for all artists or for a selected artist.
The iCal feed is optimized for reliable syncing on phones and calendar applications. For a full booking overview, use the Artist App or the Booking section inside details.
Invoice Layouts
This article explains how details uses layouts to define the structure, numbering, and default behaviour of financial documents.
The focus of this article is on layouts used for invoices & credit notes.
Layouts for royalty statements are explained in a dedicated article.
Access & security:
Layout management is restricted to users with ADMIN rights. When opening the layout section, admins are required to confirm their login again for security reasons.
► WHAT ARE LAYOUTS USED FOR
Layouts define how financial documents are generated and displayed in details. The same layout system is used for two main outputs:
- Invoices & credit notes
- Royalty Statements
A layout combines both the visual structure of a document and the business defaults that apply when new documents are created.
► ENTRY POINT: SETTINGS / LAYOUTS
All layouts are managed in SETTINGS / LAYOUTS. This overview lists every layout available for the selected client.
For each layout, the list shows key information at a glance:
- Layout name
- Default currency
- Country
- E-invoice status (where applicable)
- Invoice numbering format
Click a layout to open its configuration. Use [+] to create a new layout, or [x] to remove an unused one.
► DEFAULT LAYOUTS
Each client starts with a small set of predefined layouts that can be edited or duplicated:
- Main invoice layout
Used for official outgoing invoices and credit notes. - Internal layout
Used for internal documents or self-billing scenarios where no external invoice is required. - Royalty layout
Used for royalty statements and related royalty credit notes sent to rights holders.
These defaults act as templates. You can create additional layouts at any time for different brands, businesses, or use cases.
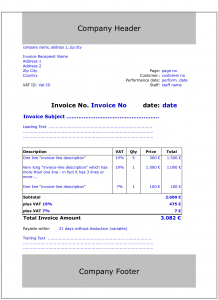
► LAYOUT STRUCTURE
Every layout is composed of three main document sections:
- Header logo, company identity, address
- Body document content and line items
- Footer legal text, bank details, payment instructions
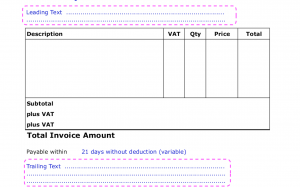
Within the body, details follows a fixed structure:
- Leading text
- Invoice or statement lines
- Trailing text
► SETUP & INVOICE NUMBERING
The LAYOUT SETUP tab defines the structural and financial defaults of a layout.
In the General section you configure:
- Layout name
- Invoice, cost invoice, and royalty numbering formats
- Country and default currency
- Default payment method
- Whether the layout is marked as a royalty layout
Numbering formats can combine fixed text with variables.
Common variables:
#yyyy# four-digit year
#yy# two-digit year
#nr#, #nr2#, #nr3# sequential numbering with different padding
Number counters increase automatically for each new document created with the layout.
Important note on invoice numbering:
Invoice numbers in details are generated using an internal, automatically incremented counter per layout and year. This counter always moves forward and does not follow changes to the invoice date or displayed invoice number.
In practical terms:
- If you create invoices in a new year and later change their invoice date to the previous year, the numbering will still continue from the current counter.
- If you delete an early invoice while newer invoices already exist, the skipped number will not be reused.
This behaviour is intentional and ensures consistent, audit-safe invoice numbering. If you need the numbering to be reset for a specific invoice layout (for example after year-end adjustments), please contact the details support team and tell us which layout is affected.
Resetting the internal counter is currently not possible from the user interface.
► PAYMENT & VAT DEFAULTS
Each layout also defines default financial behaviour, including:
- Default money account
- Payment terms and due days
- Optional discounts
- Standard and reduced VAT rates
In rare cases where national VAT rates change, VAT Rate 1 and VAT Rate 2 can be adjusted directly in the layout. These defaults apply to newly created documents.
► EDITING HEADER, BODY & FOOTER
The remaining tabs allow you to edit the document content itself:
- Header branding, logo placement, company information
- Invoices / Cost Invoices document body and line presentation
- Footer legal notes and payment instructions
Content is edited using a rich-text editor and may include variables or conditional logic. Changes affect all newly generated documents using the layout.
Tip:
If a layout is already in use, create a copy of the existing layout before making changes. This allows you to test your adjustments safely. Afterward, always create a test invoice or statement to review the result before using the layout live.
How to subscribe to your calendar in iCal (Mac)
This page will help you subscribe to an iCal feed with your bookings provided by details.
When see this page, you should have received an email from your agent with two links:
1) ### iCal Feed ###
2) ### Online App ###
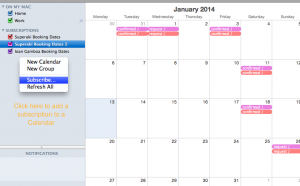
1. To subscribe, just click on the first link in the email you received. it should take you to step 2) automatically.
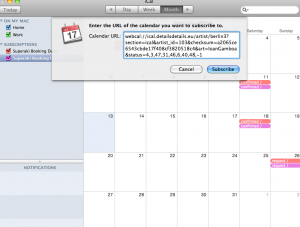
If not, open ICal and click on the ‘Subscriptions’ section with the right mouse and paste in your link.
2. Add the new calendar to the your Ical.
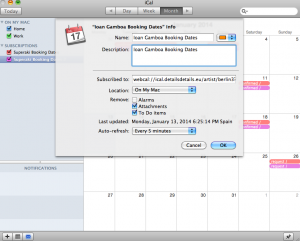
3. Edit the ‘Settings’ of the Calendar Subscriptions as required (auto-refresh, attachments..)
How to add the details calendar to your google calendar
You can add the details calendar to an existing google calendar by subscribing to it.
1) click the first link you receive in the email from your agent (### iCal Feed ###).
2) copy & paste this link to your Google Calendar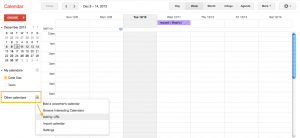
3) Add Calendar, without making it public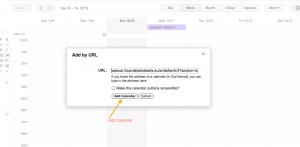
Syncing your iCal Feed with your Google cal