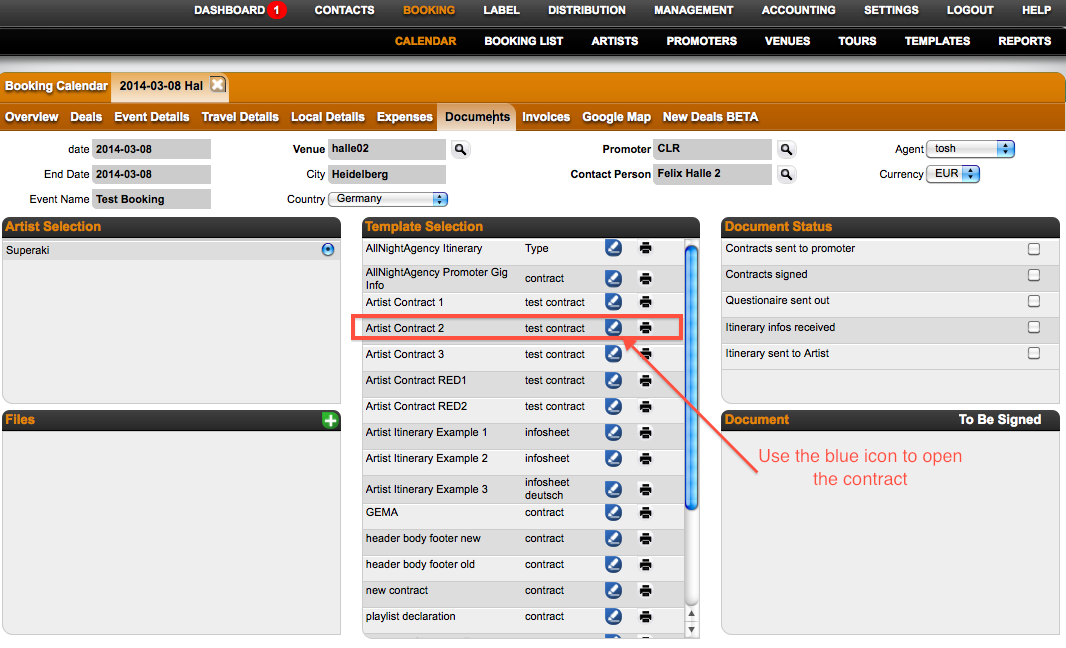
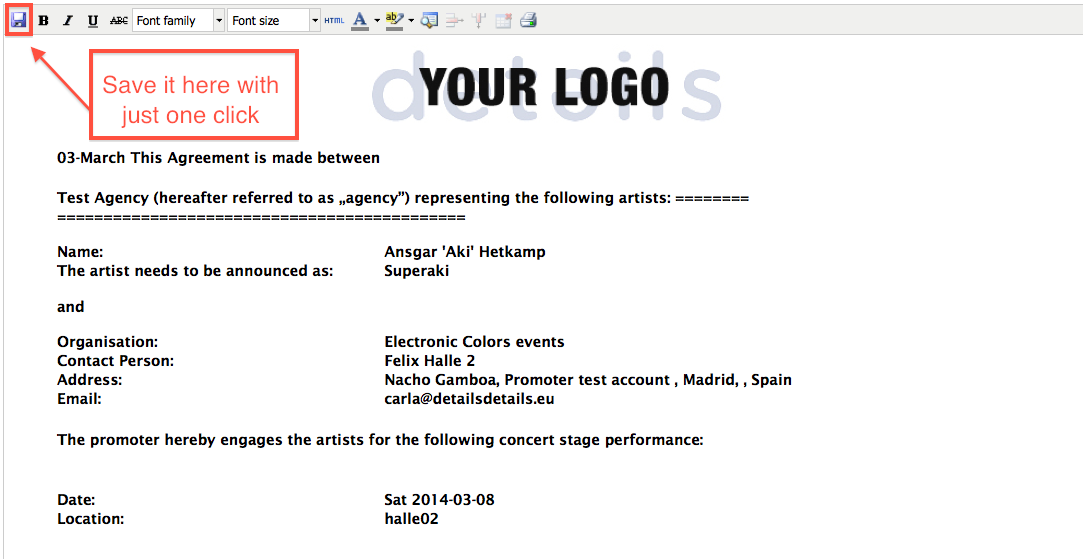
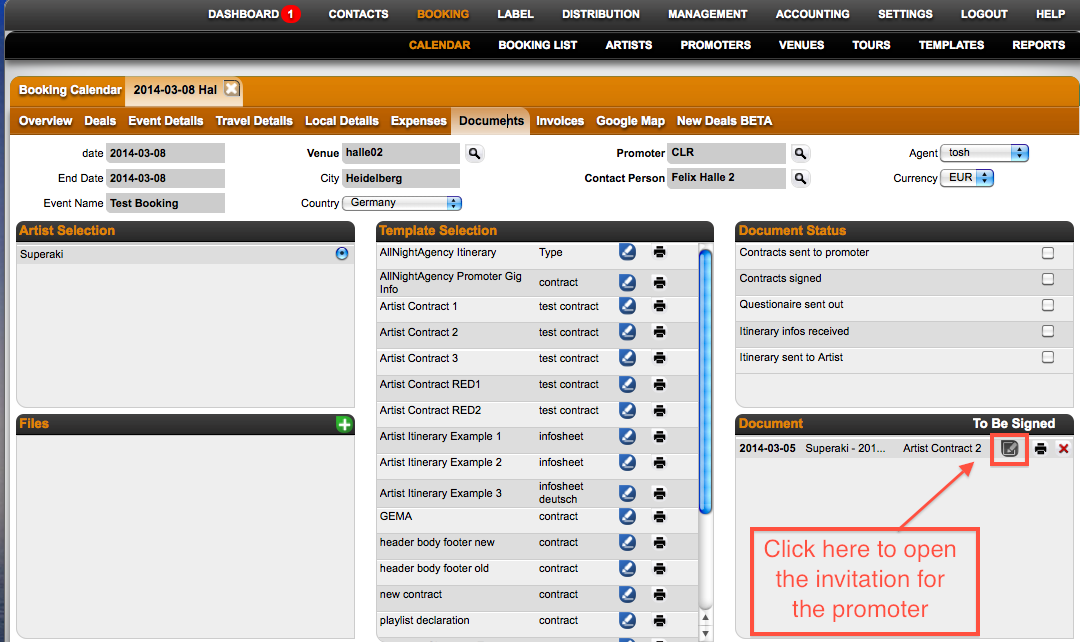
How to add Details Calendars to: another Details System (sharing artists with other agencies)

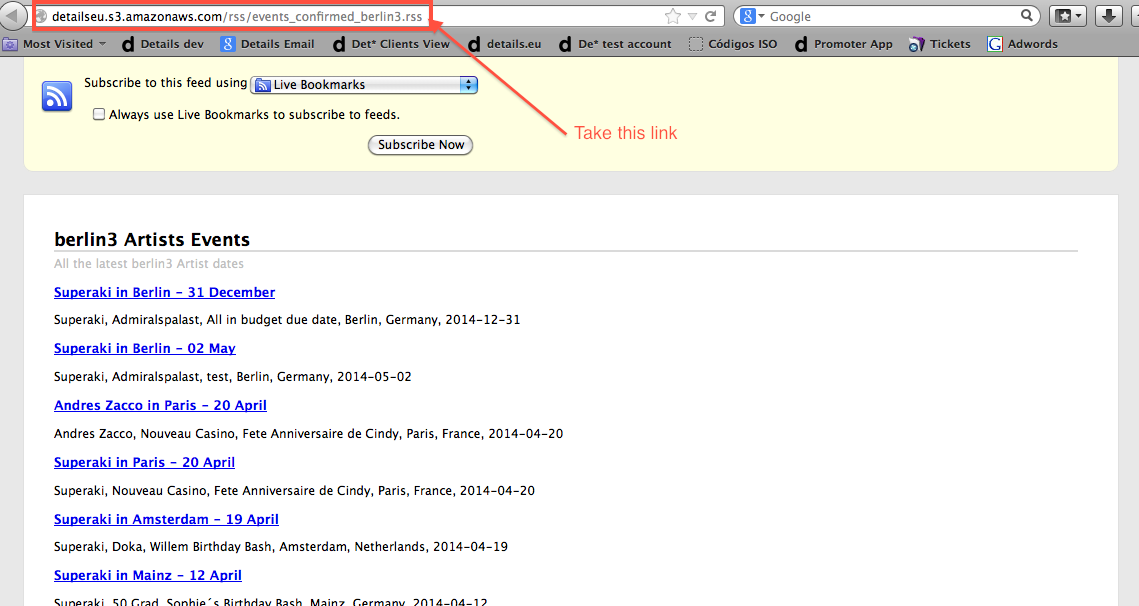
1. Create the Artist weblink you want to share (Artists Defaults – Ical weblinks)
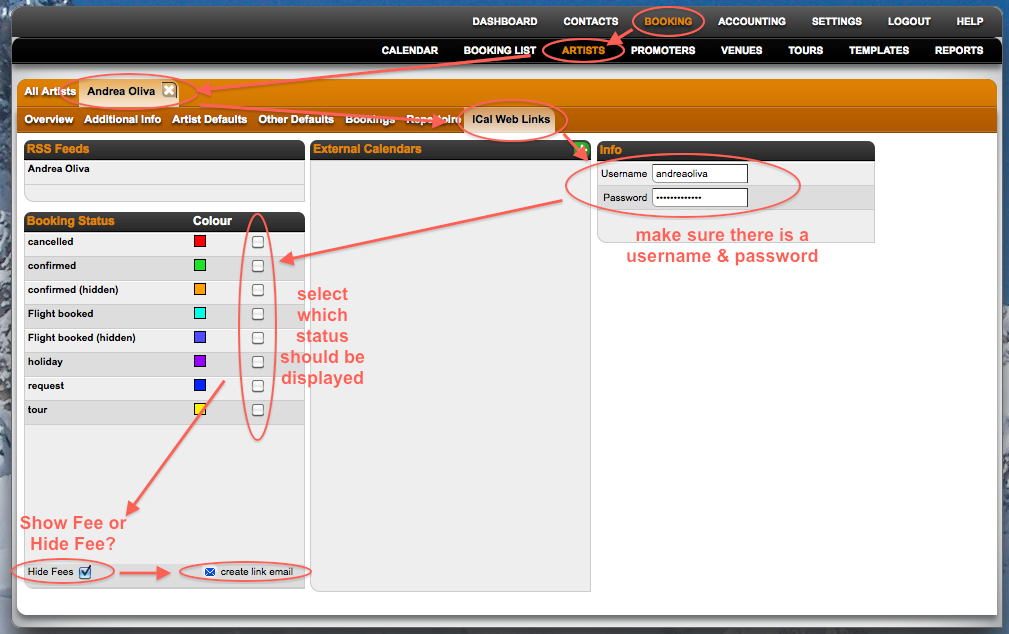
2. Pick the Ical link and send it to the Agency you share your artist with:
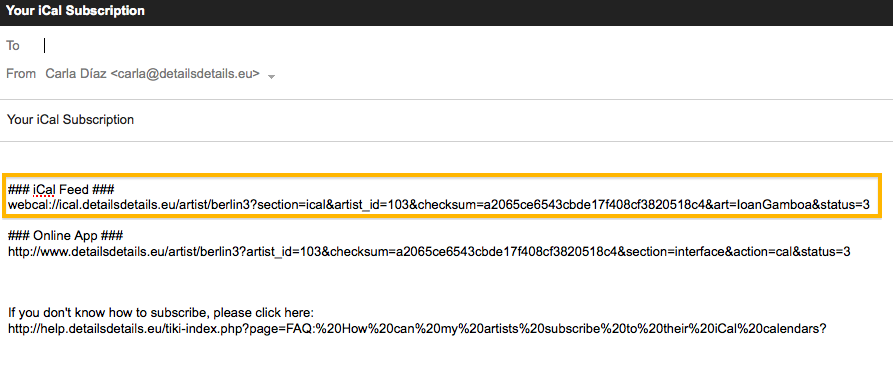
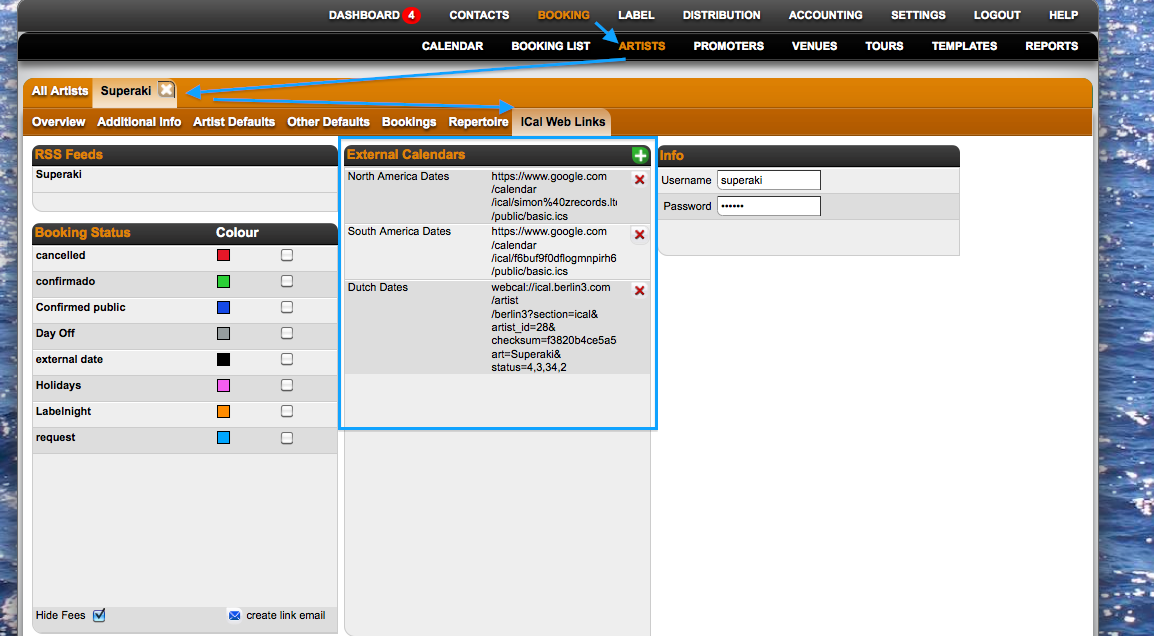
3. This exact link should be pasted on the Artist defaults: ICal web links – External dates section.
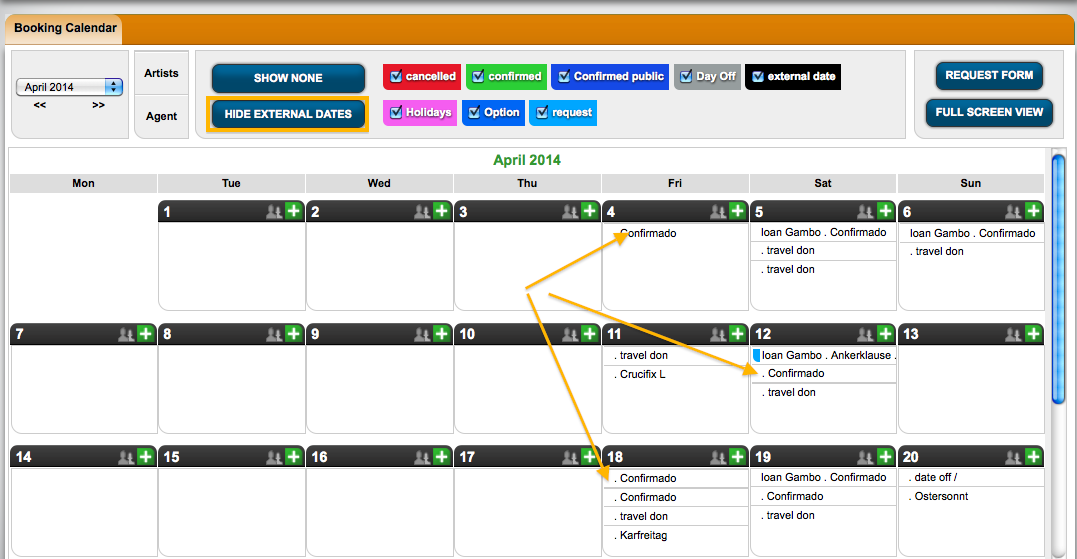
4. Now they can see your dates as ‘External Dates’ in the Main Calendar of their Details System, by clicking the ‘Show external dates‘ button.

NOTE: The first time you add an external calendar there will be an update cycle of max. 12 hours. After that calendars are synched periodically.
How to add the Artist App to your mobile phone

Welcome!

You received a link to our details ARTIST APP and would like to add it to your mobile device?


How Do I get Mobile WebApp on my Device?

Make sure your mobile device receives emails to receive the link to the Web App.
If it doesn’t, alternative ways to receive the link would be a text message or a mobile skype message.

Click on the link you received to open it in your standard device browser.

On iPhones this would be Safari.
The app will also work on any other browsers for Android phones and other devices.

Your browser should now display the details Artist App with all features made available by your agent.

In order to store the app link on your device, we recommend you ADD the app TO your HOMESCREEN:

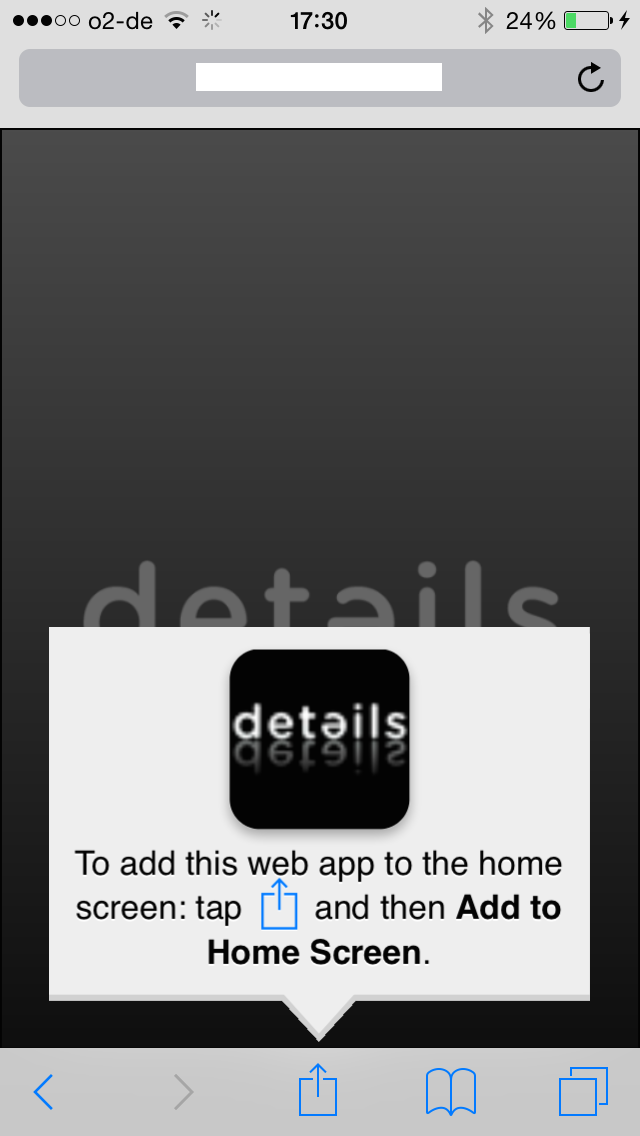
When you access the App for the first time a message should appear which indicates how to do that.

If you don►t know how to add the link to your homescreen, check THIS ARTICLE

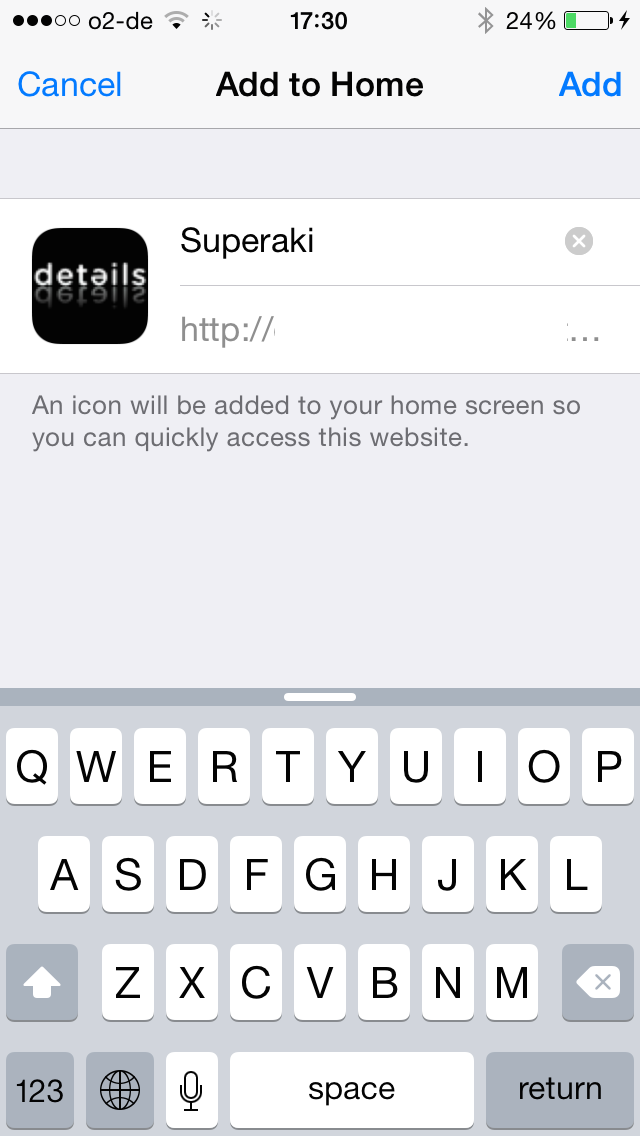
Here►s what it looks like for iPhone 5:


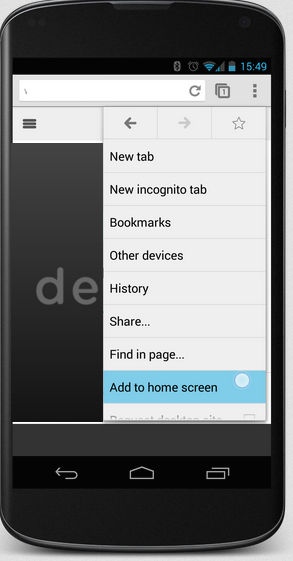
On Android it could look something like this


Notice the field containing the artist name. This text is editable and can be changed to whatever you desire. It is important, as this is the title which will be displayed on the Phone Screen. Once you are done, select the Add button.


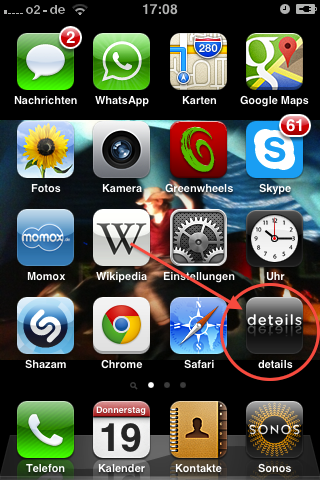
Click on your phones Home button to return to the Home Screen. A new icon should now be displayed for your artist calendar.


To add the app to your iOS device’s home screen:

First tap the box with an upward arrow.

Next tap on “Add to Home screen”

Rename your app and tap add

Quickly access your analytics from your home screen


To add the app to your ANDROID device’s home screen:

First tap on the three dots in the URL bar

Next tap on “Add to Home screen”

Rename your app and tap add

Quickly access your analytics from your home screen


NOTE:
In some cases, adding the link will not actually access the app after you clicked on it. It may remain stuck on the first page.

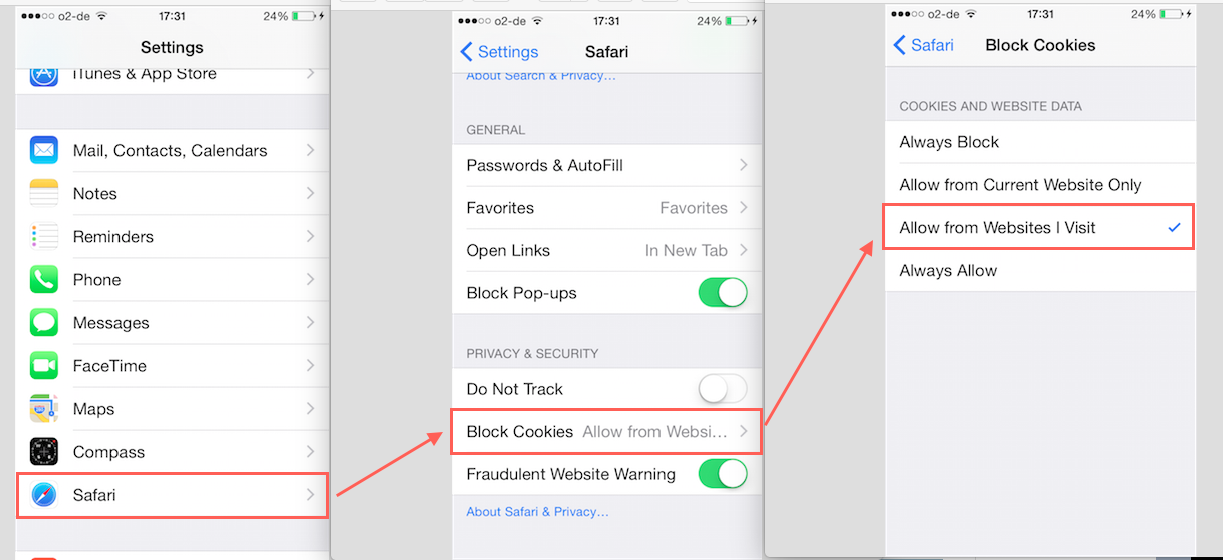
One possible reason is that your mobile devices does not allow cookies.

In that case please access your device menu for SETTINGS, then select the browser and set it to accept cookies from websites you visit!


Artist App and iCal calendar

About the Artist App
For Agents: Create links to Artists App
For Agents: How to create Ical links
For Agents: How to see multiple Artist Apps on your mobile phone.
For Artists: How to register your calendar in iCal (Mac)
For Artists: How to create your calendar in Google calendar
For Artists: Add the App on your phones!


How to add external Calendars to Details:
* From your Google Calendar
* From your current ICal subscriptions
* From your local ICal Calendar (on your computer)

How to add Details Calendars to:
* Google Calendars
* ICal Calendars
to Details System (sharing artists with other agencies)

How to create a new booking step by step

This article will show you step by step how you create and work your way through any new booking.

For a quick overview, please check the ‘Create New Booking’ VIDEO in this WIKI.


Here are the setps of a typical workflow for a new booking:

1) Create a new booking by clicking the green PLUS icon on the top right of any day in the BOOKING / CALENDAR.

In case you wonder: yes, this is the only place where you can add new bookings yourself in details.
The only alternative way to create new bookings is via the REQUEST FORM, where external people request a booking via the internet and you may easily convert a request into a new booking.

2) onclick of the PLUS sign you enter a 4 step creation process we call the BOOKING WIZARD:

Step 1) Select date, city, country and one or multiple ARTISTS from your roster

Step 2) Select a VENUE from your database or create a new one

Step 3) Select a PROMOTER from your database or create a new one

Step 4) Select a CONTACT from your contact database or create a new one


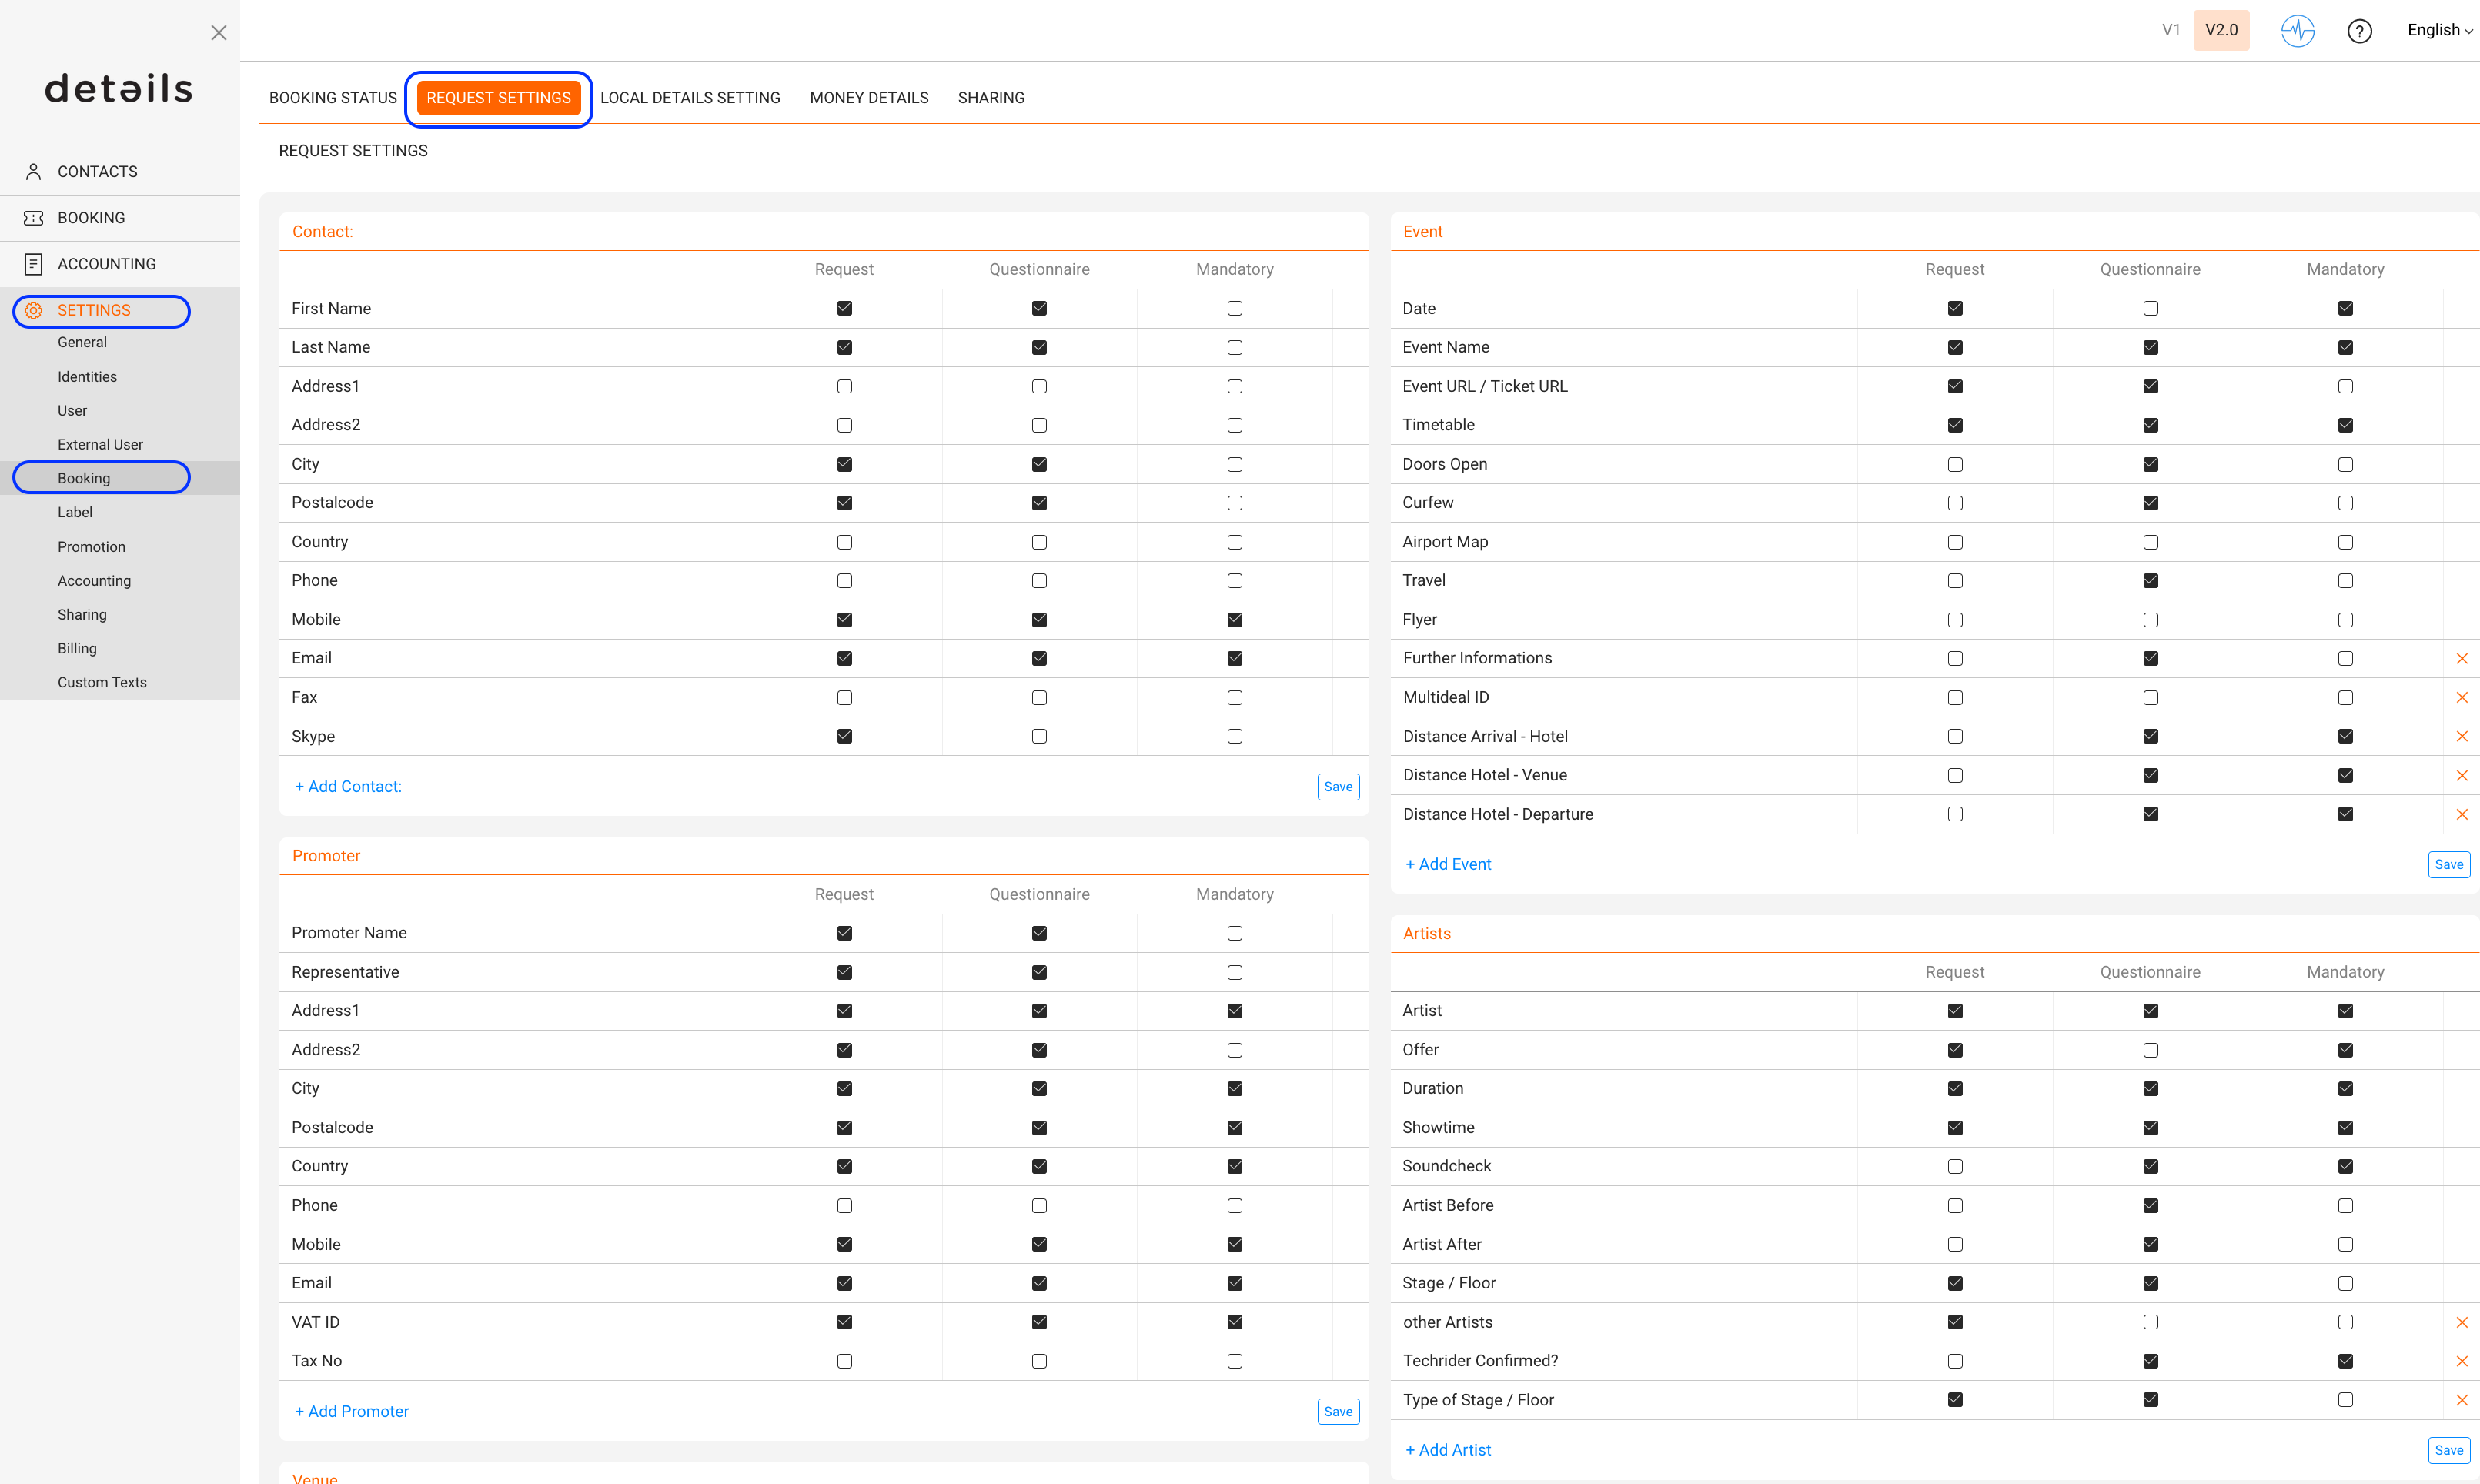
How to customize the fields for the Booking Request Form/Questionnaire

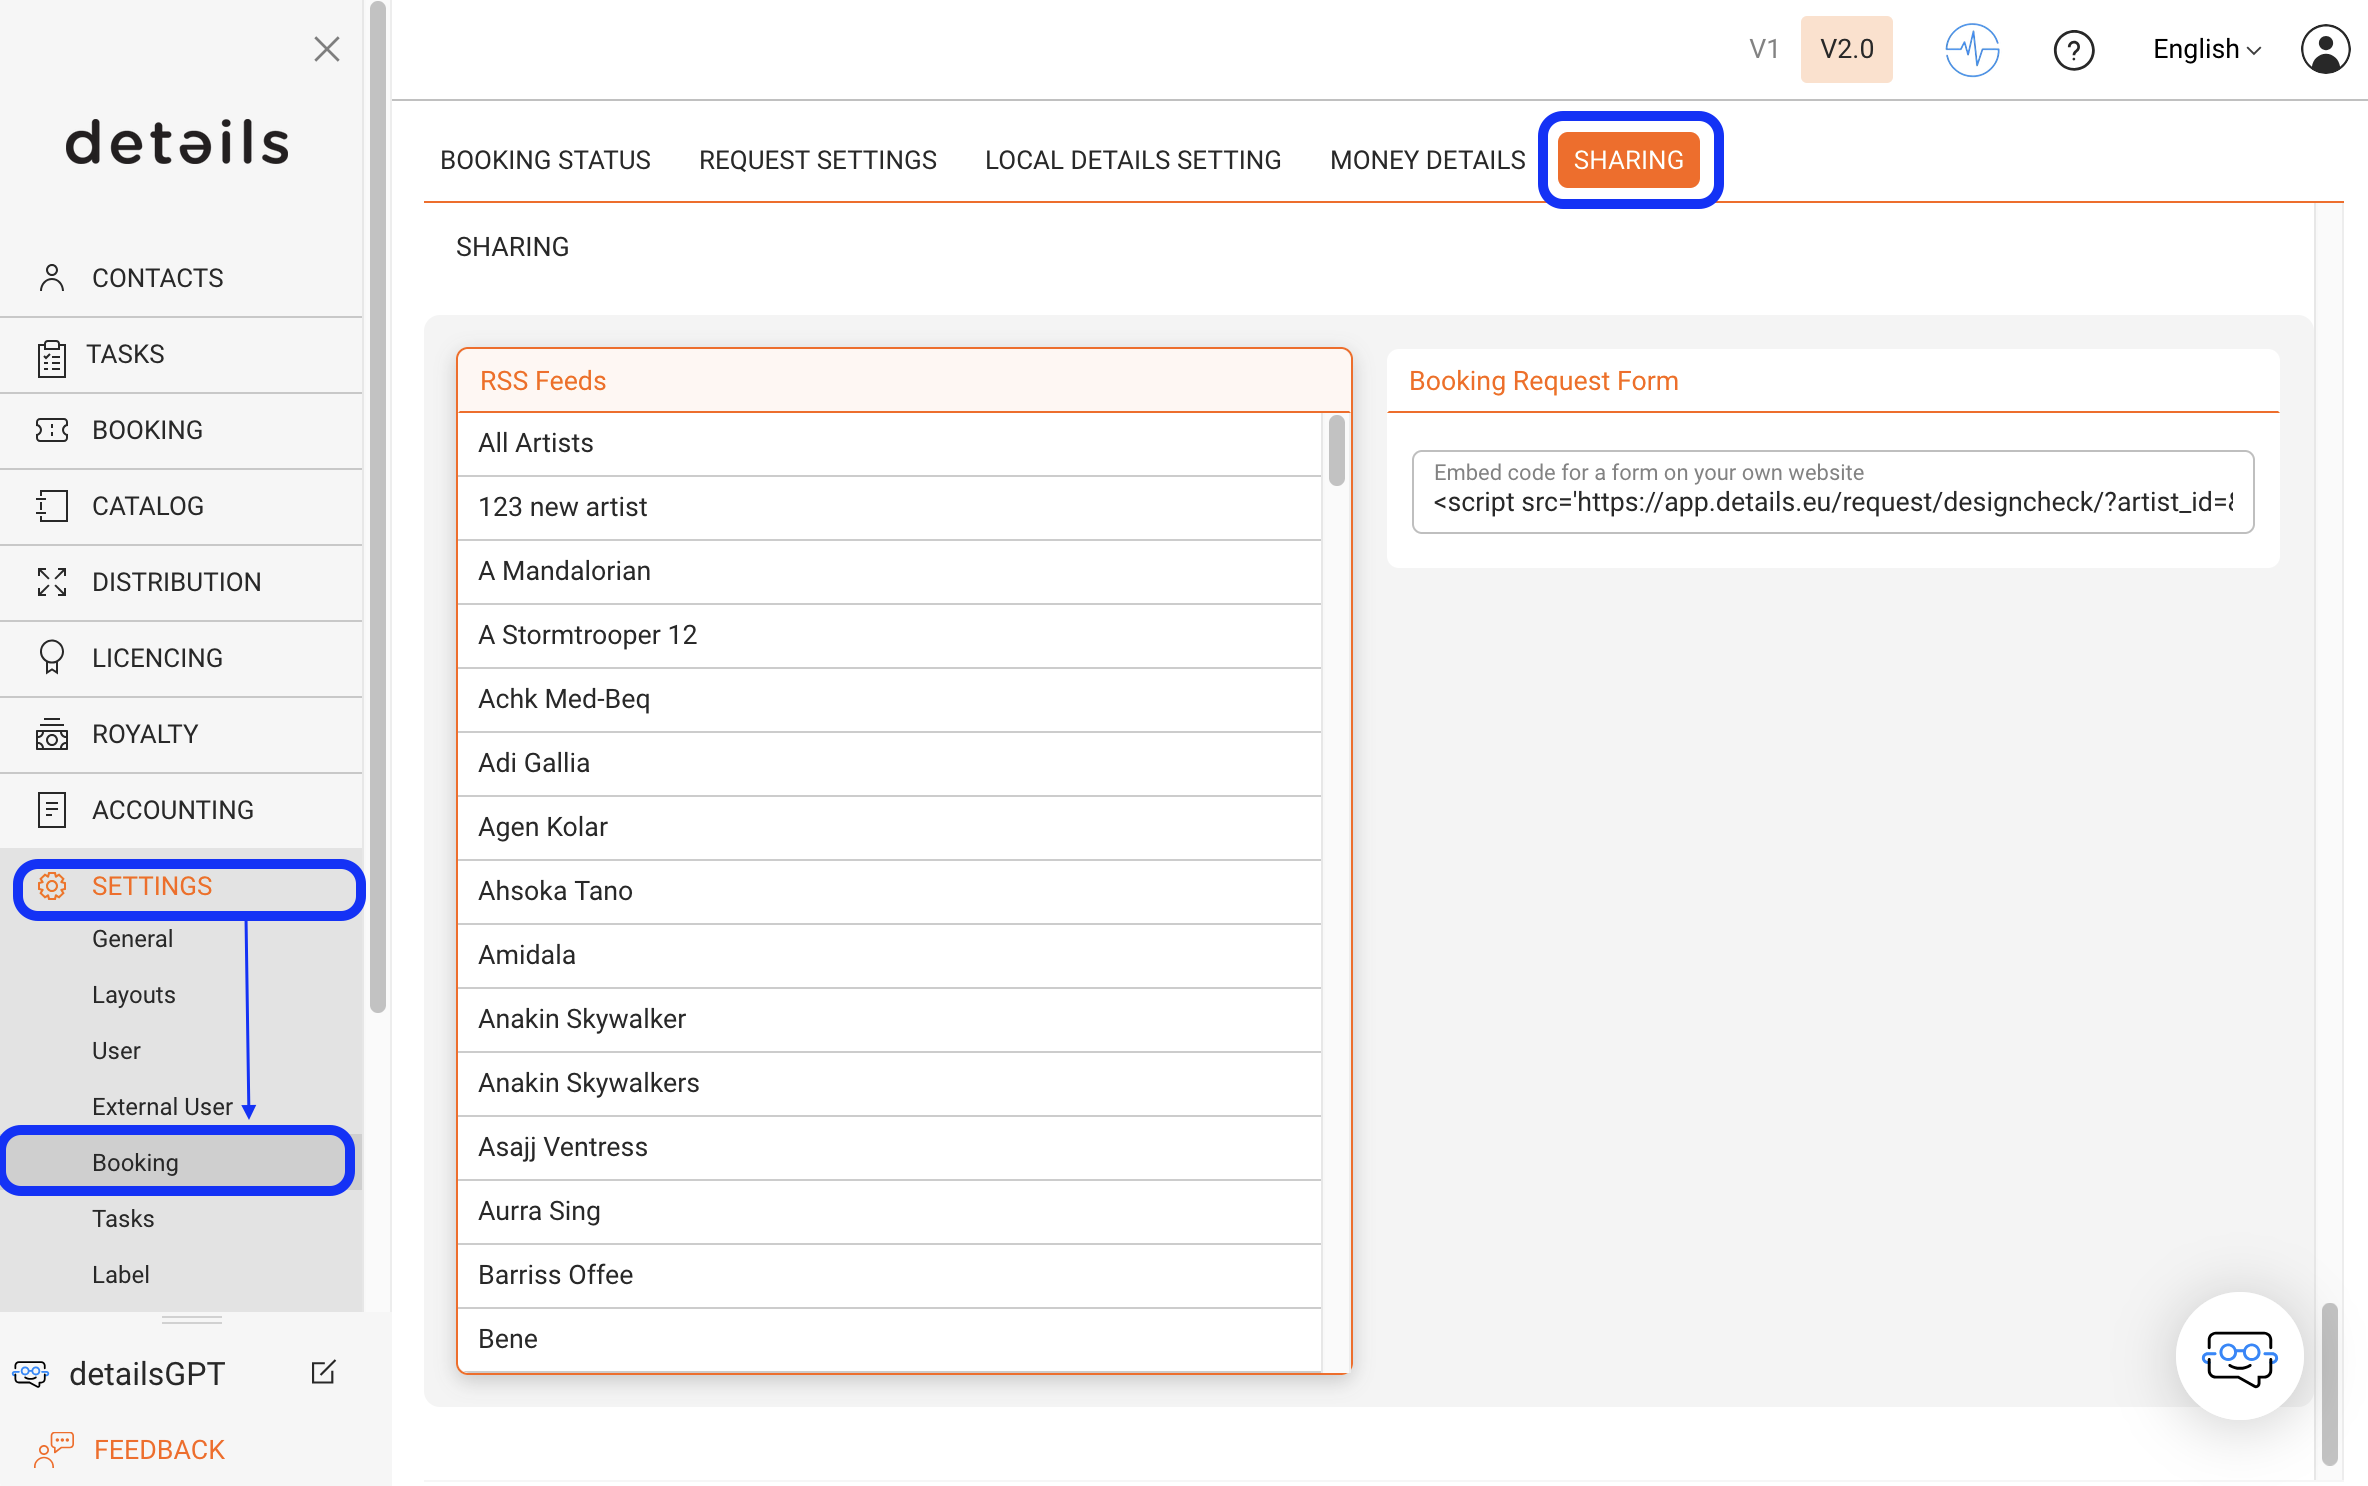
If you want to customize the fields you want for the Booking Request Form or the Questionnaire, please follow these guidelines. You just need to go to:

Settings – Booking – Request Settings

Then you can pick which fields you want in either the request form or the questionnaire OR both, and which of them should be ‘mandatory‘ for the promoter.

If you want to create a personal custom field, you can just add it on the proper section clicking on the ‘+ Add ‘ button.


Update the Artist Defaults in your Documents


Check this article if you want to update the artists defaults for a specific booking or if you need to change, for example, the dates for the Hotel.

Whenever a new booking is created, it will automatically copy the default values from the Artist profile. Later, however, it will keep the values as displayed in the booking itself to allow special arrangements for techriders, hotels etc for this specific gig. Sometimes, however, a booking was previously created and something changes in the artist defaults.

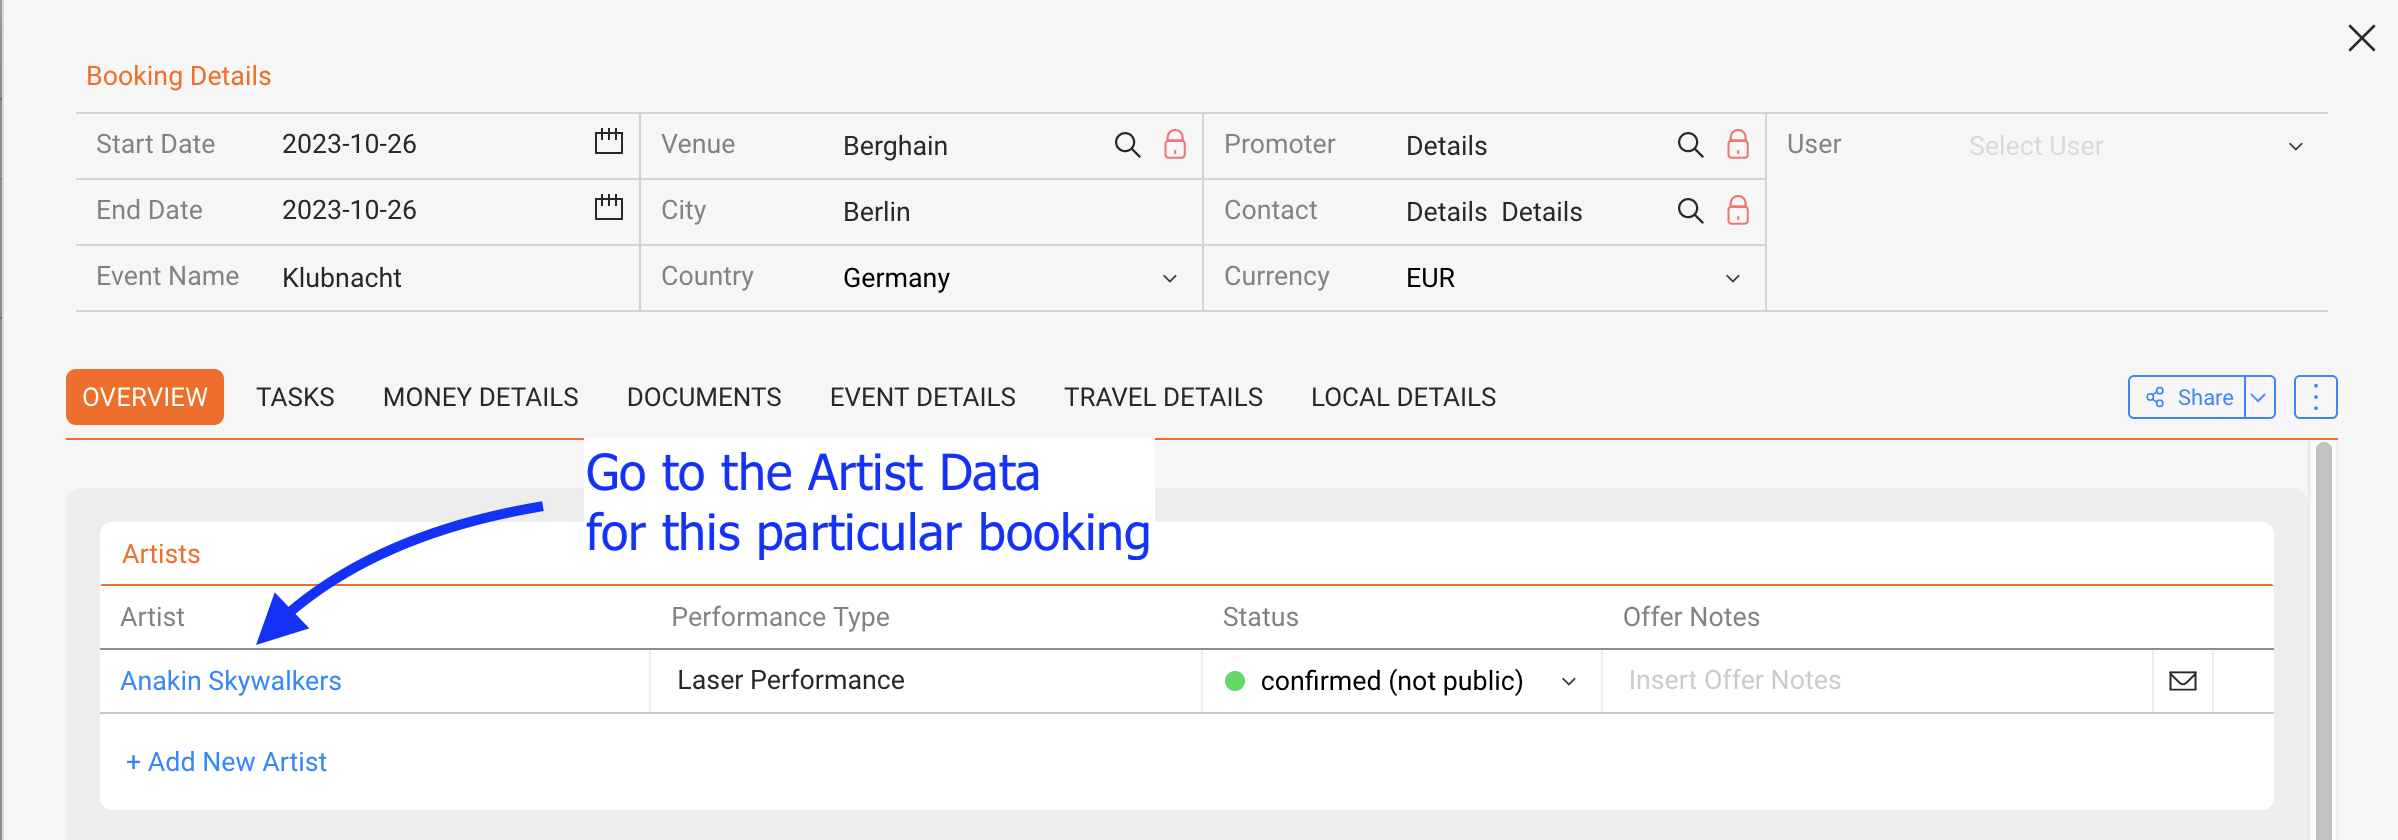
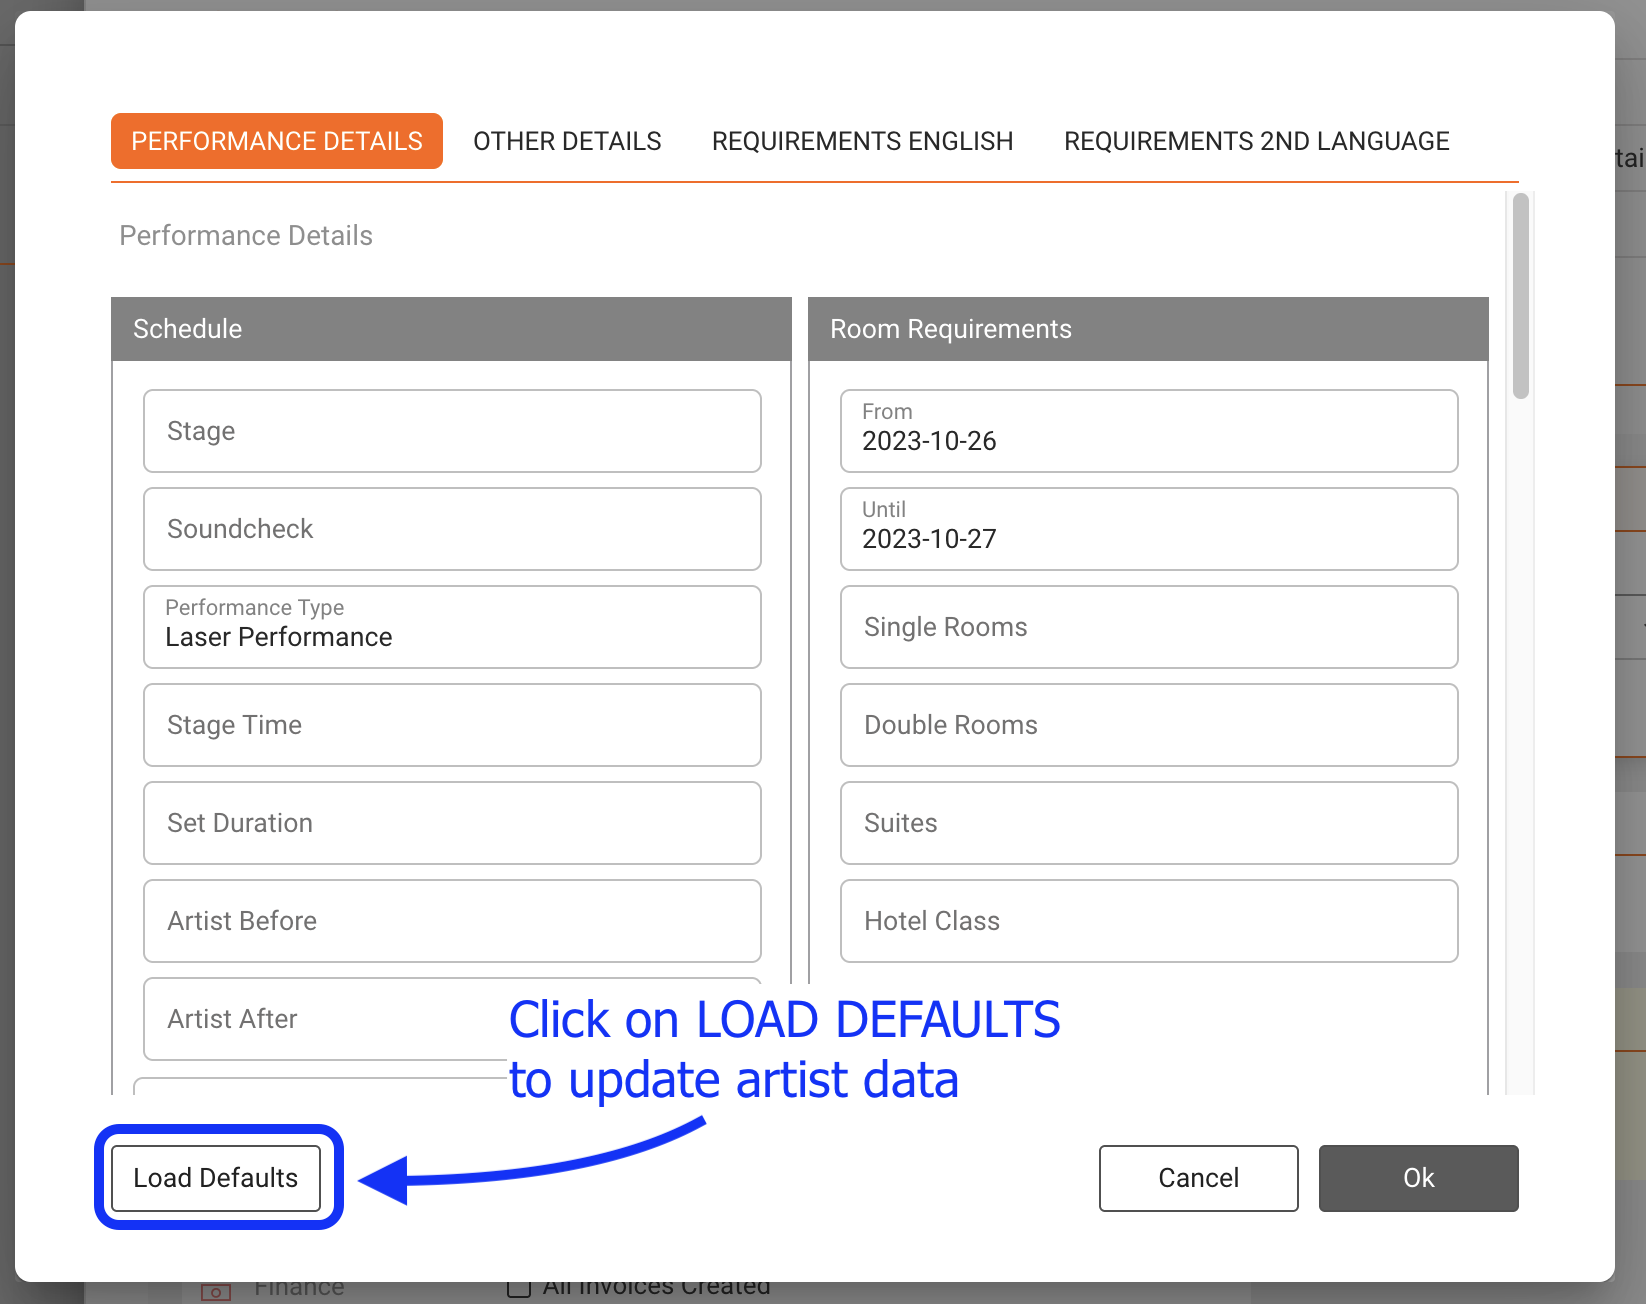
NOTE: When you update the Artist defaults of one particular artist in the ARTIST profile, ALL the existing bookings will NOT be automatically updated. To update the Artist defaults in one particular booking, you will need to follow these steps:

Go to the Booking-Overview:

Click on the Load Defaults button:


Accounting – Invoice Reminder

On Accounting / Invoice Reminder you can set create invoice reminders for your unpaid invoices. These can be send to the invoice recipients manually or in a batch then.

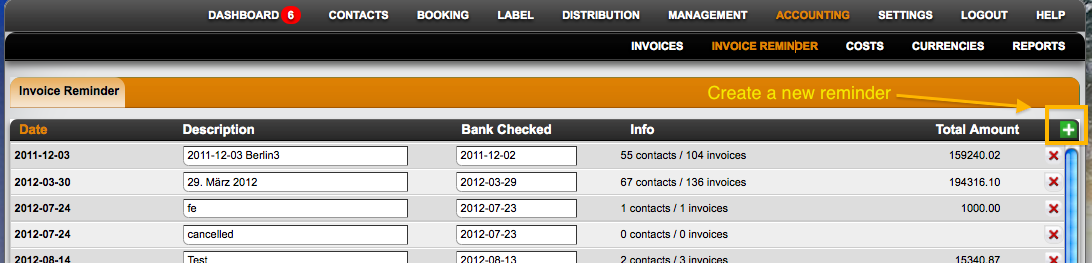
1. Go to section Accounting – Invoice reminder, and click on the green button to create one invoice reminder:

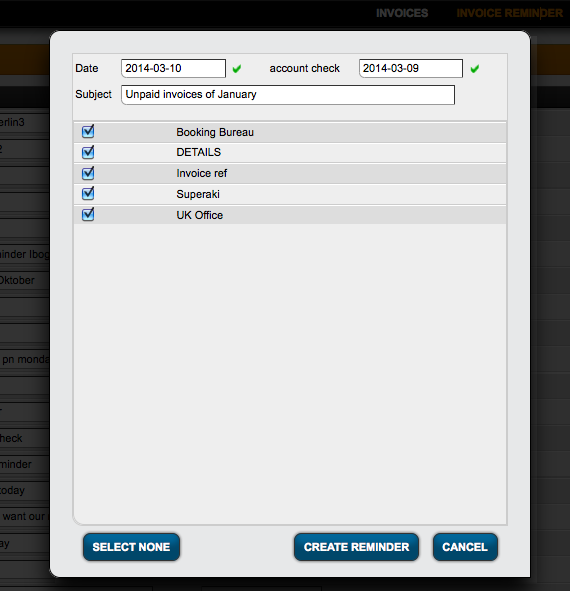
2. Add the date you checked your bank account, as well as the invoice projects you want to check and click create reminder. The system will find all unpaid invoices.

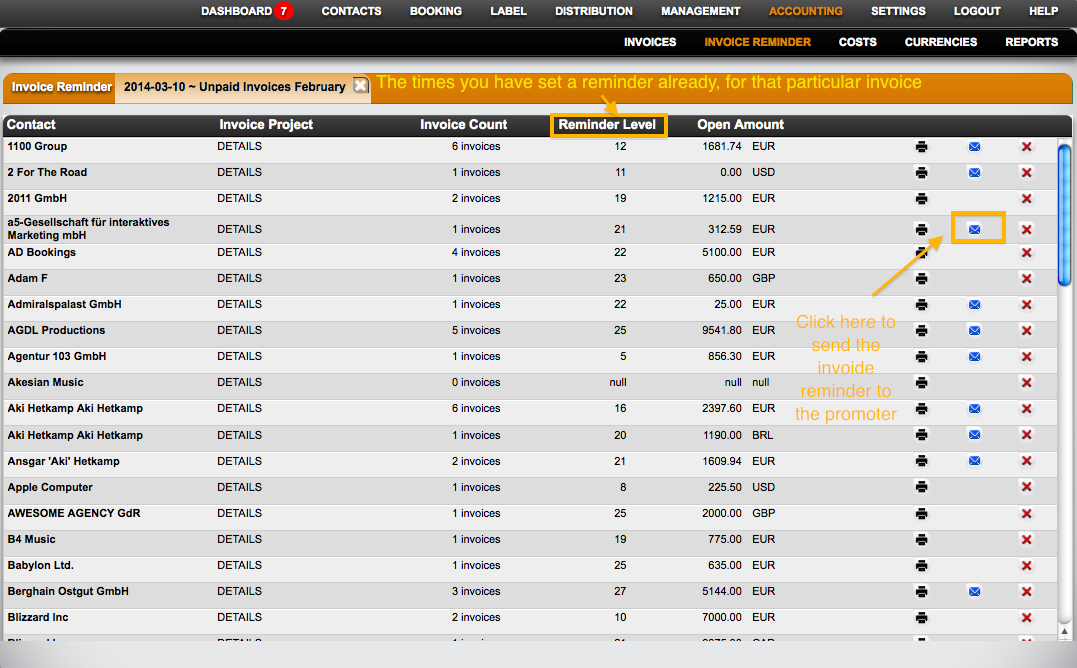
3. The invoice reminder is created. To send a particular reminder to a promoter, click on the blue envelope. This will open an e-mail to the assigned contact with all relevant info.

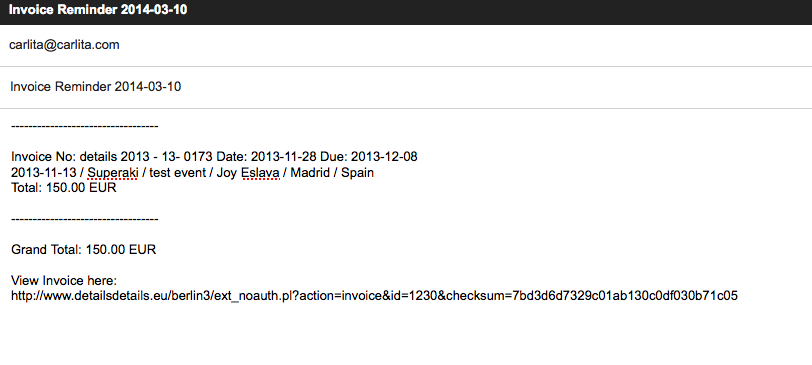
4. This is how the final invoice reminder looks like:

You can also send the reminders in a batch (to all recipients that have mail addresses assigned) by clicking the Notify All button at the bottom of the page.